

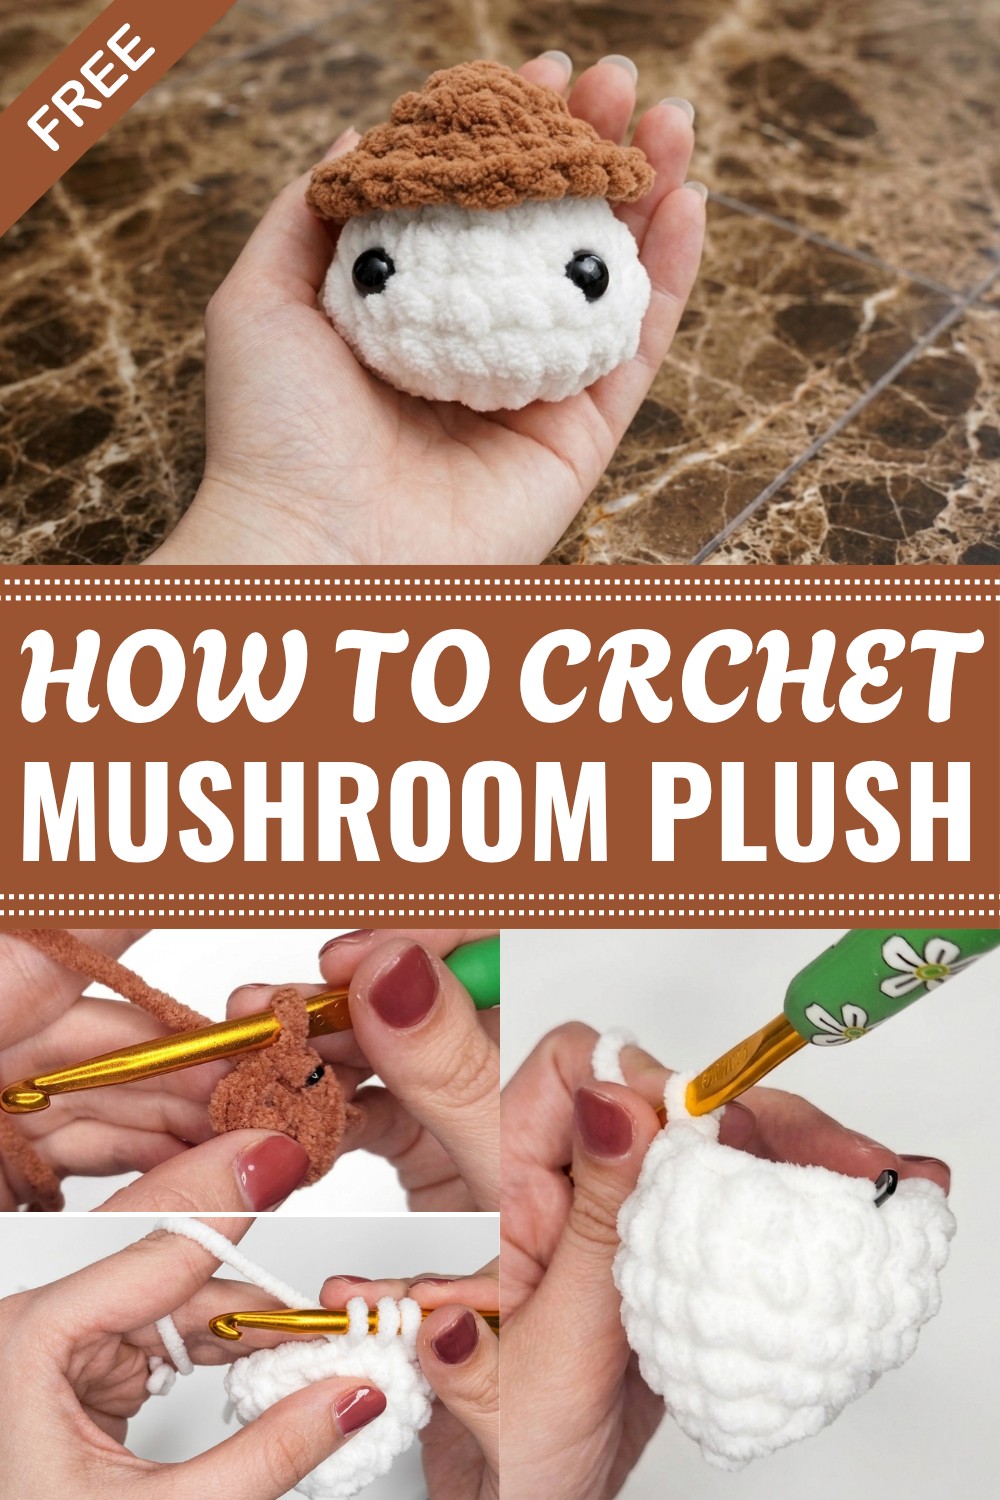
Glow up your skills with this free crochet mushroom plush pattern, offering step-by-step instructions for stitching, shaping, and customizing your cute keychain!
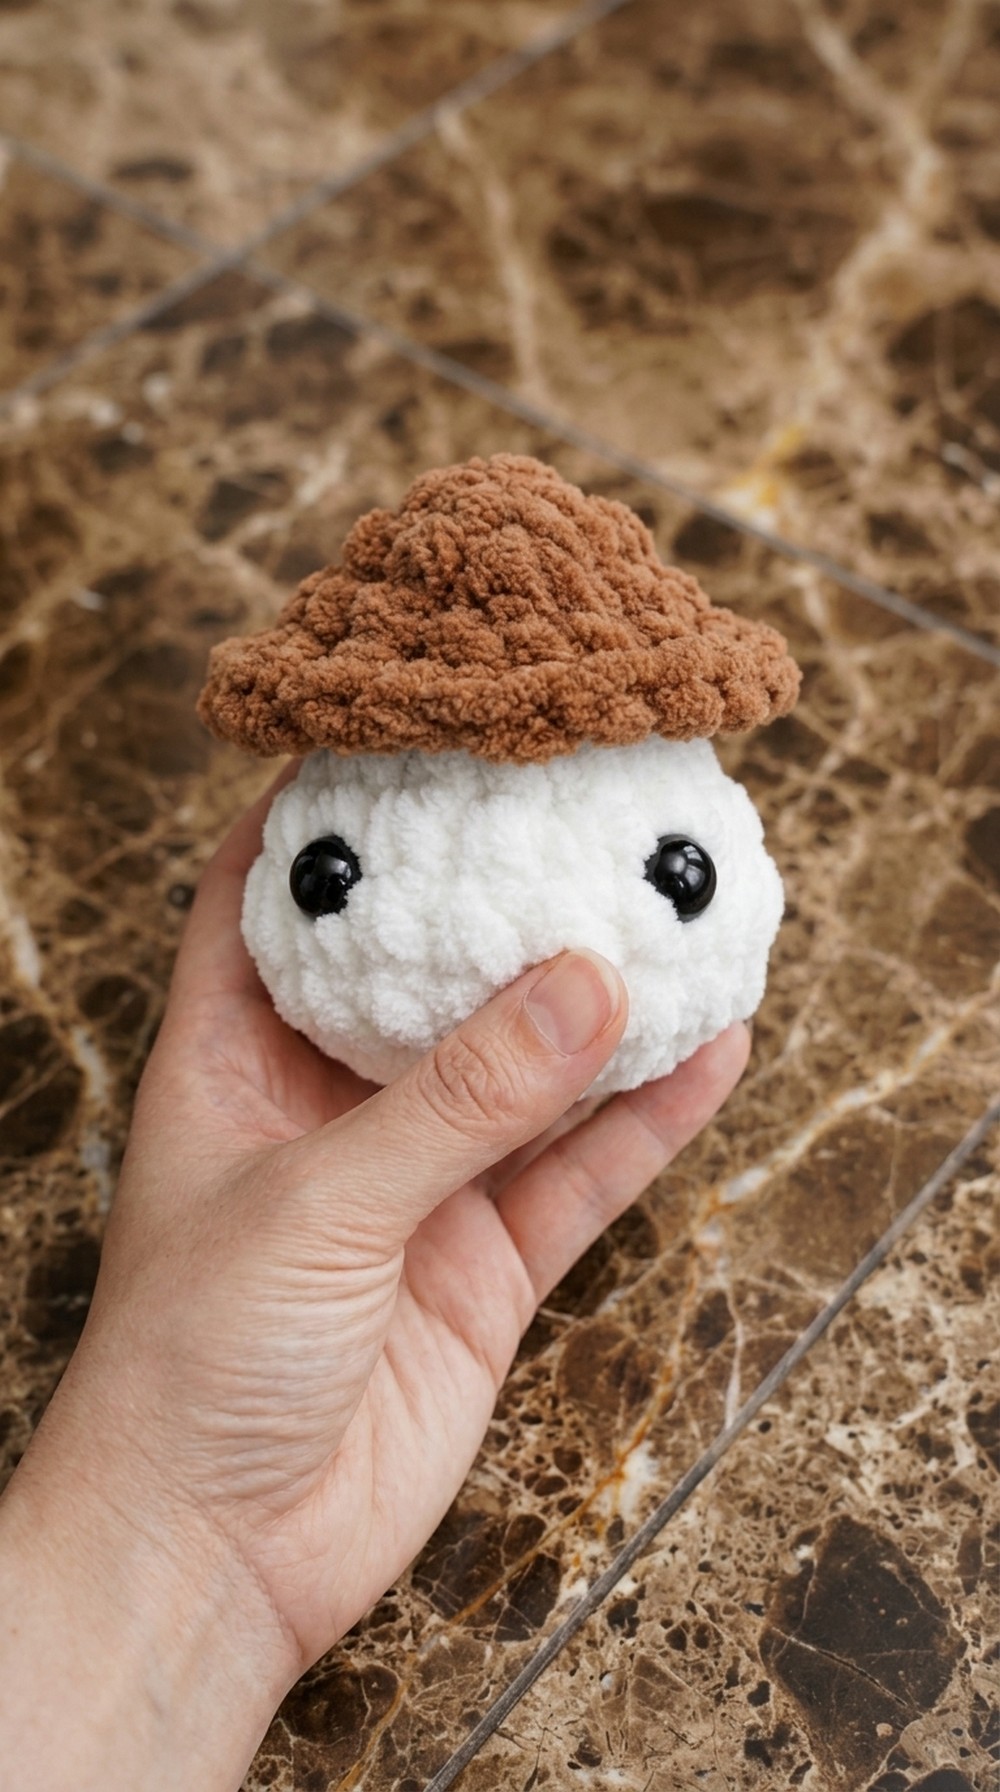
Soft, squishy, and irresistibly cute, this crochet mushroom plushy brings a touch of whimsy to any space. Its rounded cap and plump stem make it look as though it jumped right out of a fairytale or your favorite video game. With simple, smooth single crochet stitches and plush, chunky yarn, the toy is comfortable to hold and perfect for hugging or squeezing as a stress reliever.
You can easily personalize this mushroom with your choice of colors. Go classic with red and white, pick bright shades, or make it pastel for a softer look. The little details a smiling face, tiny eyes, and maybe even a bit of blush, give the plushy plenty of personality. To turn it into a portable charm, just add a jump ring or hook so you can clip it to your bag, backpack, or keys.
Adorable Crochet Mushroom Plush Pattern for All Skill Levels
Whether you’re just starting with crochet or already love making amigurumi, you’ll find this pattern simple and enjoyable. Basic techniques like single crochet, circles, and increasing or decreasing stitches are all you need, and the plush works up quickly. This makes it a perfect last-minute gift, desk companion, or sweet decoration for any room.
Perfect for crafters of all ages, this plush mushroom is a delightful project that will bring a smile wherever it goes. Kids, gamers, or anyone who enjoys cute handmade items will love receiving one, and it’s just as fun to create as it is to share.
Super Cute Crochet Mushroom Keychain Pattern
Before You Start
- Choose soft, plushy yarn for a cute finish.
- Gather a smaller-than-recommended hook for tighter stitches (recommended: hook size 6mm for bulky yarn).
- Prepare a stitch marker or a bobby pin.
- Have a needle for sewing ends and attaching pieces.
- Optional: jump rings, keychain clasp, scrap string for hanging.
- Read through the entire pattern to understand steps and assembly.
Pattern Notes
- Written in US crochet terms.
- All rounds are worked in continuous spirals; use stitch markers to mark round beginnings.
- Single crochet (sc) is used throughout (except slip stitch).
- Stuffing is optional but recommended.
- Use the “front loop only” technique for decreases to create a round bottom.
- Both mushroom cap and stem are made separately and then sewn together.
How I Made the Crochet Pattern
- Started the cap and stem with a magic ring.
- Increased with sc for shaping, and decreased with “front loop only.”
- Used a stitch marker to maintain accurate round counting.
- Stuffed the body for desired texture and shape.
- Sewed cap and stem together with leftover yarn tails.
- Added keychain hardware for functional hanging.
Skill Level
Beginner (some amigurumi experience helps; basic increases/decreases required)
Finished Size
- Approximately 2.5"–3" (6–8cm) tall when made with bulky yarn and 6mm hook.
Materials
- Bulky Weight (#5) plushy yarn in two colors (cap and stem)
- 6mm crochet hook
- Stitch marker or bobby pin
- Yarn needle for sewing ends
- Scissors
- Polyfill stuffing (optional)
- Safety eyes (optional) or embroidery yarn for facial features
- Jump rings/keychain clasp (optional)
- Scrap string for alternate hanging option
Measurements / Sizing (Optional Schematic)
- Cap diameter: ~2.5” (6cm)
- Stem height: ~1.5” (4cm)
- Width and height can be easily adjusted by using finer yarn or a smaller hook.
Gauge & Stitch Pattern
- Gauge isn’t critical for amigurumi.
- Pattern is worked with single crochet (sc) in the round.
- Use tight tension to minimize gaps.
Stitch Abbreviations
- ch = chain
- sc = single crochet
- sl st = slip stitch
- st = stitch
- inc = increase (2 sc in one st)
- dec = decrease (single crochet two together, here worked in front loop only (flo))
- flo = front loop only
Special Stitches
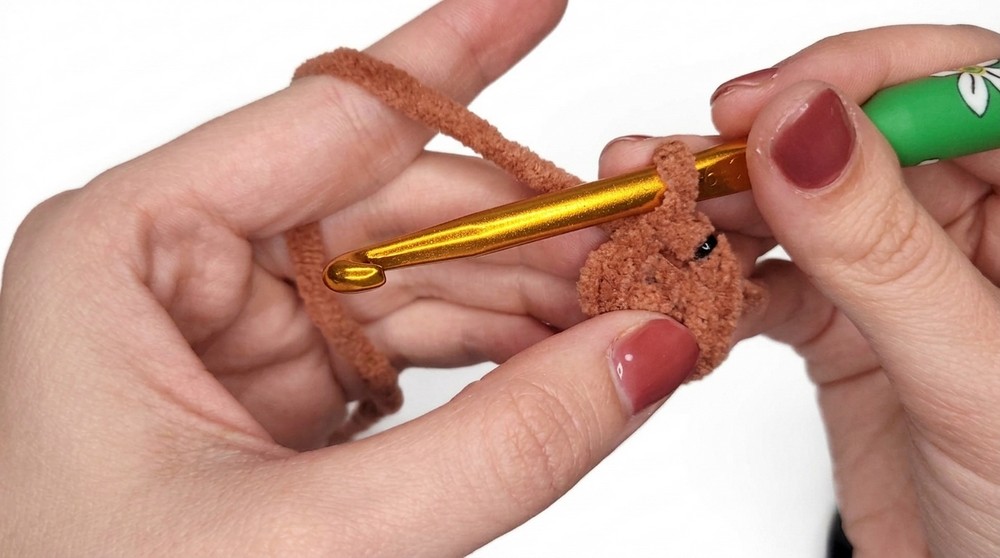
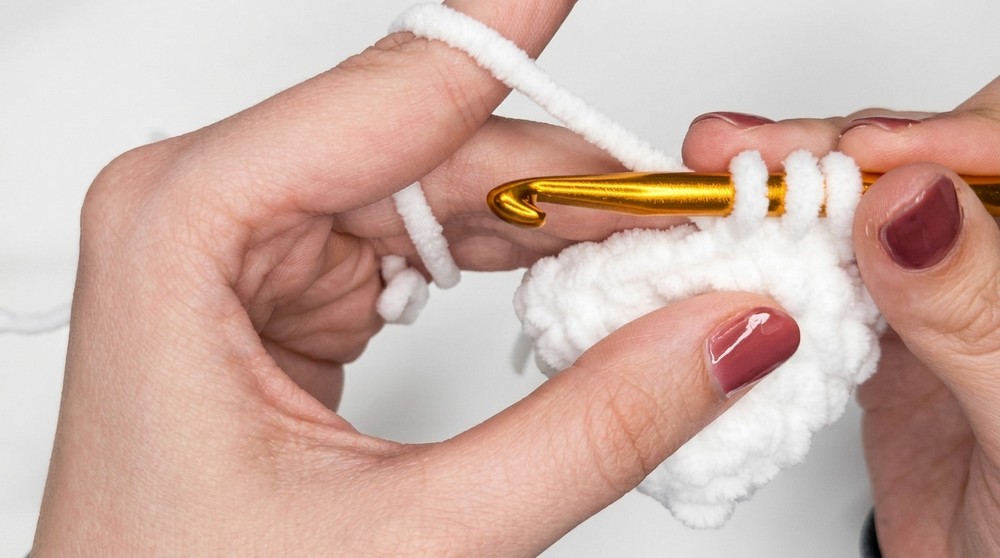
- Magic ring: Wrap yarn around fingers, pull through, and work starting stitches into the ring.
- Single crochet increase (inc): Make 2 sc in the same stitch.
- Single crochet decrease (dec) in flo: Insert hook into front loop of next two stitches, yarn over, pull up loop, yarn over, pull through all three loops.
The Pattern
Mushroom Cap (Top)
- Magic Ring:
- Start with a magic ring.
- Within the ring, work 5 sc.
- Round 1 (Increase):
- Place stitch marker in first sc.
- 2 sc in each st around (5 inc; total: 10 sc).
- Round 2 (Increase):
- [1 sc, 1 inc] repeat around.
- 1 sc in next st, 2 sc in next st; repeat (15 sc).
- Round 3 (Increase):
- [1 sc, 1 sc, 1 inc] repeat around.
- 1 sc in next st, 1 sc in next st, 2 sc in next st; repeat (20 sc).
- Finish Cap:
- sl st to next st to finish.
- Cut yarn, leaving a long tail for sewing later.
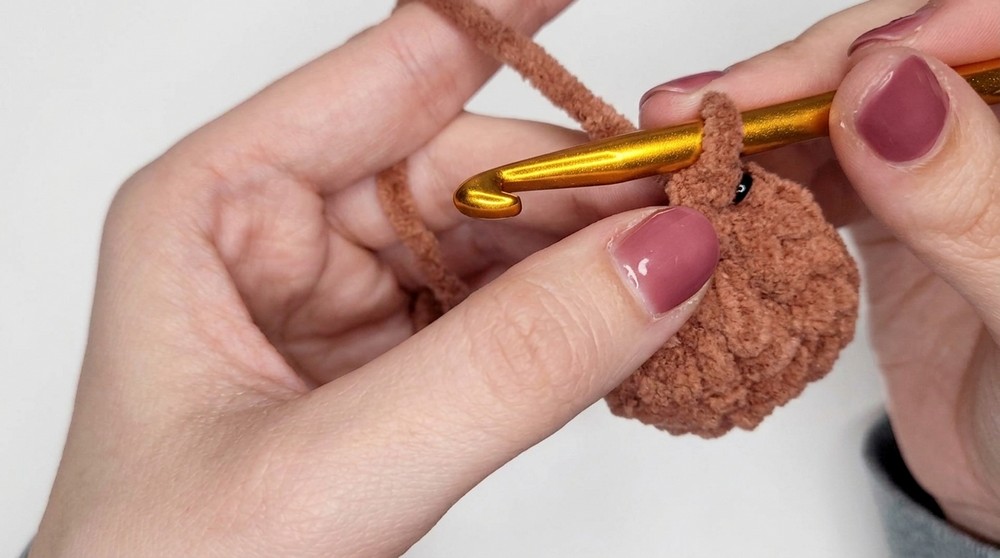
Explanation:
You create a flat circle for the mushroom cap with three rounds of increases. Place your marker in the first stitch of each round to keep track. Finish off neatly and sew in ends except one long tail for joining.
Mushroom Stem (Body)
- Magic Ring:
- Start with a magic ring.
- Work 5 sc in the ring.
- Round 1 (Increase):
- Place stitch marker in first stitch.
- 2 sc in each st around (5 inc; total: 10 sc).
- Round 2 (Increase):
- [1 sc, 1 inc] repeat around.
- 1 sc in next st, 2 sc in next st; repeat (15 sc).
- Round 3 (Increase):
- [1 sc, 1 sc, 1 inc] repeat around.
- 1 sc in next st, 1 sc in next st, 2 sc in next st; repeat (20 sc).
- Rounds 4–5:
- 1 sc in each st around (20 sc per round).
- Rounds 6–7 (Decrease):
- Work dec in flo around: [dec, sc].
- Insert hook in front loop of next two sts, yarn over, pull through, yarn over, pull through all loops.
- Repeat for two rounds until stem narrows.
Explanation:
Stem is worked exactly like the cap, but after shaping you add two rounds of decreases to get a rounded bottom. Work in the front loop only for decreasing (creates a smooth curve). At this point, add safety eyes and stuffing before final closing.
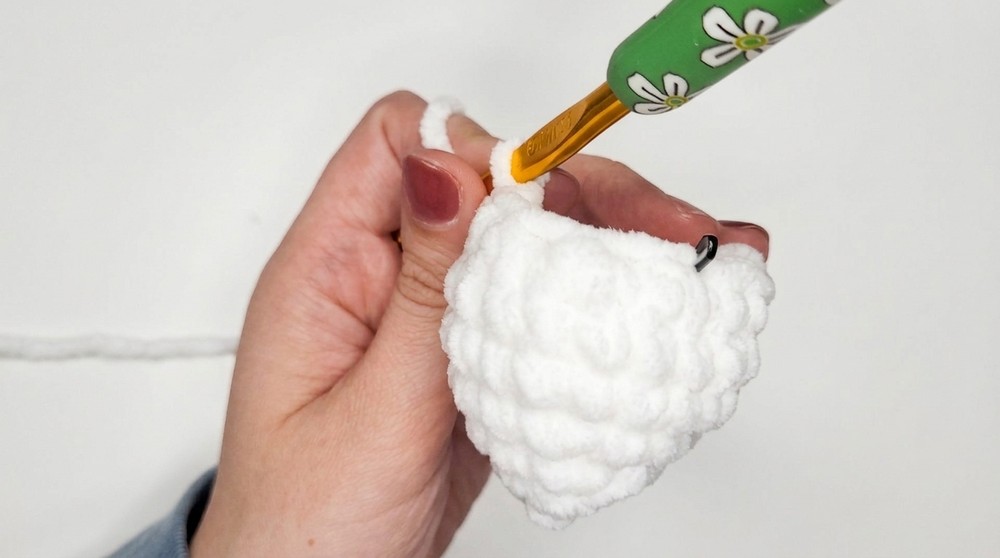
Finishing Stem
- Add stuffing/safety eyes now for a plush finish.
- Thread needle with center yarn tail and sew remaining opening closed.
- Secure and hide end inside your work.
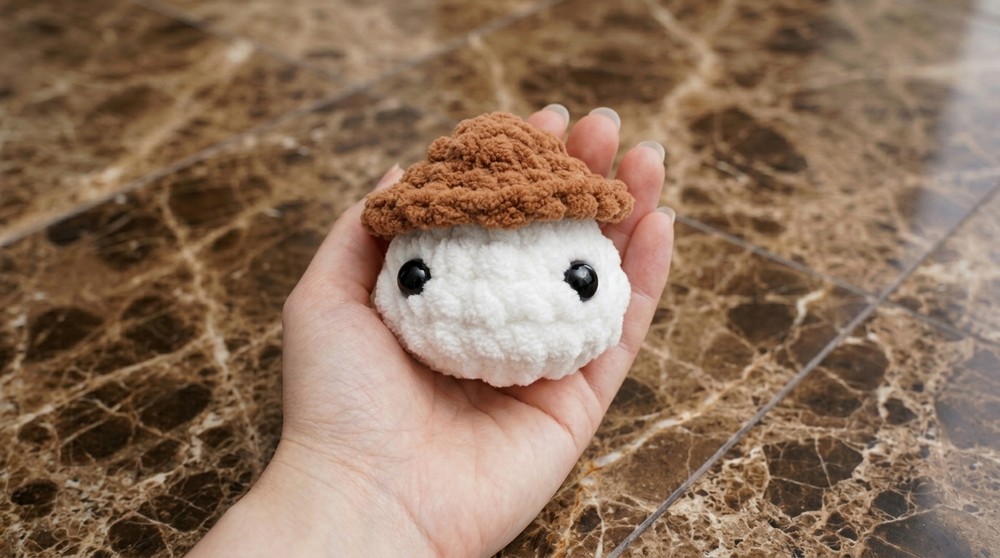
Assembly & Finishing
- Attach mushroom cap to stem by sewing using yarn tail left from cap.
- Tie both pieces together with a firm knot.
- Weave in and trim yarn tails securely.
- Add keychain hardware:
- Thread jump ring through cap/yarn, add keychain clasp.
- OR, use scrap yarn/string to create a loop for hanging.
- Optionally embroider a face or blush onto stem using yarn or makeup.
- Shape stem by sewing/tugging as desired to create a flat or rounded bottom.
Solution of Problem
If your decreases leave a “butt” or protruding end:
- Use sewing needle to pull and shape into a flatter base by tugging, sewing, and hiding ends inside.
- Add a little extra stuffing to round out the shape before closing.
What You Can Make With These Stitches
- Mushrooms (all sizes)
- Mini plushies or amigurumi animals
- Plush keychains
- Decorative bag charms
- Kawaii accessories
- “Magic ring” toys or ornaments
With this pattern, you can create a super cute little mushroom keychain in soft yarn, customize the size, add a face, or change colors for variety! Just follow the bolded stitch instructions for each round and you’ll have a perfect mushroom accessory to keep or gift.
If you’re new to crochet:
The magic ring is a way to start in the round without holes. Increases make your circle grow, decreases close your shape. Stuff and sew as you go, and don’t worry about perfect rounds—the mushroom is forgiving and adorable no matter what!
Leave a Reply