

Add warmth and unique style to your space with a Crochet Mini Pumpkin that makes every room feel cozy and every Halloween gift truly special.
A small yarn pumpkin makes a cozy and charming addition to any space during the fall season. The crochet mini pumpkin is both warm and cute, serving as a simple decoration, a thoughtful gift, or a small handmade item to add a personal touch to your home. Its compact size allows it to fit well on shelves, tables, mantels, or desks, bringing a subtle autumn feeling indoors.
Free Crochet Mini Pumpkin Pattern for Handmade Keepsakes
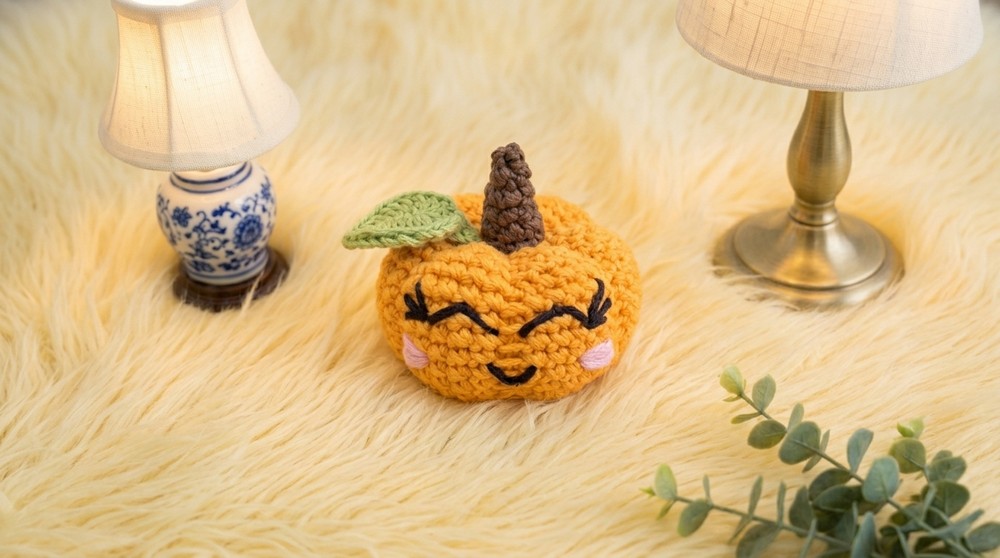
Measuring about 4 inches in diameter, this mini pumpkin has a round shape with soft, gentle lines that mimic the natural ribs found on real pumpkins. A small stem and a couple of crocheted leaves sit on top, giving it a finished and appealing look. The design is simple yet attractive, making it great to display on its own or as part of a seasonal grouping with other decorations.
This crochet project suits beginners and those with some experience. It uses easy techniques, including working single crochet stitches in the round, along with simple increases and decreases to form the pumpkin’s shape. Adding surface slip stitches creates texture that gives life to the piece. These steps are straightforward and help improve basic crochet skills while keeping the process enjoyable.
Ideal for Halloween and fall decor, this crochet mini pumpkin brings a handmade warmth to any room. It is a nice choice if you like small crochet projects that are easy and rewarding.
Crochet Pumpkin Keychain Pattern
This crocheted pumpkins, each standing 5 cm tall with an average width of 5 cm. These adorable pumpkins are perfect as keychains or fall miniatures, and you can customize the color and facial details to your liking. Let’s jump into the step-by-step process for crocheting these lively autumn pumpkins!
Quick Overview Of Pattern
- Begins with a Magic Ring and basic rounds to shape the pumpkin body.
- Pumpkin features: Segment shaping is created by special stitches, using back loops and creative decreases.
- Stem and Leaf: Attached directly onto the pumpkin for realism and charm.
- Embroidered Face: Includes eyes, lashes, mouth, and blush, all finely stitched in contrasting threads.
- Stuffed Form: Filled with synthetic fiber for a plump, tactile finish.
- Optional Keyring: Easily inserted for portable style.
Notes
- Cotton Yarn: Holds shape and offers vivid color—a must for expressive amigurumi.
- Back Loop Only (BLO): Used heavily to define the pumpkin’s rows and wedges.
- Segment Shaping: Zigzag stitching compresses the body to create classic pumpkin ridges.
- Embroidery: Take your time for lively facial details—markers help with initial placement.
- Color Choice: Orange, pumpkin, leaf green, brown, black, and pink allow vibrant, playful results; feel free to substitute as desired.
Skill Level
Advanced Beginner to Intermediate
Requires confident single crochet, working in rounds, back loop stitches, increases, decreases, simple embroidery, and assembly.
Materials
- Yarn: 100% cotton, 2 mm thickness (leaf green, pumpkin orange, brown, black, pink)
- Synthetic Fiber: For stuffing
- Scissors
- Metal Crochet Hook: Size 2 mm
- Tapestry Needle: Size 4, blunt tip
- Tweezers
- Keyring Loop: Optional for finishing
Measurements / Sizing
- Height: 5 cm (from tip to base)
- Width: 5 cm (average)
- Leaf: Approx. 2 cm
- Stem: Approx. 2 cm
Gauge (and Stitch Pattern if applicable)
Gauge is not critical—amigurumi technique requires tight stitches to prevent stuffing from showing.
Stitch Abbreviations
| Abbreviation | Name |
|---|---|
| ch | Chain |
| sc | Single crochet |
| sl st | Slip stitch |
| inc | Increase (2 sc in same stitch) |
| dec | Decrease |
| BLO | Back loop only |
| st / sts | Stitch / stitches |
Special Stitches
- Back Loop Only (BLO): Work into the back loop for ribbing.
- Decreases: For shaping, use alternating front and back loops as instructed for a smooth wedge effect.
Crochet Guide
Pumpkin Body
Round 1:
- Start with a magic ring and make 6 sc into the ring.
- Pull ring closed.
- Close the round: insert your hook into the first stitch, make a sl st.
Round 2:
- Ch 1.
- In same st: inc (2 sc in same st).
- Repeat inc in each st around.
- At the end, you have 12 sc.
- Close round with sl st to first st.
Round 3:
- Ch 1.
- In same st: 1 sc.
- Next st: inc, but ONLY in BLO.
- Repeat: (1 sc through both loops, 1 inc in BLO) around.
- Total: 18 sc.
- Close with sl st.
Round 4:
- Ch 1.
- In same st: 1 sc.
- Next st: 1 sc.
- Next st: inc in BLO.
- Repeat: (2 sc in both loops, 1 inc in BLO) around.
- Total: 24 sc.
- Close with sl st.

Round 5:
- Ch 1.
- In same st: 1 sc.
- Next 2 sts: 1 sc each.
- Next st: inc in BLO.
- Repeat: (3 sc, 1 inc in BLO) around.
- Total: 30 sc.
- Close with sl st.
Round 6:
- Ch 1.
- In same st: 1 sc.
- Next 3 sts: 1 sc each.
- Next st: inc in BLO.
- Repeat: (4 sc, 1 inc in BLO) around.
- Total: 36 sc.
- Close with sl st.
Round 7:
- Ch 1.
- In same st: 1 sc.
- Next 4 sts: 1 sc each.
- Next st: 1 sc in BLO.
- Repeat: (5 sc, 1 sc in BLO) around.
- Total: 36 sc.
- Close with sl st.
Rounds 8–13:
- Repeat round 7—36 sc total per round, always alternating 5 sc, 1 sc in BLO.
- End each round with sl st.
Pumpkin Decreasing Rounds
Round 14:
- Ch 1.
- In same st: 1 sc.
- Next 3 sts: 1 sc each.
- Next: dec (front loop only of next st, back loop only of following st, work together).
- Repeat: (4 sc, dec as above) around.
- Total: 30 sc.
- Close with sl st.
Round 15:
- Ch 1.
- In same st: 1 sc.
- Next 3 sts: 1 sc each.
- Next: 1 sc in BLO.
- Repeat: (4 sc, 1 sc in BLO) around.
- Total: 30 sc.
- Close with sl st.
Round 16:
- Ch 1.
- In same st: 1 sc.
- Next 2 sts: 1 sc each.
- Next: dec (front loop/back loop as above).
- Repeat: (3 sc, dec) around.
- Total: 24 sc.
- Close with sl st.
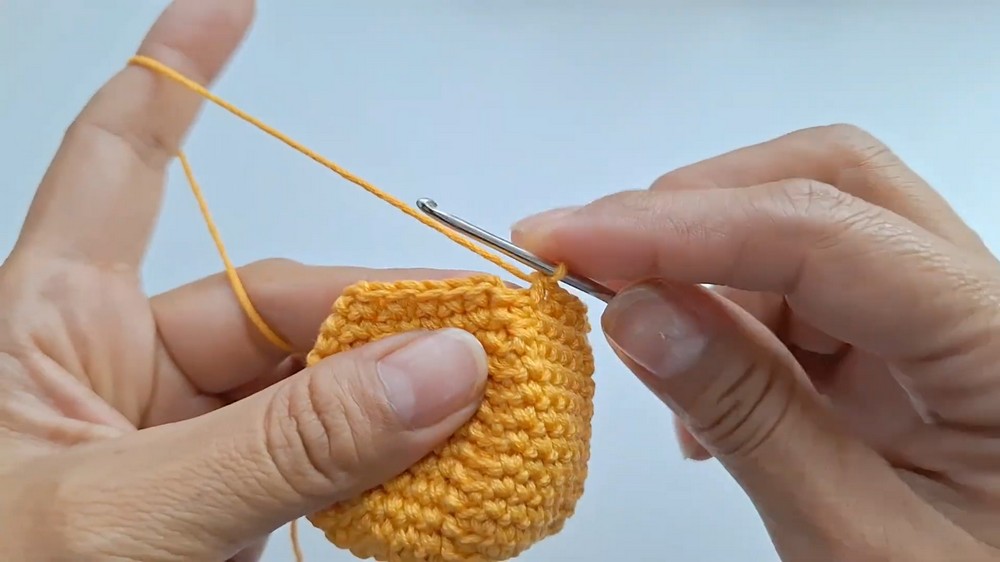
Round 17:
- Ch 1.
- In same st: 1 sc.
- Next st: 1 sc.
- Next: dec (front loop/back loop as above).
- Repeat: (2 sc, dec) around.
- Total: 18 sc.
- Close with sl st.
- Stuff pumpkin fully with fiber at this point.
Round 18:
- Ch 1.
- In same st: 1 sc.
- Next: dec.
- Repeat: (1 sc, dec) around.
- Total: 12 sc.
- Close with sl st.
Round 19:
- Ch 1.
- Begin with dec using BLO for each decrease.
- Repeat dec 6 times.
- Total: 6 sc.
- Fasten off, leave a long tail.
Pumpkin Segmentation
- Use tapestry needle, weave tail in zigzag through front loops only of final round.
- Pull tight, cinch closed.
- Thread needle through visible BLO lines on exterior (from previous rounds), compress to create pumpkin wedges.
- Repeat until you have ~6 distinct segments.
- Fasten securely, hide tail in work.
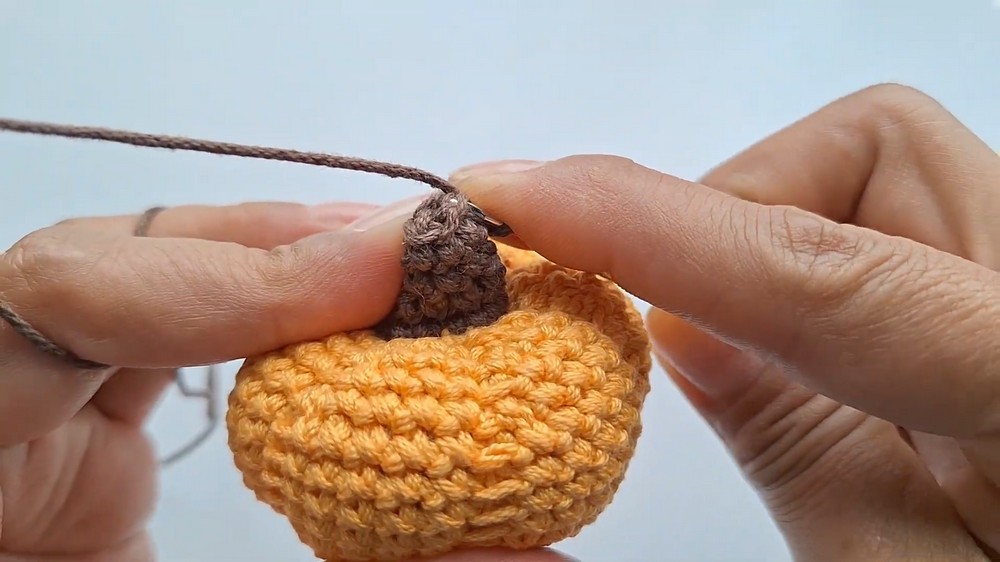
Stem
- Attach brown yarn to any outer strand of final round.
- With hook #4, sc around the BLO for a total of 12 sc.
- Close round with sl st.
- Next round: Ch 1, dec every 2 sts (pull the two front loops of each set together).
- 6 sc remain.
- Next 2 rounds: Ch 1, sc in each st (6 sc each round).
- Final round: Ch 1, dec in sets of 2.
- 3 sc remain.
- Sl st, break yarn, and knot at base.
- Weave in ends and bury yarn inside stem.
Leaf
- With leaf green yarn, hook #4:
- Ch 8.
- In 4th ch from hook, work dc.
- In next st, work 3 dc.
- Next st: dc.
- Next st: hdc.
- Following st: sc.
- Next st: sl st.
- Ch 2, sl st in same st to form tip.
- Work back along other side:
- sc, hdc, dc, (3 dc) into same st.
- Ch 3, return to same st with a sc.
- Take one chain, sc, sl st.
- Ch 2, sl st, leave tail, and cut.
- Attach leaf at pumpkin base near color change.
Assembly & Finished Size
- Eye Placement:
- Mark stitches between rounds 7-8, 6-7, three points apart, centered.
- Use black yarn to embroider eyes and lashes as shown, following markers.
- Mouth Placement:
- Under eyes, two rounds down, centered, embroidered with black yarn.
- Blush Placement:
- At mouth height, side by side, with pink yarn; make 3 loops for each cheek.
- Keyring (Optional):
- Add loop at stem for portable use.
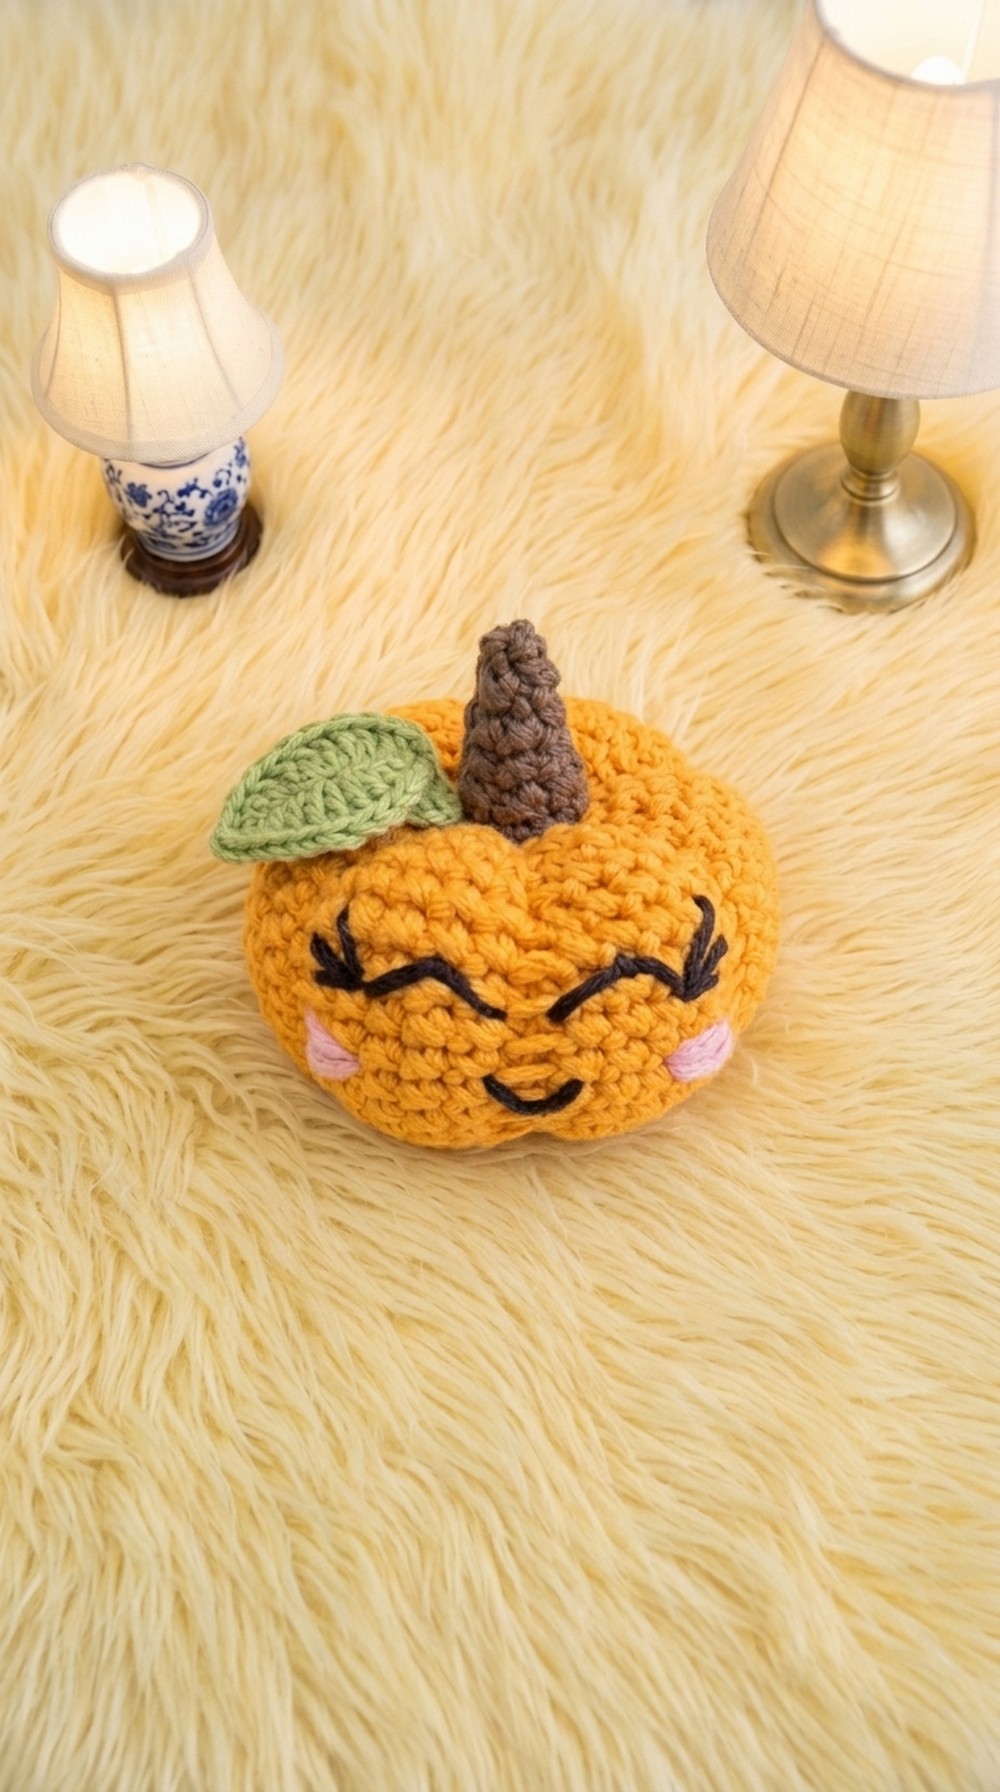
Finished pumpkin: 5 cm tall, 5 cm wide; perfect mini size!
Conclusion
That’s how we finished our little pumpkin keychains! This pattern combines classic amigurumi techniques with delightful personality—perfect for fall, gifts, or everyday charm. Your careful stitches and color choices bring the pumpkins to life, and embroidered faces add tons of character. Add a keyring for practical use or group several for a cheerful autumn display.




Leave a Reply