

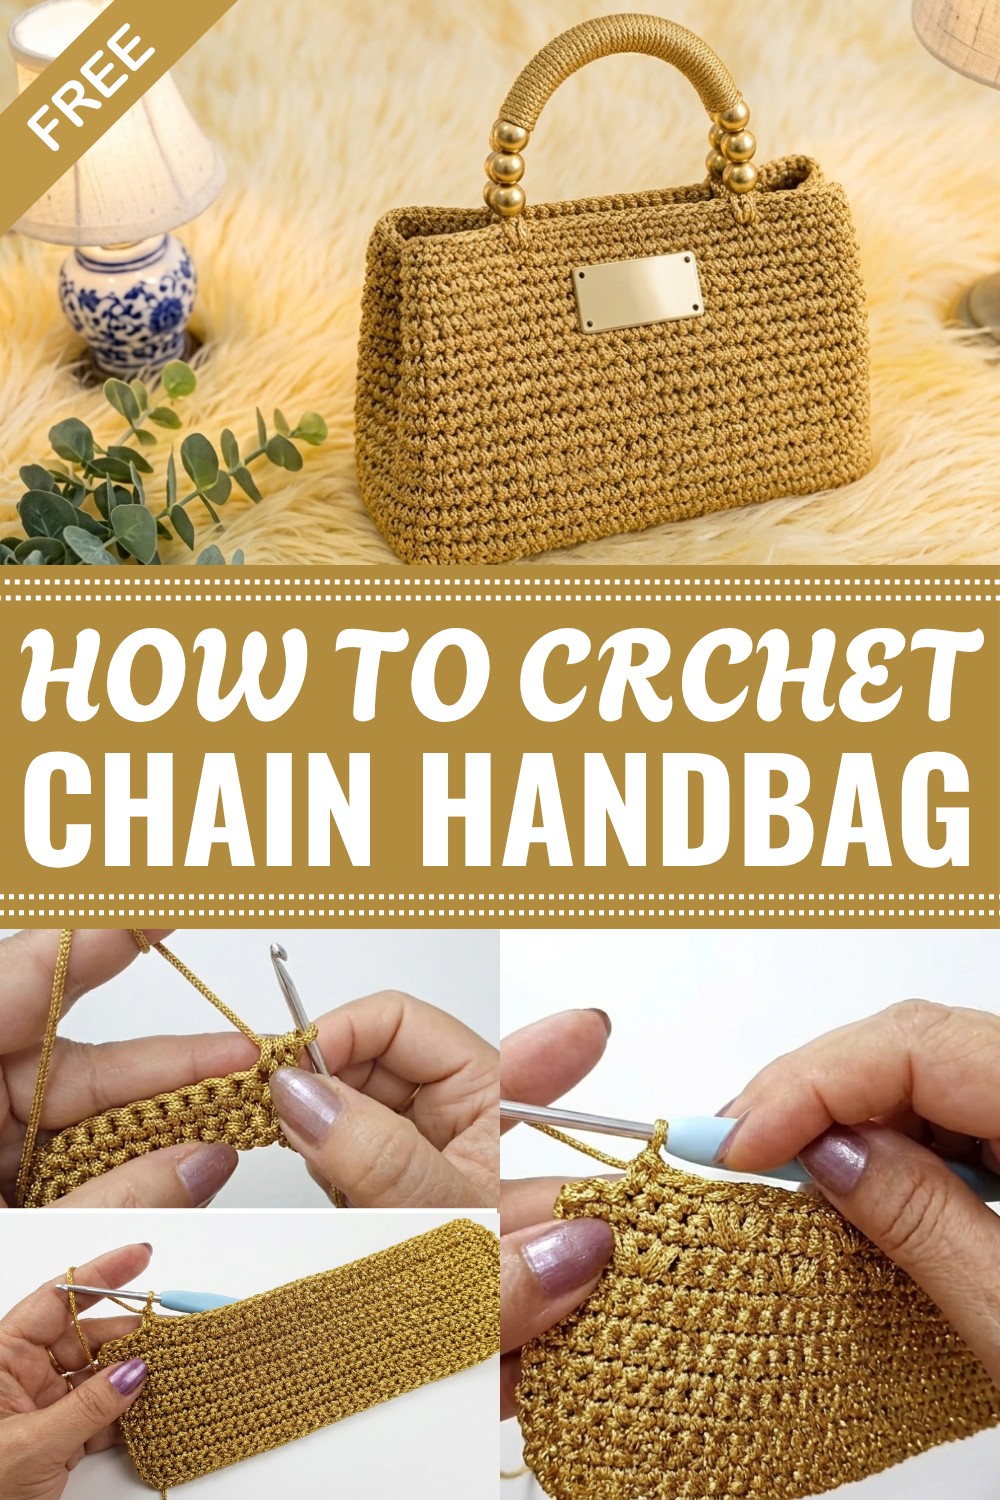
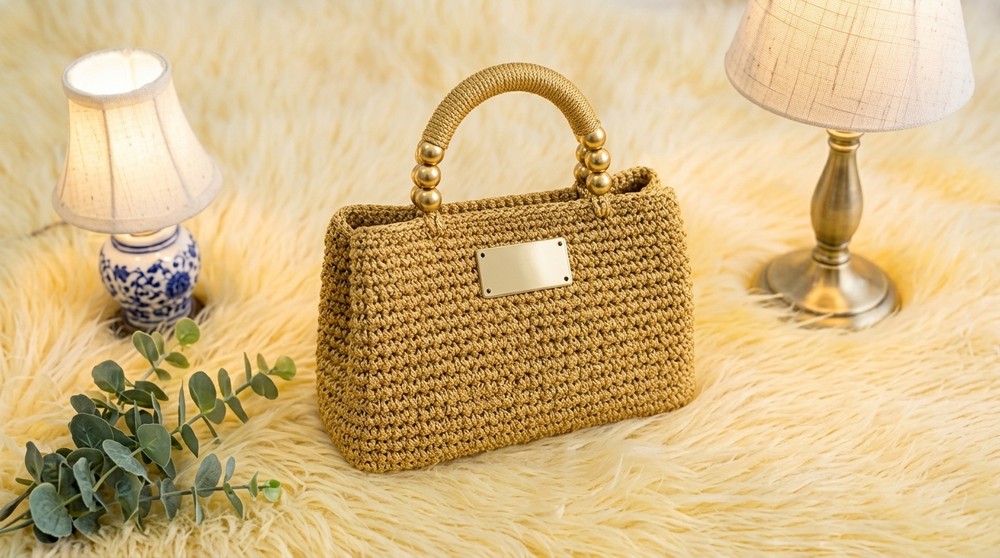
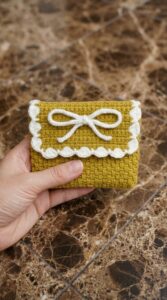
Add a touch of elegance to your wardrobe with this chic crochet chain handbag, combining texture and style to complement any outfit.
A handmade handbag brings a unique touch of creativity and style to any outfit. Using a free crochet chain handbag pattern allows for the creation of a fashionable and practical accessory with a stylish chain handle. This pattern provides clear instructions to craft a beautiful crochet bag that combines softness and durability.
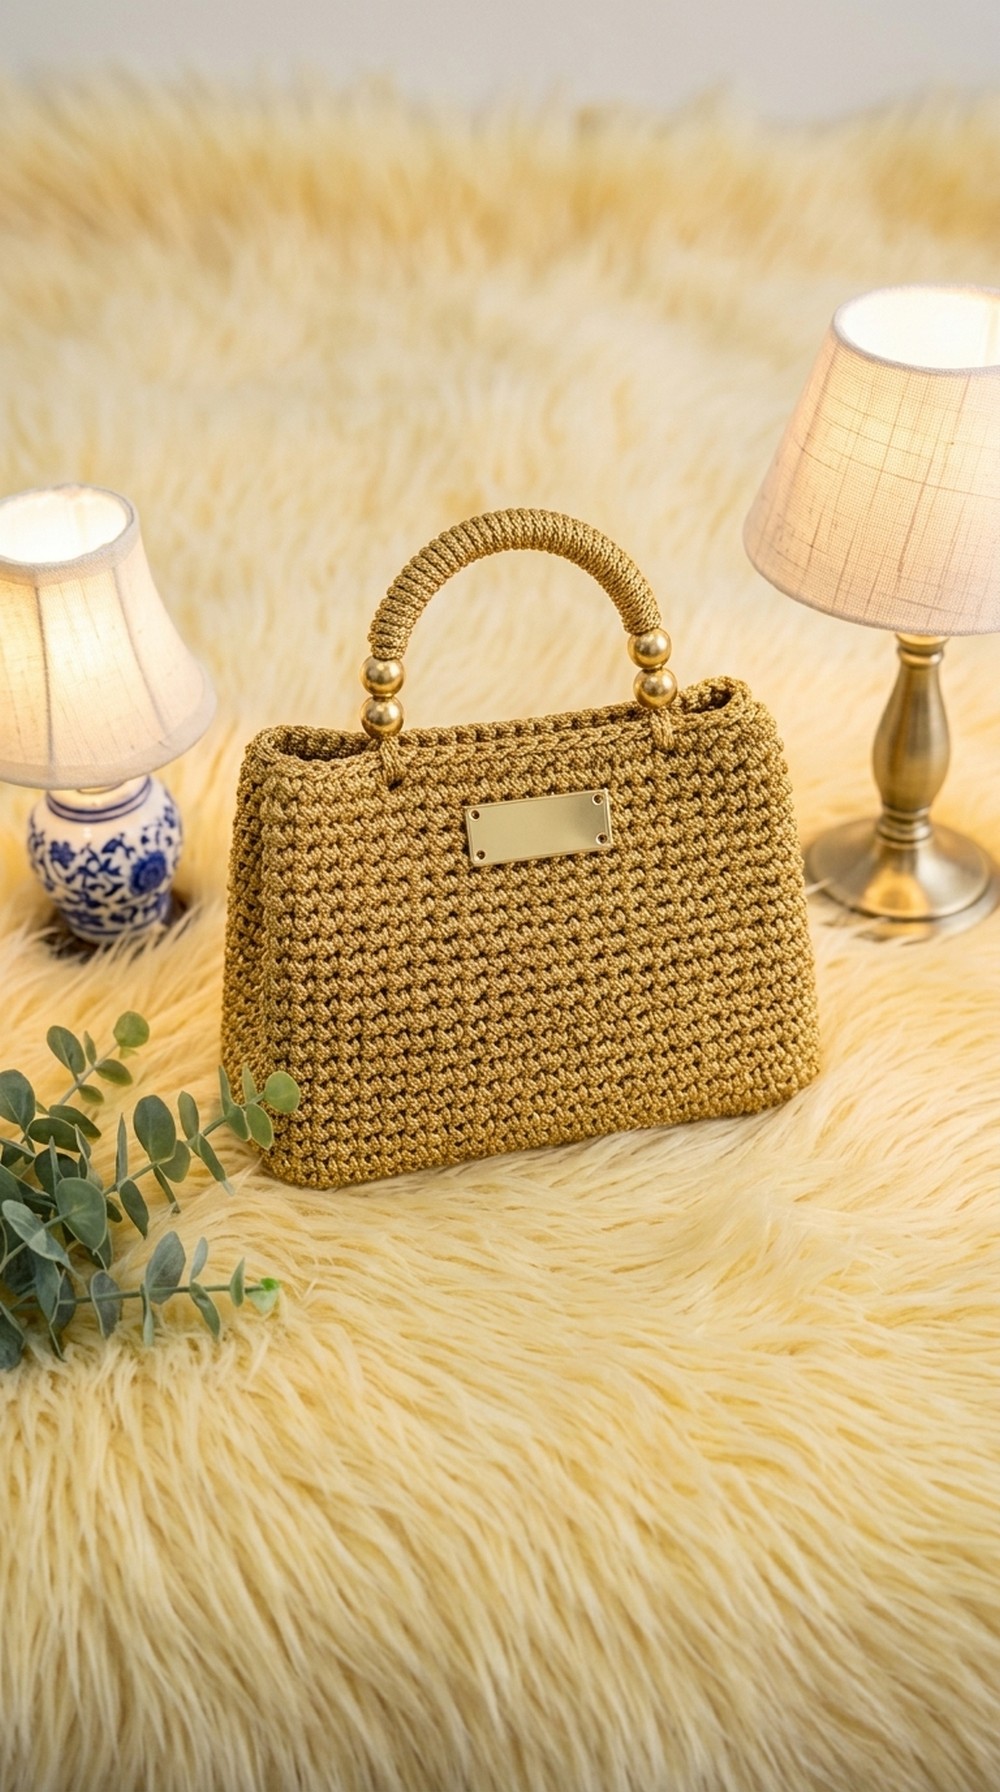
The design of this crochet handbag features an open, airy stitch pattern that gives it a fresh and modern appearance. The texture balances softness with strength, ensuring the bag maintains its shape while being comfortable to carry. The chain handle adds a shiny, elegant contrast to the soft yarn, making the bag visually appealing and trendy. Typically, the handbag has a neat rectangular or square shape, which makes it versatile and easy to pair with various outfits.
Free Crochet Chain Handbag Pattern
This crochet bag is suitable for many occasions. It works well for casual outings, shopping trips, or as a stylish small purse for events. Its size is ideal for carrying everyday essentials such as a phone, wallet, keys, and small personal items. Additionally, this handbag can be a thoughtful handmade gift for friends and family who appreciate unique accessories.
The free crochet chain handbag pattern is accessible to those with basic crochet skills, making it a manageable project for beginners while still offering creative opportunities for experienced crocheters. Color and stitch variations allow customization, so each handbag can reflect personal style. Overall, this pattern provides a fun and rewarding way to create a charming and functional handbag.
Easy Silver Crochet Handbag – Step by Step Pattern
Learn how to crochet this beautiful and easy silver handbag using simple stitches and clear assembly steps. This project uses durable polyester cord and is designed for crocheters new to bag-making or those wanting a quick, rewarding accessory. The richly textured surface and professional finish—complete with lining, zipper, and chain strap—make this bag a stand-out yet accessible project.
Skill Level & Terminology
- Skill Level: Confident Beginner
- Terminology: US Crochet Terms, step-by-step instructions
If you know how to chain, single crochet (sc), half-double crochet (hdc), and work basic increases/decreases, you’ll be ready.
Materials & Tools
- Yarn: 2.5mm silver polyester cord/thread
(other sturdy synthetic or cotton yarns will also work) - Hook: ¼" (approximately 2 mm) crochet hook
- Lining: Fabric to match the size of the bag
- Zipper: Length to suit your bag
- Handles: Ready-made or crocheted (see below)
- Chain/Sling: Optional, for crossbody or shoulder style
- Transparent or matching nylon thread for sewing
- Needle, scissors, measuring tape
Gauge
- Gauge is not critical, but a tight, even stitch is needed for bag firmness.
- Sample: 11 single crochet rows x 34 stitches = approx. 20 x 6.5 cm.
- Adjust hook size if the fabric feels too loose or stiff.
Abbreviations List
| Abbreviation | Meaning |
|---|---|
| ch | chain |
| sc | single crochet |
| hdc | half double crochet |
| sl st | slip stitch |
| st(s) | stitch(es) |
| inc | increase (2 sc in one st) |
| dec | decrease (sc 2 together) |
| RS | right side |
Special Stitch Instructions
- Single Crochet (sc): Insert hook in stitch, yarn over, pull up loop, yarn over, pull through both loops on hook.
- Half Double Crochet (hdc): Yarn over, insert hook in stitch, yarn over, pull up loop (3 loops on hook), yarn over, pull through all three loops.
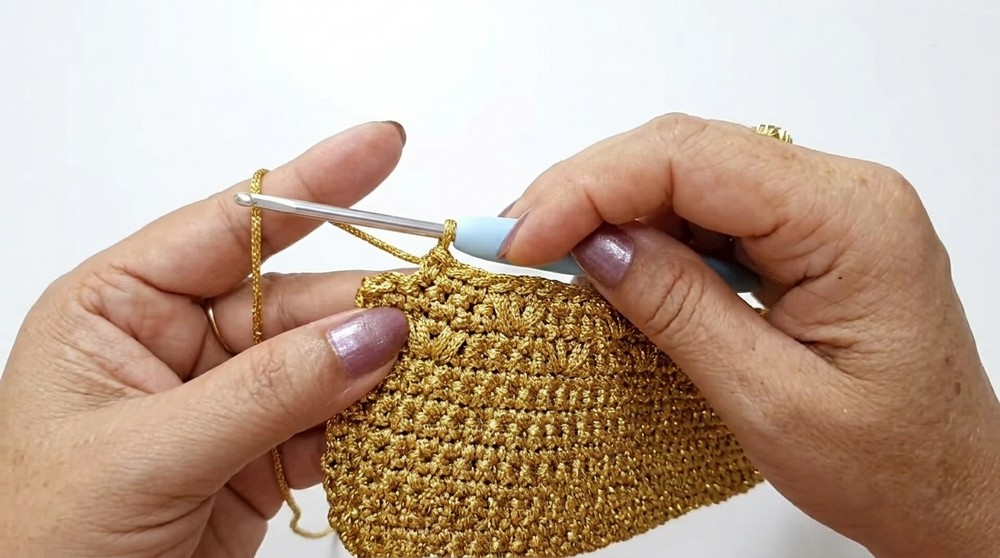
- Long Loop/V Stitch (Bag Pattern): Skip 1 ch, insert hook into next ch from below, pull up a long loop for decorative texture. Alternate with regular single crochet.
- Increase (inc): Work two sc in the same stitch.
- Decrease (dec): Work sc across two stitches together.
The Pattern Itself
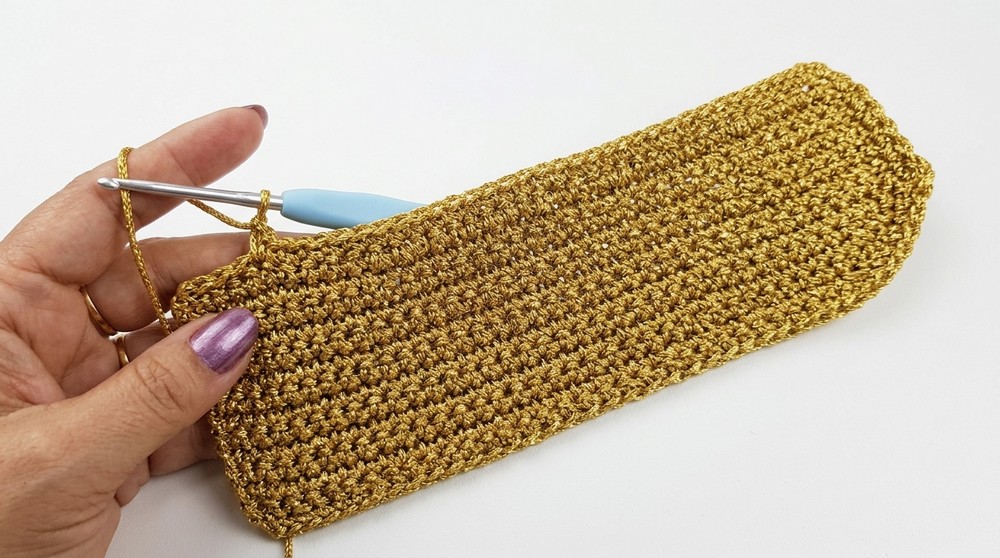
Bag Base
- Ch 34 (not too tight, not too loose).
- Row 1: Turn, sc in each stitch across (34 sc).
- Rows 2-11: Ch 1, turn, sc in each st across (34 sc).
If you’re not familiar with reading patterns, simply make a rectangle of 11 rows of 34 single crochets. This is your bag base.
Attaching to Canvas
Optional for extra strength, otherwise skip this section if you do not have canvas.
- Place the crocheted piece onto a matching-sized canvas or stiff fabric.
- If there’s extra material, trim canvas to fit with a small margin all around.
- Starting from one side, join crochet to canvas using sc along the next row, leaving a 1-row (or small margin) border on each side.
- Continue sc along the sides, joining canvas and crochet, until both are securely attached.
If you don’t have canvas, just shape your base by blocking.
Side Panels Construction
- Turn to work along the side (short edge of base).
- Row 1 (RS): Join yarn, sc across edge (approx 36 sc, adjust as needed for neat edges). Ch 1, turn.
- Row 2: Sc in each st across. (Repeat for sturdy sides.)
- Repeat above two rows once more (total of 2 sc rows on each side panel).
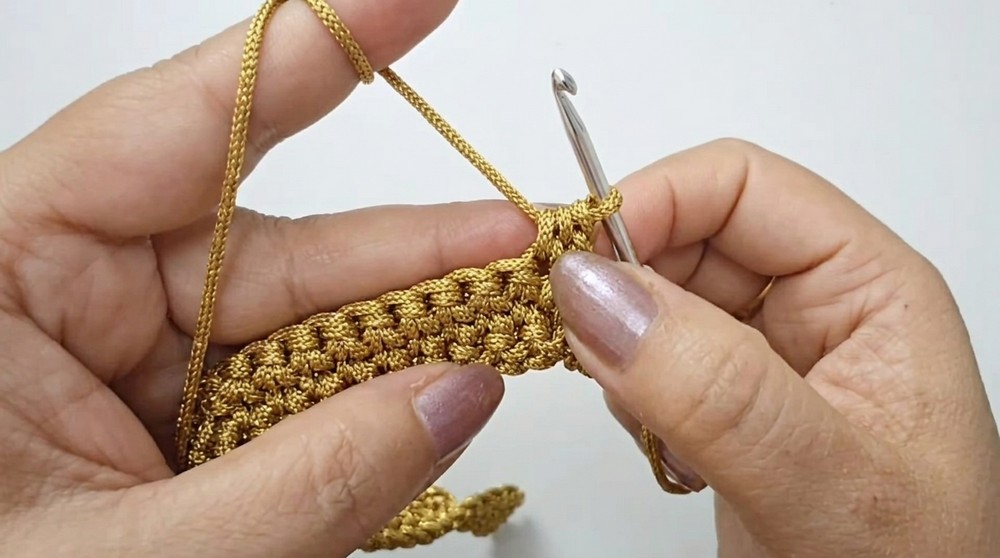
Main Body Pattern (Textured Rows/V-Stitch Rows)
Pattern is a 4-row repeat (1 row patterned, 1 row sc) for a rich texture.
Pattern Row 1 (V-stitch/long loop):
- Ch 1, turn.
- Skip the first ch, pull up a long loop from the next ch space below, sc in the next space, make another long loop from the next space below, sc in next st; repeat along the row.
- After each V, make three sc, then make V as follows:
- Skip 1 st, pull long loop from below, sc in same st, pull another long loop, then sc, then three regular sc.
- Continue to end. The last two or three sts: finish with sc.
Pattern Row 2 (sc row):
- Ch 1, turn.
- Sc in each st across.
Pattern Row 3 (offset V-stitch/long loop):
- Repeat as above, but start pattern by making the long loop/V at the beginning. This time, V stitches will be staggered to fill between previous rows.
- Alternate with sc as you go.
Pattern Row 4 (sc row):
- Ch 1, turn, sc across.
Continue repeating these rows until the desired height is reached (approx. 13 pattern sets, or total bag height of approx. 18.5 cm). Adjust length for personal preference.
For beginners: After two plain rows, start making a pattern row by skipping a stitch, pulling up a tall loop, then making sc and repeating. Then make three single crochets normally. This sequence creates a V-like decorative pattern. Alternate with a row of basic sc stitches, and repeat this until the bag is tall enough.
Other Side Panel
- Repeat side-panel construction (as above) for the opposite edge.
Edging
- Round 1: Working around all edges, sc in each st; in each corner, make 3 sc in the same corner stitch to keep corners flat.
- Continue until you’ve outlined the entire bag. Fasten off and weave in ends.
If you want a more polished edge, make two rounds of sc; always place 3 sc in each corner.
Strap (Make 2 Side Strips)
- Ch 12.
- Row 1: Sc in 2nd ch from hook, sc across (10 sc).
- Rows 2-14: Ch 1, turn, sc in each st across (10 sc).
- (Creates a flat strip; for shaping, decrease one st per side every two rows to taper to 8 sts.)
This is your side gusset. It creates width for your bag and neat sides.
- For edges, outline the strip with sc all around, making 3 sc at each strip corner.
You’ll need two of these strips to form both sides of your bag.
Top Flap/Zipper Band
- Ch 34.
- Row 1-3: Sc in each st across (34 sc per row).
- Row 4: Ch 1, turn, hdc in each st across for a flexible band.
- Row 5: Ch 32, hdc in last st (for the base of zipper band).

After making the band, continue with 2 rows of sc for strength.
If unsure about pattern, just crochet a rectangle of three rows sc, one row hdc, then a chain to match zipper length, and attach hdc in last st. Add two more rows of sc for structure.
Finished Size
- Width: 20 cm
- Base Depth: 6.5 cm
- Body Height: 12 cm (expandable with more rows)
- Side Strip (gusset) Height: match with bag’s depth, approx. 13 cm
- Top Flap/Zipper Length: match with bag width
Assembly & Finishing
- Sew Zipper: Attach your zipper to the top band using a needle and matching or transparent thread, with small backstitches for security.
- Insert Lining: Cut lining fabric to match bag’s dimensions, allowing a 1.5" margin for seams. Stitch to bag interior using invisible or whip stitches.
- Attach Side Strips: With right sides together, stitch, whip-stitch, or sc the side strips to the bag’s front and back edges.
- Join Edges: For best finish, use invisible slip stitches from inside or neat whip-stitches, catching both edge loops.
- Attach Handles: Stitch ready-made or crocheted handles securely to bag’s upper edges, spacing symmetrically for best balance.
- Attach Sling/Chain: If using, crochet a matching chain (or use pre-made chain) and attach via side D-rings or directly to the strap base, threading through and reinforcing with extra stitches.
- Sew Top Flap: Stitch or slip-stitch the finished flap over the zipper.
- Weave in All Ends: Carefully bury all yarn tails.
Conclusion
This glamorous silver crochet handbag combines simple stitches with clever assembly. You start by making a single crochet base, create textured sides with long-loop “V” stitches, and finish with neat edgings, a sturdy side gusset, and elegant handle/strap options. Perfect as a sophisticated evening bag or everyday bling, this project is both fast and satisfying even for those new to bags.

Leave a Reply