

Create a festive Crochet Mrs Claus with simple steps that bring holiday cheer and a warm handmade touch to your decorations and gifts this season.
Adding a touch of holiday cheer to your decorations or gifts is easy with this delightful project. The Crochet Mrs Claus gives a warm and festive feel to any space, showing off her classic red dress, white apron, and cozy bonnet. She fits well on a Christmas tree, a shelf, or as a sweet handmade gift.
Cute Crochet Mrs Claus Free Pattern for Christmas Décor
This charming figure uses soft yarn that offers a smooth and comfortable texture. Small in size, she is simple to place anywhere. The details on Mrs Claus add a joyful and lively look, perfect for the holiday season.

The skill level for making this Crochet Mrs Claus suits beginners who know basic stitches, while also offering a chance to practice neat finishing touches. Basic materials are needed, like yarn in a few colors, a crochet hook, stuffing, and some small accents.
Working on this project is pleasant since it’s not too big or difficult, allowing completion in a reasonable time. Plus, it adds something personal and cozy to holiday decorations.
For anyone wanting a sweet and festive item that adds warmth and holiday spirit, the Crochet Mrs Claus is a great choice to bring some cheer into the season.
Amigurumi Mrs. Claus Head Pattern
This pattern details the construction of Mrs. Claus’s head in amigurumi style, featuring a rounded base, secure facial features, embroidered details, and textured hair with a charming bun. The sequence utilizes simple stitches and incremental shaping to assemble the character, making it an accessible yet rewarding project. Creative surface embellishments such as embroidered nose, mouth, and highlights lend character, while the hair and bun add a finished, three-dimensional touch. This project can be used as part of larger amigurumi figures, ornaments, or as a stand-alone festive mascot.
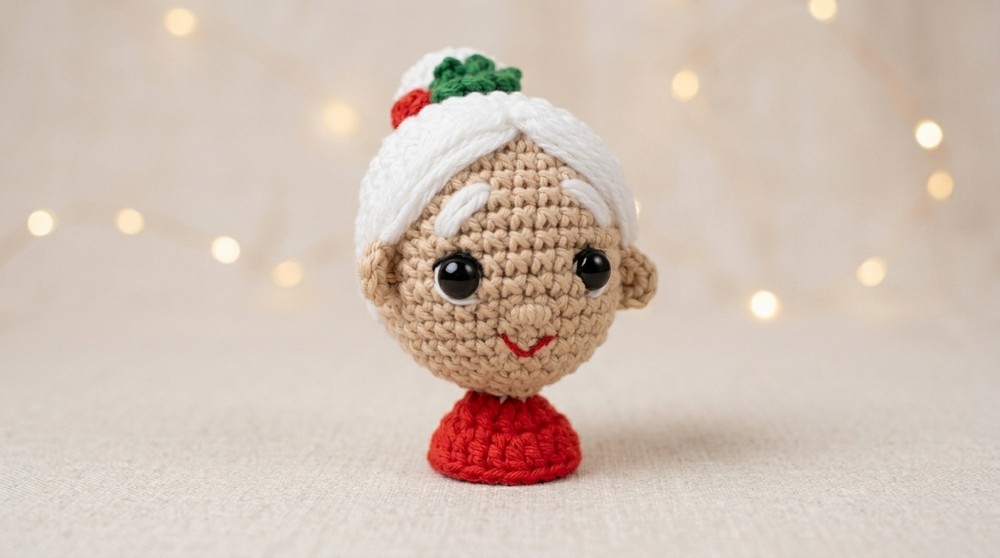
Pattern Basic Points
Construction Sequence
- Head is worked from top down, starting with a magic ring
- Increases form a smooth sphere, with gradual decreases for closing
- Safety eyes and facial embroidery are added after the main head is formed and before ultimate closure
- Hair cap is crocheted separately and sewn in place, with a bun formed and attached last
- Ears and facial features are embroidered or crocheted directly onto the base
Key Structural Points
- Rounds of single crochet and systematic increases establish dimension
- Ears are worked in place for accurate positioning and symmetry
- Bun and bangs are attached after hair is assembled for realistic effect
Customization
- Face, hair color, and accessory shades can be varied for unique versions
Special Notes
- Use a stitch marker to maintain the starting stitch for perfect round shaping
- Stuff the head gradually, especially after safety eyes are placed to maintain a spherical shape
- Do not over-tighten facial embroidery to avoid puckering
- Embroider facial highlights and nose before fully closing the head for best placement
- For small details use a fine yarn needle and matching yarn or thin thread
Skill Level
Advanced Beginner
The project involves standard amigurumi techniques: magic ring, increases, decreases, in-place color changes, simple embroidery, and assembling multiple parts. Experience with sewing crocheted components and working in the round is helpful.
Materials
- Yarn in skin color, white (hair), red (collar), black and white (embroidery detail), pink (for cheeks, optional)
- Crochet hook (matching yarn weight, suggested 2.25–2.5 mm for DK or sport weight)
- Yarn/tapestry needle
- Scissors
- Fiberfill stuffing
- Stitch markers
- Safety eyes (8mm recommended) or black yarn for embroidering eyes
- Silicone glue (optional for securing threads/decorative details)
- Blush (optional for rosy cheeks)
Measurements / Sizing
- Finished head: approx. 6–8 cm high, 5–6 cm diameter (using DK yarn and 2.5mm hook)
- For other sizes, adjust yarn weight and hook accordingly
Gauge (and Stitch Pattern if applicable)
- Gauge is not critical; tight single crochet produces a firm, even fabric
- All rounds worked in single crochet unless otherwise noted
Stitch Abbreviations
| Abbreviation | Meaning |
|---|---|
| MR | Magic ring/magic circle |
| sc | Single crochet |
| inc | Increase (2 sc in 1 stitch) |
| dec | Decrease (sc 2 together) |
| sl st | Slip stitch |
| ch | Chain |
| BLO | Back loop only |
| st(s) | Stitch(es) |
Special Stitches
- Magic ring (MR): Adjustable starting ring for amigurumi
- Back loop only (BLO): Work into back loop only for certain details (collar)
Pattern
Head
- Round 1: With skin color, MR, 6 sc in ring (6)
- Round 2: inc in each st (12)
- Round 3: [sc, inc] around (18)
- Round 4: [2 sc, inc] around (24)
- Round 5: [3 sc, inc] around (30)
- Rounds 6–15: sc in each st (10 rounds; maintain 30 sc per round)
- (Use a marker to track rounds)
- Place safety eyes (or embroider later):
- Insert between rounds 11 and 12, leaving 6 sts between eyes
- Round 16: [3 sc, dec] around (24)
- Lightly stuff and shape head as rounds progress
- Round 17: [2 sc, dec] around (18)
- Round 18: [sc, dec] around (12)
- Round 19: dec in each st around (6)
- Fasten off, close with sl st, leave tail for finishing

Collar (Red Yarn)
- Join red yarn to front loops left on last round of head.
- Work in front loops only:
- [ch 2, 2 dc in same st] for each front loop around (12 sts/loops)
- Join with sl st, ch 2, [dc in same st, dc in next st], repeat for second border round as desired
- Fasten off and weave ends.

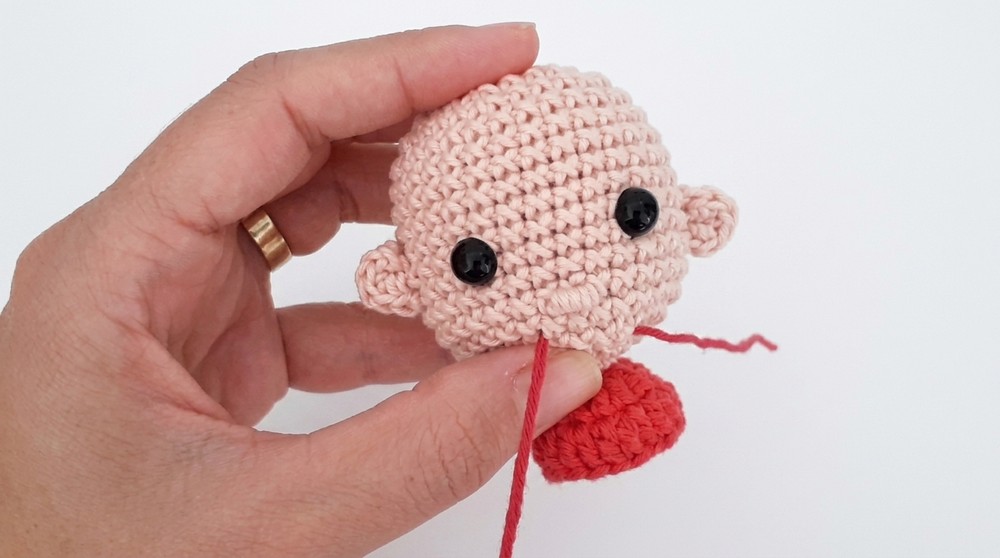
Ears (Make 2, in place with skin color)
- From the location beside each eye (count 3 sts to side of each eye), insert hook.
- Ear round: ch 2, then in first ch: 6 sc, sl st in next st to anchor
- Tighten magic circle, sew end for security or leave tail inside
Nose & Facial Embroidery
- With pink or skin yarn, embroider nose one round below eyes, centered between them. Pass the thread through the same spots for 5–6 loops to form an oval nose.
- With black yarn, embroider smile one round below nose.
- With white thread, embroider small “shine” dots below each safety eye.
- With black, embroider eyelashes or eyebrow lines if desired.
Hair Cap (White Yarn)
- Round 1: MR, 6 sc (6)
- Round 2: inc in each st (12)
- Round 3: [sc, inc] around (18)
- Round 4: [2 sc, inc] around (24)
- Round 5: [3 sc, inc] around (30)
- Round 6: [4 sc, inc] around (36)
- Rounds 7–11: sc in each st (5 rounds, 36 sts)
- At the end, leave a long tail for sewing
- Fit and sew hair to the head, leaving forehead space for bangs
Bun (White Yarn)
- Round 1: MR, 6 sc (6)
- Round 2: inc in each (12)
- Round 3: [sc, inc] around (18)
- Rounds 4–5: sc in each st (2 rounds)
- Round 6: [sc, dec] around (12)
- Fill lightly, sl st to close, leave tail for sewing
- Attach bun just above magic ring of hair cap
Bangs / Fringe
- With white yarn, use needle to tack strands across forehead space (between ears), from the edge of the cap to brow line.
- Weave up and down to simulate short fringe; secure with stitches behind the ears.
Blush (Optional)
- With pink pencil or blush, apply gently to cheeks for color
Assembly & Finished Size
- Stuff head evenly, sewing closed if needed
- Sew or glue hair cap on top, aligned with ears
- Attach bun above magic ring
- Sew ears directly to marked sides
- Embroider or sew details as above before final assembly
- Add collar and finalize by weaving in all ends
Conclusion
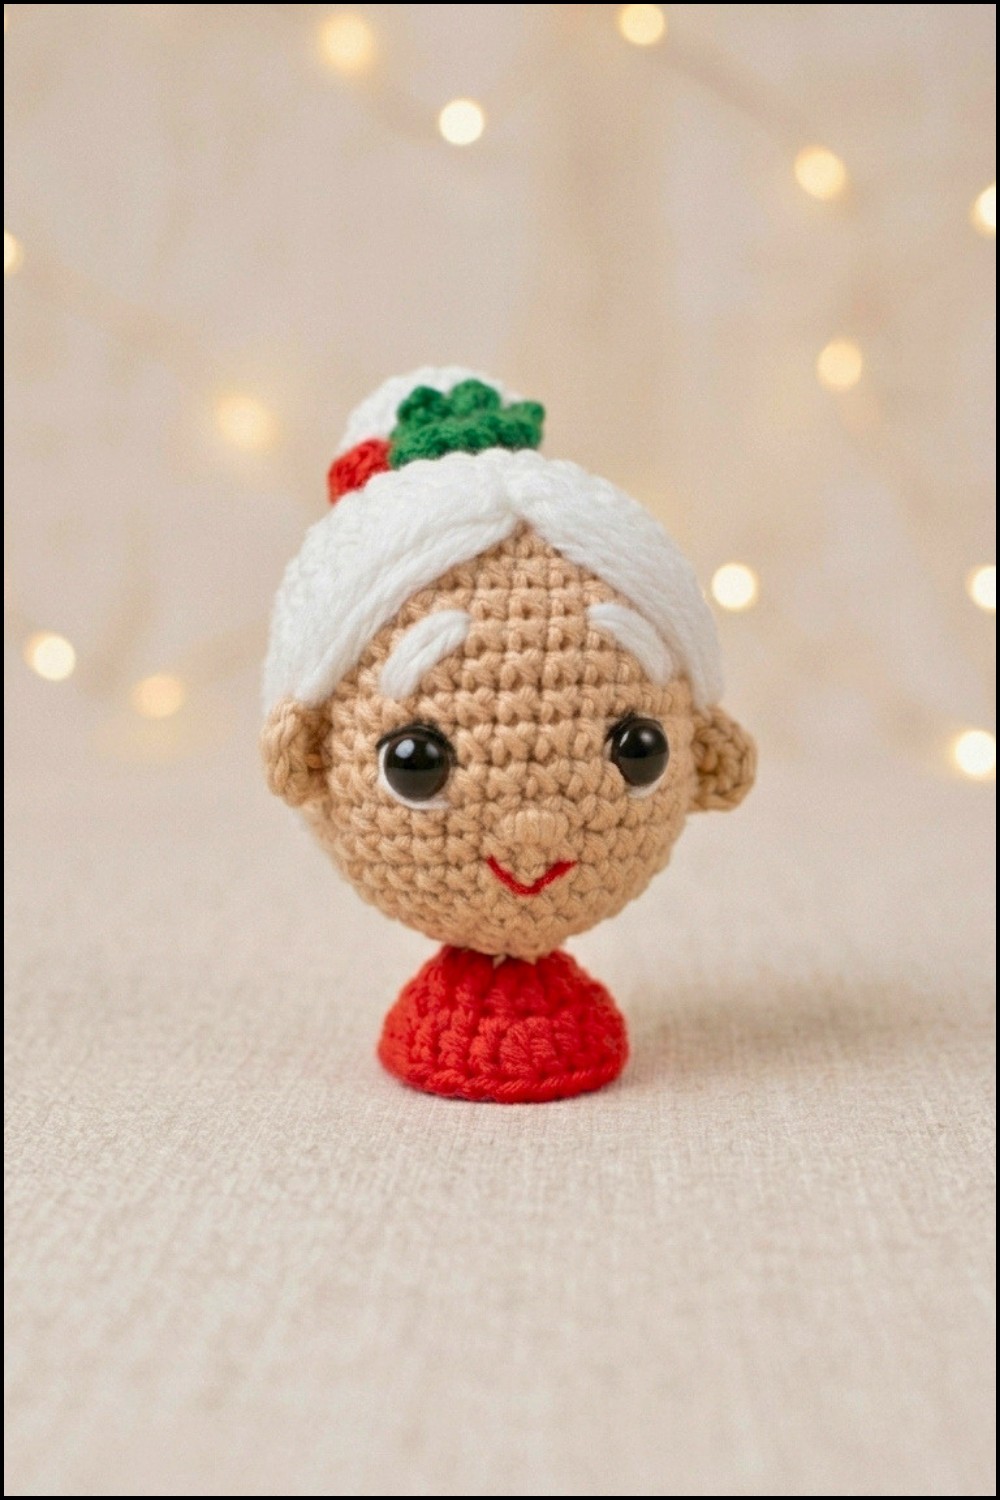
This Mrs. Claus head pattern provides a detailed, expressive result through simple amigurumi shaping, precise surface embroidery, and clear assembly steps. The distinct hair and facial features bring festive warmth and customization potential. The process builds skills in in-situ ear construction, embroidery on crochet, and multi-part assembly, making it suited to advanced beginners eager to expand their amigurumi repertoire. Adjust coloring or accessories for themed variations, or incorporate the head into holiday figures and decor as desired.


Leave a Reply