

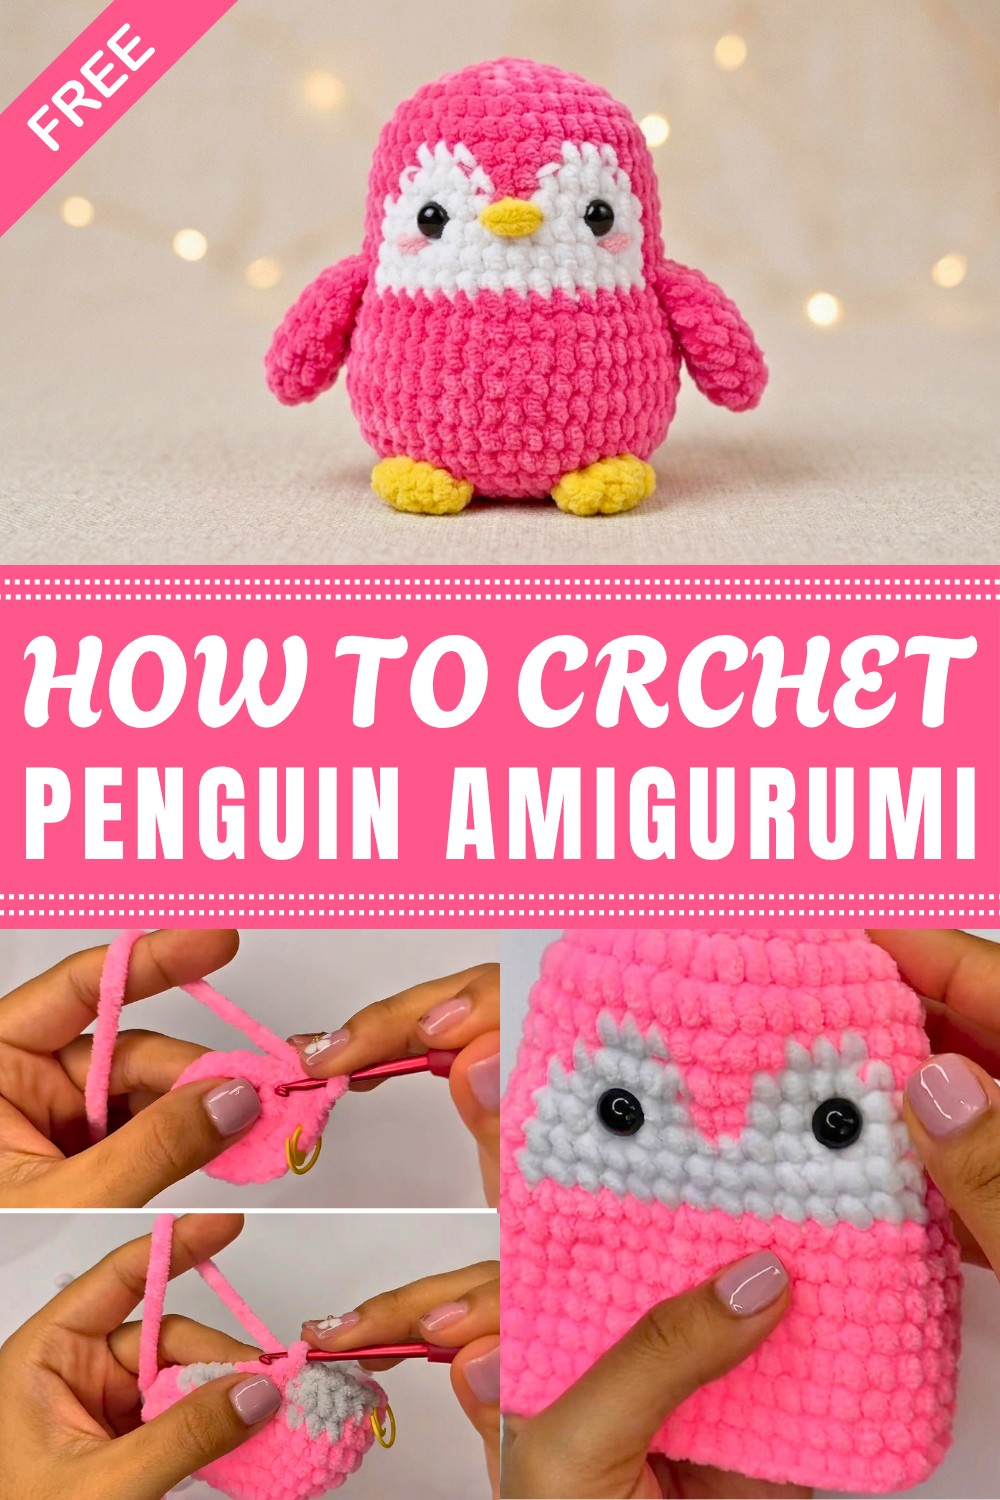
Find a unique crochet penguin free pattern that brightens any space with its adorable design and makes a wonderful handmade gift or decoration.
Have you ever wanted to make a cute little toy that you can hold in your hand? A Crochet Penguin Amigurumi is a small, soft toy made with yarn that looks like a happy penguin with a round body and tiny wings. Kids and adults both love these charming penguin toys because they are warm and cuddly. You can use them as decorations, gifts, or sweet companions on your desk or shelf.
Cute Crochet Penguin Amigurumi Free Pattern For Winter Décor
One of the best things about a crochet penguin is that you can choose any size or color you like. You can make a tiny penguin that fits in your pocket or a larger one to hug. While penguins are usually black and white, you can try fun colors like blue, pink, or even purple to make your toy extra special and unique.
When creating a crochet penguin amigurumi, the most important stitch to learn is the single crochet. This stitch makes the toy tight and soft so the filling doesn’t escape. You will also use simple stitches like increase and decrease to shape the round body and the little wings perfectly. These easy stitches make the project great for beginners and fun to practice.
Crochet penguins are not just pretty toys; they also help you learn and enjoy being creative. They are perfect for kids who want to try something new and for anyone who loves soft, handmade crocheters. Whether for yourself or as a thoughtful gift, a crochet penguin amigurumi brings warmth, smiles, and a touch of handmade magic to any home.
Amigurumi Penguin with Detailed Colorwork and Embroidery
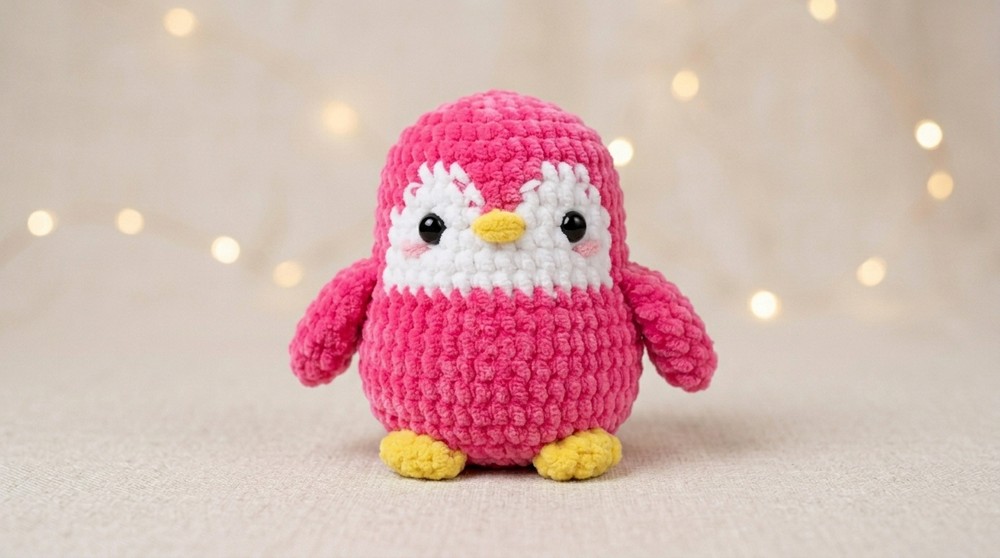
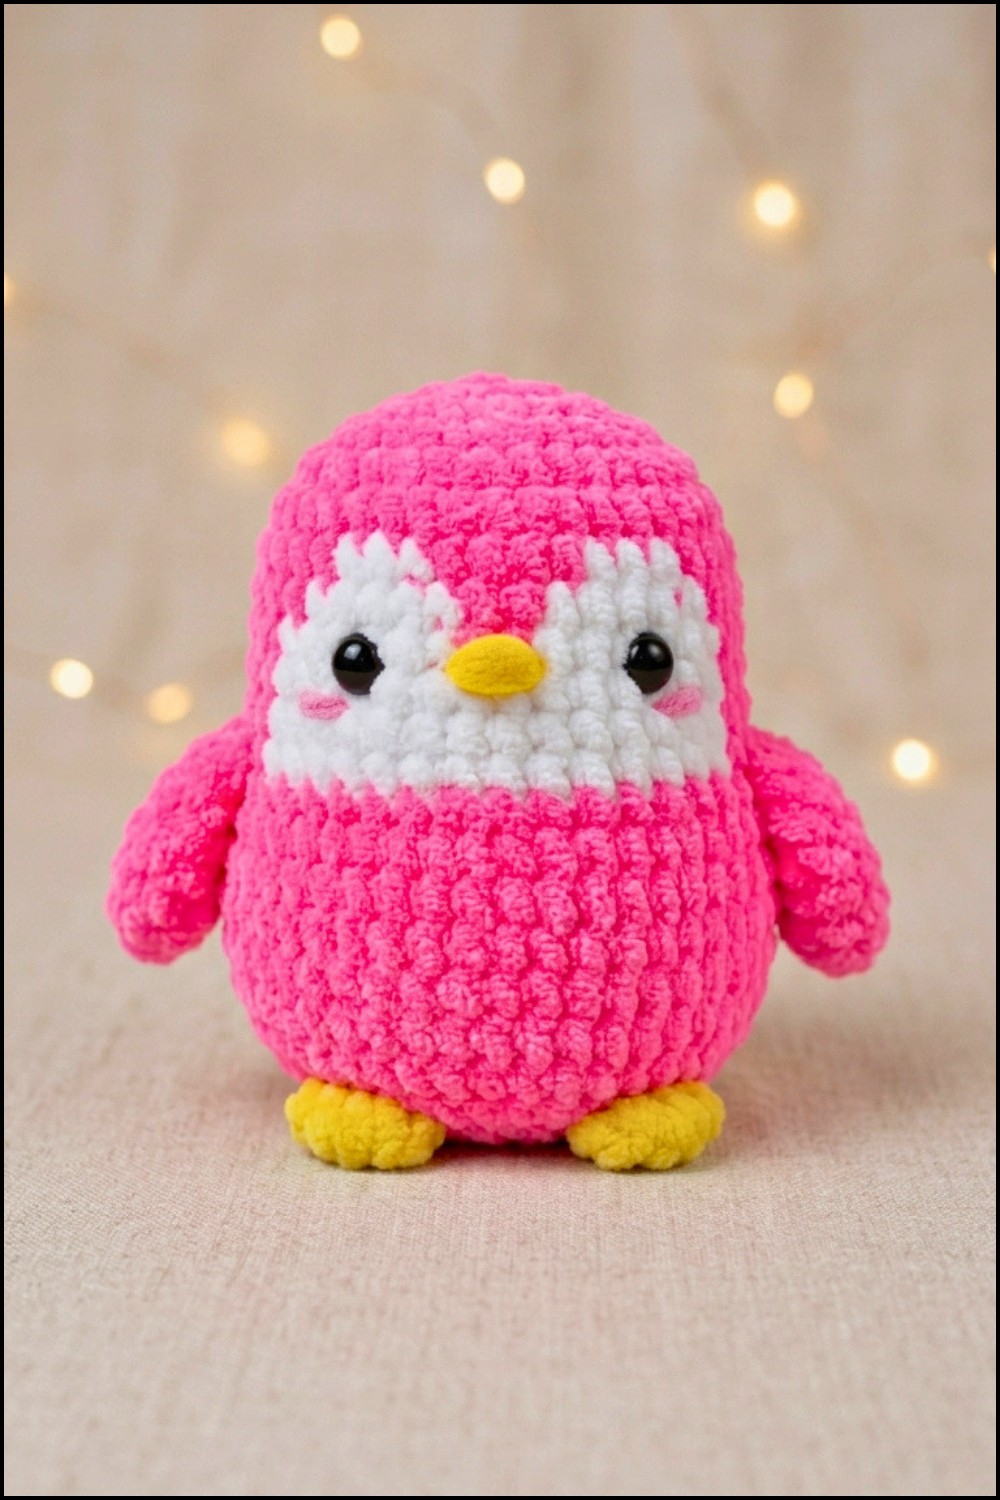
This amigurumi penguin pattern features a larger, plush design that stands out as a cuddly character. The structure highlights clever color changes for a neat finish and incorporates classic techniques for shaping, assembling, and embellishing, resulting in a vibrant, expressive toy. Each element—from the smooth color transitions on the body to the crisp wings, feet, and embroidery—is considered for optimal crafting and appeal.
Pattern Basic Points
- The body is worked in seamless rounds, using colorwork techniques for precise transitions between pink and white sections.
- Closed rounds are formed using slip knots and chains, marking each round with stitch markers for accuracy.
- Color changes use front loop pickups and working over yarn tails for a tidy finish.
- The wings and feet are crafted separately, incorporating rounds of increases, decreases, and flat closure for a structured effect.
- Safety eyes are inserted between specific rounds before final decrease and closure, ensuring exact placement.
- Nose and cheeks are embroidered post-assembly for expressive detailing.
- All pieces are assembled securely, incorporating hidden knots and seamless finishes.
Special Notes
- Chenille yarn offers a plush result but can be substituted with cotton or acrylic. Adjust yarn weights to maintain size and firmness.
- Marking the first stitch of each round helps track color changes and maintains symmetry throughout the project.
- Employ invisible decreases picked up through the front loop for a subtle finish during shaping.
- Stuff the body thoroughly, especially around the base and sides, to maintain shape and prevent flat spots.
- Cut and weave in yarn tails during color changes for a neater appearance, particularly in the face area.
- Secure all embroidery knots inside the fabric to prevent unraveling during use or washing.
- The pattern scales well—use thinner yarn and smaller hook for a miniature version.
Skill Level
The pattern is beginner-friendly, with elements suitable for those expanding basic amigurumi skills. Those with intermediate crochet experience will appreciate the detailed colorwork and assembly, but clear instructions make the project accessible to newcomers.
Materials
- Yarn: Chenille (Carto Poo Yarca recommended) or cotton/acrylic in two shades for the body (pink and white), plus yellow for feet and nose
- Hook: 3mm crochet hook (match yarn size if substituting)
- 9mm safety eyes (adjust if size changes)
- Silicone-coated cotton stuffing
- Tapestry needle
- Stitch marker
- Scissors
Measurements, Gauge & Stitch Pattern
- Finished Size: Approximately 15–18 cm in height, depending on yarn and crochet tension
- Gauge: Not critical, but 8 single crochet stitches across should measure about 4 cm with chenille yarn
- Stitch pattern: Amigurumi is worked in spirals, using single crochet (sc) throughout most sections
Stitch Abbreviations
- ch: chain
- sc: single crochet
- inc: increase (2 sc in one stitch)
- dec: decrease (sc over two stitches)
- sl st: slip stitch
- hdc: half double crochet
- FL: front loop
- AM: magic ring
Special Stitches
- Invisible Decrease: Insert hook through front loops of next two stitches, yarn over, pull through both, yarn over, finish as a single crochet.
- Color Change (Front Loop Method): When switching colors, insert hook from the top to pick up just the front loop and an additional ‘floating’ loop (see video for visual guide). Pull new color through both loops and continue working, carrying the other color in the back for two or three stitches.
- Flat Closing (Wings): Fold work and crochet across both layers to close piece flat.
Penguin Body Pattern
Foundation & Rounds 1–6:
- Create a slip knot, then ch 2.
- In the first chain, work 8 sc.
- Mark the first stitch.
- R2: Work inc in each sc around (16).
- R3: Repeat: sc, inc around for 8 repeats (24).
- R4: Repeat: 2 sc, inc around for 8 repeats (32).
- R5: Repeat: 3 sc, inc around for 8 repeats (40).
- R6: Sc in each stitch around (40).
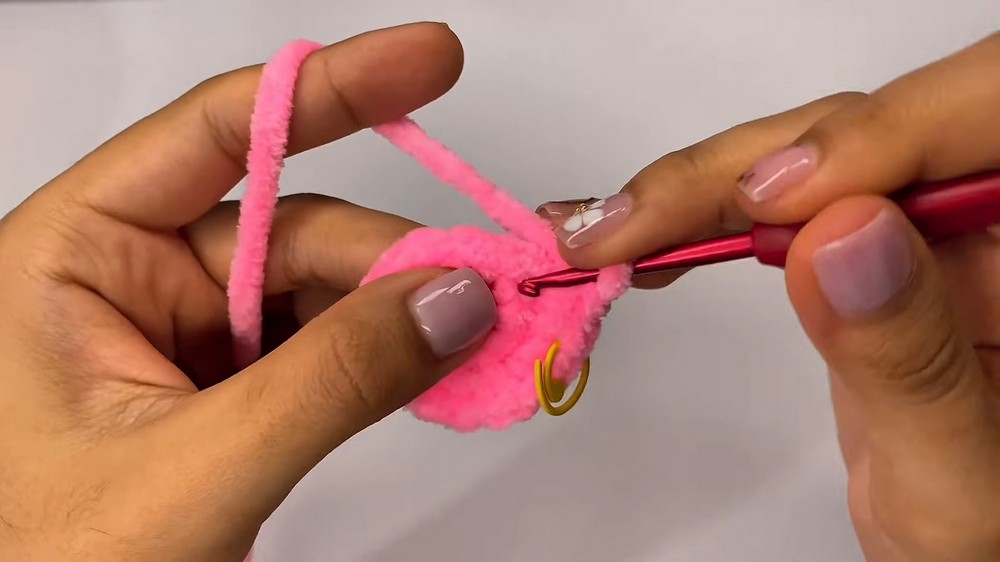
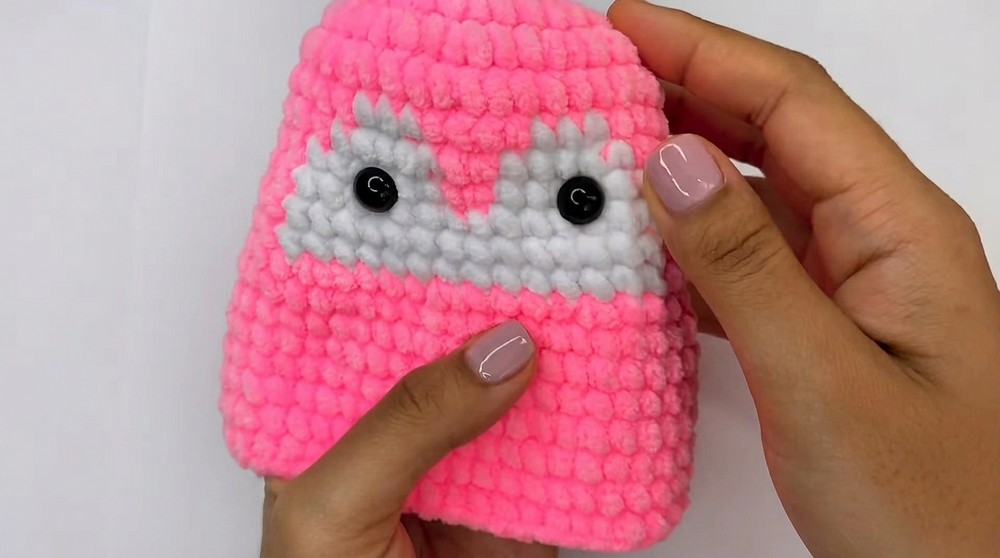
Colorwork Section (Rounds 7–12):
- R7: With pink, sc in first 15 stitches (mark first stitch).
- Change to white: insert hook from the top, pick FL and floating loop, pull white through.
- Sc 3 in white, carrying/resting pink yarn.
- Change back to pink: pick FL & floating loop, pull pink through, sc 4 in pink.
- Change to white again: sc 3 in white, carrying/resting pink.
- Finish remaining 15 sc in pink, carrying white for first couple stitches before dropping.
- R8: With pink, sc 14. Change to white (FL method), sc 5. Switch to pink, sc 2. Switch to white, sc 5. Finish with 14 sc in pink.
- R9: With pink, sc 13. Change to white, sc 6. Switch to pink, sc 2. Switch to white, sc 6. Finish with 13 sc in pink.
- R10–12: Repeat: 13 sc pink, 14 sc white, 13 sc pink for all three rounds. Cut/join yarn at each color change for a cleaner finish.
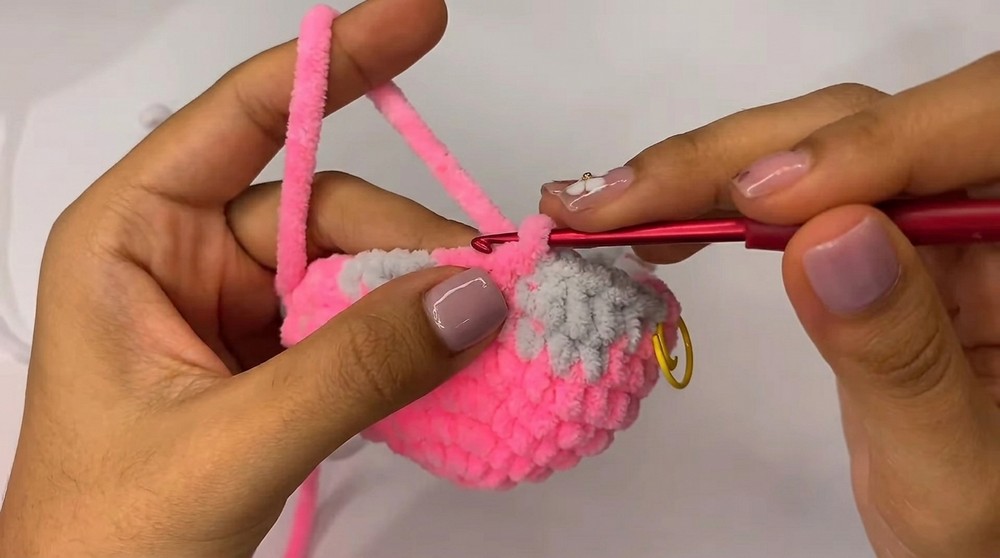
Increasing and Shaping (Rounds 13–20):
- R13: Sc 4, inc, repeat sequence around (48).
- R14–20: Sc in each stitch around, maintaining color pattern as desired (48).
Eye Placement
- Insert safety eyes between rounds 9 and 10, centered within the white sections, with 3 stitches between the eyes.
Shaping & Closure (Rounds 21–25):
- R21: Sc 4, dec, repeat sequence around (40).
- R22: Sc 3, dec, repeat sequence around (32).
- R23: Sc 2, dec, repeat sequence around (24). Stuff firmly and evenly as you work.
- R24: Sc 1, dec, repeat sequence around (16).
- R25: Work 8 decreases (8). Cut yarn, thread tail through the front loops of all stitches, pull tight to close, secure inside.
Wings Pattern
Foundation & Rounds 1–4:
- Slip knot, ch 2. In first chain, work 8 sc.
- Mark first stitch.
- R2: Inc in each sc around (16).
- R3–4: Sc in each stitch around, maintaining 16 stitches.
Increasing and Shaping (Rounds 5–7):
- R5: Sc 3, inc, repeat sequence 4 times (20).
- R6: Sc in each stitch around (20).
- R7: Sc 3, dec, repeat sequence 4 times (16).
Flat Closing (Round 8):
- Fold wing flat. Work 8 sc, crocheting together matching stitches from both sides to close.
- Leave a tail for sewing.
- Make two identical wings.
Feet Pattern
- With yellow yarn, slip knot, ch 2.
- In first chain, 4 hdc.
- ch 1, sl st in first chain to close.
- Leave tail for sewing.
- Make two feet.
Embroidery (Nose & Cheeks)
- With yellow yarn, embroider the nose centrally between the eyes over two adjacent pink stitches (row 9–10).
- Secure and hide knots inside.
- With pink yarn, embroider cheeks next to each eye, working 2–3 passes, securing and hiding knots inside.
Assembly
- Use tapestry needle to sew wings along the color-change line of the body, aligning both wings level.
- Sew feet between rounds 21–22, making sure they match the direction of the eyes.
- Hide all finishing knots and tails inside the body cavity for neatness and security.
Finished Size & Conclusion
The completed penguin measures between 15–18 cm in height, depending on yarn tension and stuffing. The plush character, neat colorwork, and expressive embroidery produce an appealing amigurumi suitable as a toy or display. The pattern guides through structured rounds and advanced color technique, strengthening manual precision and attention to detail. All components—from the wings to the feet—join seamlessly for durability and lasting charm. The design can be personalized with different colors or yarn types, achieving a custom project with consistent results. This comprehensive pattern supports both skill-building and creative enjoyment, offering a rewarding crafting experience with a polished, professional finish.




Leave a Reply