

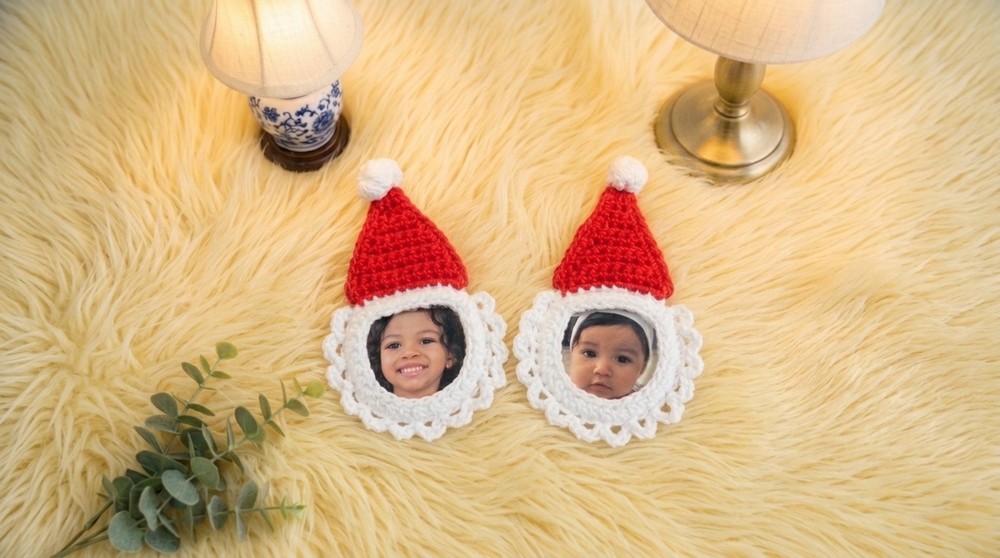
Bring holiday cheer to your home with this engaging Crochet Santa Ornament featuring a customizable photo frame and a cozy handmade Santa hat design.
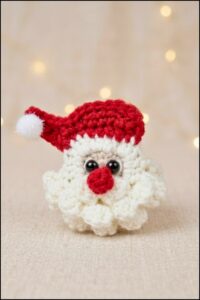
A special handmade decoration that adds a joyful feeling to your holiday season is a charming Santa Claus figure. The Crochet Santa Ornament features Santa’s bright red hat, fluffy white beard, and friendly face, adding a festive touch to any Christmas tree. You can use this ornament to hang on your tree, decorate gifts, or embellish wreaths and garlands around your home.
Unique Crochet Santa Ornament Pattern for Playrom Decor
The ornament comes in various colors beyond classic red and white, including green, gold, and soft pastels, allowing you to match your personal style. Its size can be adjusted to fit small branches or larger spaces like doors and shelves, making it a versatile decoration.
Using crochet stitches like single crochet (sc), double crochet (dc), and half double crochet (hdc), the ornament takes shape with a cozy texture. These stitches form Santa’s round face, soft beard, and pointed hat.
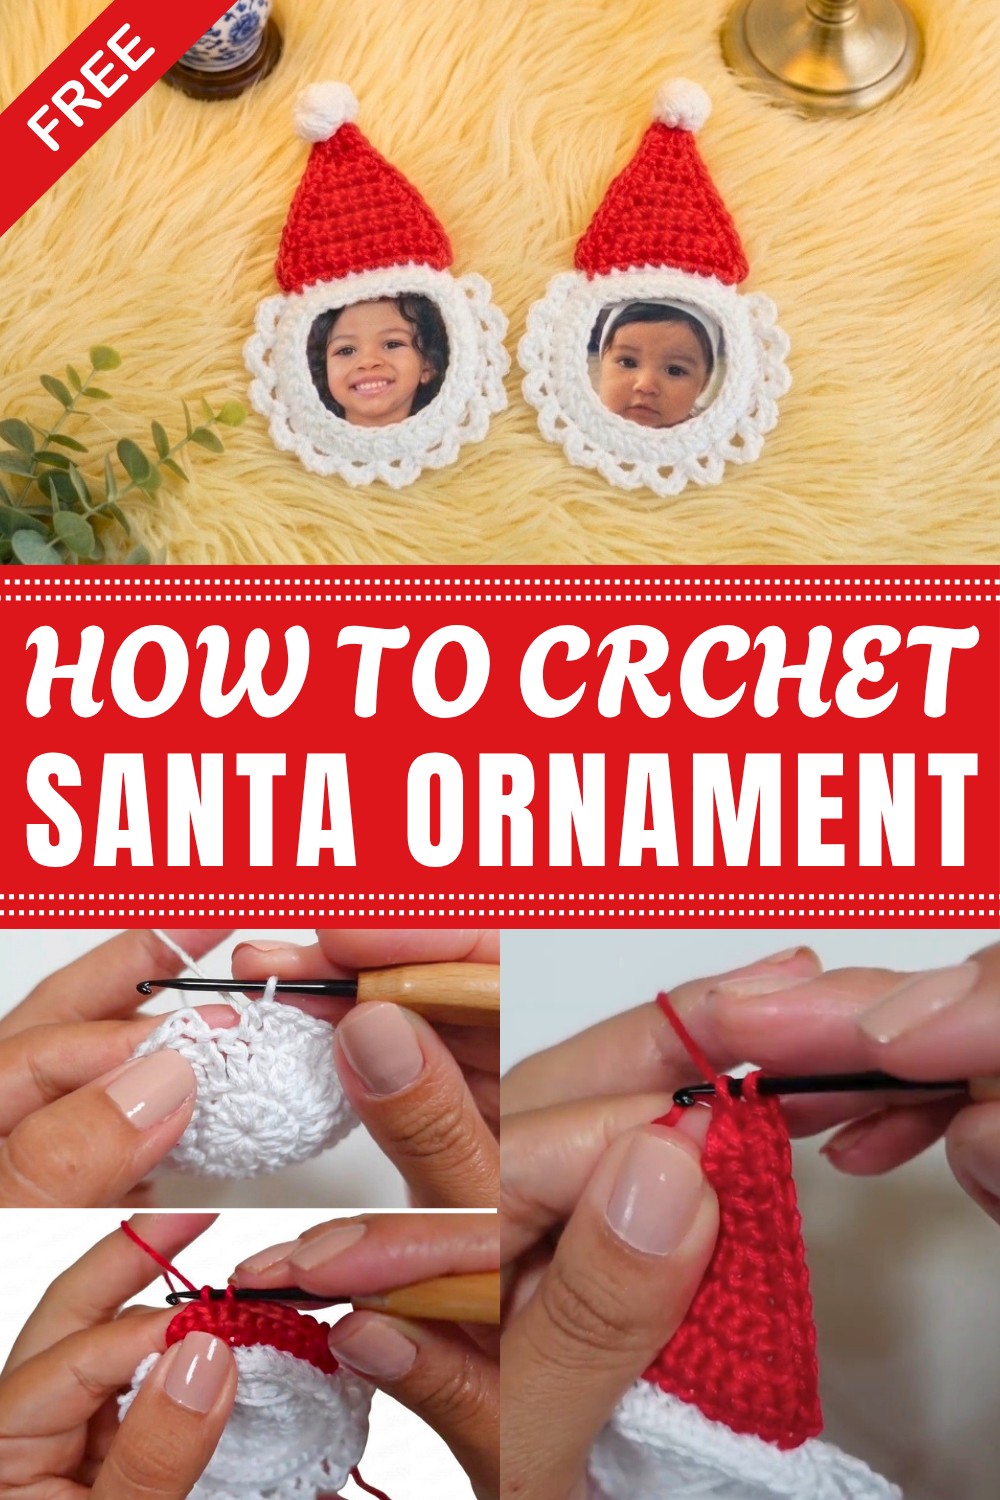
Some Crochet Santa Ornaments include a small frame for a photo, turning them into meaningful keepsakes and personalized gifts. Whether used for decorating, gifting, or collecting, this ornament adds warmth and festive cheer to holiday celebrations.
Katitas Crochet Christmas Ornament Pattern
This charming ornament is a delightful addition to any Christmas tree. It features a personalized photo frame with a cute Santa hat, and you can customize it with photos of your loved ones and your favorite colors. The project requires minimal materials and is beginner-friendly, making it ideal for new and intermediate crocheters alike. Let’s bring the holiday spirit to your home with this adorable crochet ornament.
Pattern Notes
- The pattern is worked in rounds and rows using standard crochet stitches.
- The hat and beard are crocheted separately and sewn to the base.
- The photo frame is sized to hold a passport-sized photo or similar.
- Stitches are worked tightly to maintain shape.
- Ends are woven in neatly for a clean finish.

Skill Level
Beginner to Intermediate
- Familiarity with basic stitches such as chain (ch), single crochet (sc), double crochet (dc), half double crochet (hdc), slip stitch (sl st), increases, and decreases is required.
- Working in the round is needed.
- Techniques covered: magic ring, increases, decreases, puff stitch, finishing with weaving in ends.
Materials
- Symphony yarn 100% mercerized cotton, 2 mm thickness: white and red (or your chosen colors)
- 2.5 mm crochet hook
- Wool needle (for weaving in ends)
- Scissors
- Passport-sized photo (cut slightly smaller to fit)
Measurements / Sizing
- Ornament height: Approximately 7 cm (including hat and pom-pom)
- Ornament width: Approximately 5 cm at the widest point
- Photo frame diameter: Fits passport-size photo (~4.5 x 3.5 cm)
Gauge
- Gauge is not critical for this ornament.
- Use hook size recommended for yarn to achieve tight stitches that hold shape well.
Stitch Abbreviations
| Abbreviation | Stitch |
|---|---|
| ch | chain |
| sc | single crochet |
| dc | double crochet |
| hdc | half double crochet |
| sl st | slip stitch |
| inc | increase (2 stitches in one stitch) |
| dec | decrease (crochet 2 stitches together) |
| puff st | puff stitch (see special stitches) |
Special Stitches
Magic Ring: A technique to begin crocheting in the round by forming a loop around your finger and crocheting stitches into it.
Puff Stitch: Yarn over, insert hook into stitch, yarn over, pull through (repeat 3 or 4 times), yarn over and pull through all loops on hook to create a puff texture.
Katitas Crochet Christmas Ornament
Base Circle (Photo Frame)
Round 1:
- Make a Magic Ring.
- Chain 3 (counts as first double crochet (dc)).
- Work 11 dc into the ring (total 12 stitches including the beginning chain).
- Pull tail to close the ring tightly.
- Join with a slip stitch (sl st) into the 3rd chain of the initial chain 3.
Round 2:
- Chain 3 (counts as first dc).
- Make 1 dc in same stitch (first increase).
- Work 2 dc in each stitch around (total 24 sts).
- Join with sl st to top of beginning chain 3.
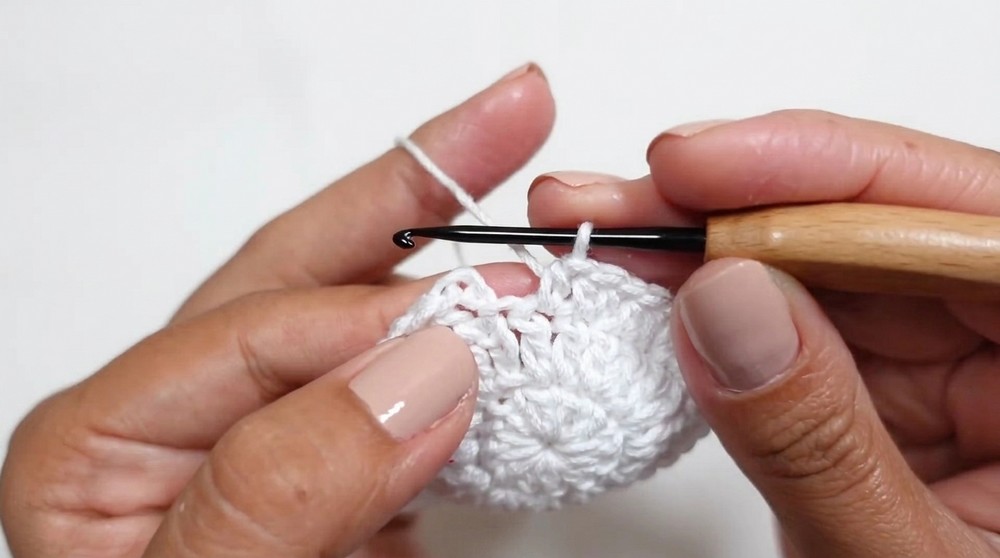
Round 3:
- Chain 2 (counts as first half double crochet (hdc)).
- Make 2 hdc in next stitch (increase), then 1 hdc in next stitch.
- Repeat (increase, 1 hdc) around.
- Close round with sl st into 2nd chain of beginning chain 2.
Chain Loop
- Chain 10 stitches.
- Slip stitch (sl st) into 10th chain to form a loop, prepare for next round.
Connecting Round
Round 4:
- Chain 1 (does not count as stitch).
- Make 1 hdc in each of the next 2 stitches.
- Make 1 decrease (hdc2tog) over the next 2 stitches.
- Make 3 hdc in next 3 stitches.
- Repeat sequence: (3 hdc, decrease) until reaching the chain loop.
- Continue working single crochet (sc) over each chain until loop is closed.
- Cut yarn, leaving tail.
- Pull tail to close ring tightly.
- Weave in ends with wool needle.
Santa’s Beard
- Insert needle at last hdc of base.
- Tie a slip knot.
- Chain 4.
- Skip 1 stitch of base.
- Slip stitch (sl st) into next stitch.
- Repeat (chain 4, skip 1 stitch, sl st) around base edge.
- Pull chain ring to back of base, cut yarn.
- Weave ends with wool needle.
Santa’s Hat
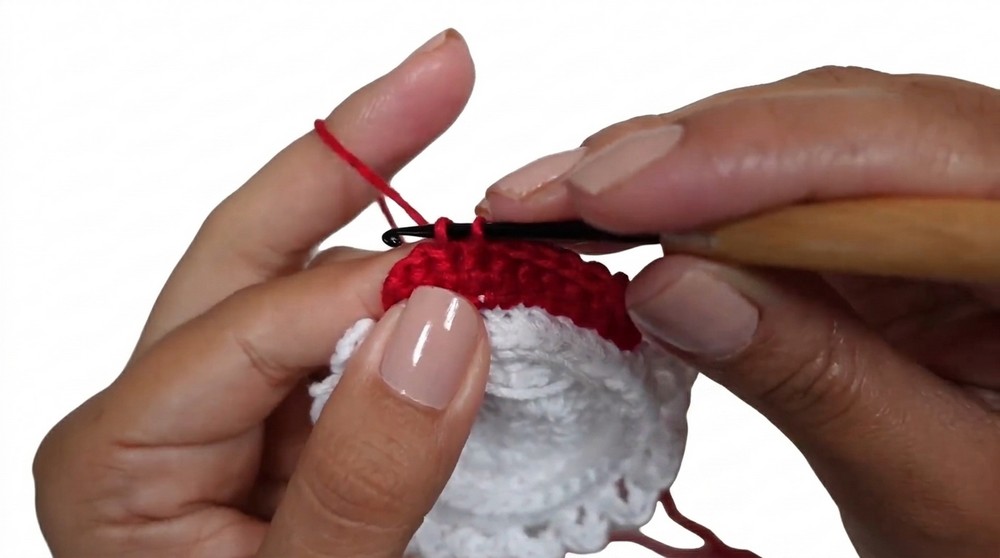
Round 1 (following beard):
- Attach new yarn (red or your choice).
- Insert hook into first chain stitch of base edge.
- Work single crochet (sc) evenly in each chain stitch to other end.
- Chain 1, turn.
Round 2:
- Skip first stitch.
- Work sc in each stitch to end.
- Chain 1, turn.
Round 3:
- Make 1 decrease (sc2tog) at beginning.
- Work 5 sc.
- Make another decrease (sc2tog) over next 2 stitches.
- Chain 1, turn.
Round 4:
- Work 7 sc.
- Chain 1, turn.
Round 5:
- Make 1 decrease (sc2tog) at beginning.
- Work 3 sc.
- Make 1 decrease (sc2tog) over next 2 stitches.
- Chain 1, turn.
Round 6:
- Work 5 sc.
- Chain 1, turn.
Round 7:
- Make 1 decrease (sc2tog) at beginning.
- Work 1 sc.
- Make 1 decrease (sc2tog) over next 2 stitches.
- Chain 1, turn.
Round 8:
- Work 3 sc.
- Chain 1, turn.
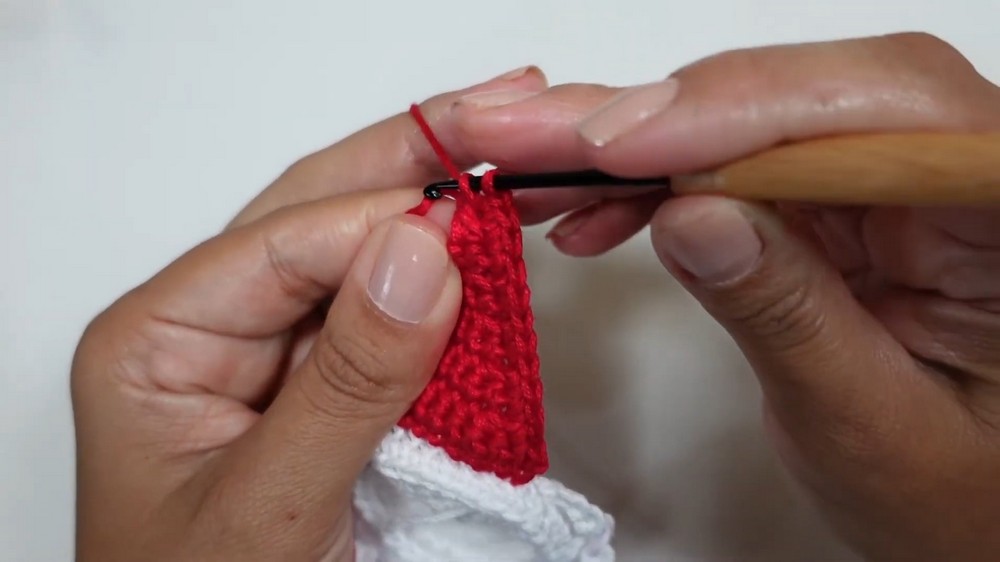
Round 9:
- Make 1 decrease (sc2tog) at beginning.
- Work 1 sc.
- Chain 1, turn.
Round 10:
- Work 2 sc.
- Chain 1, turn.
Round 11:
- Make 1 decrease (sc2tog) over next 2 stitches.
- Cut yarn leaving a tail, pull tight to close.
Hat Edge
- Attach yarn to any edge stitch of hat.
- Work single crochet (sc) evenly around entire hat edge, including corners and shaping points.
- Cut yarn and weave in ends.
Pom Pom (Hat Top Ball)
Round 1:
- Make a Magic Ring by wrapping yarn around index finger.
- Chain 3.
- Work 3 puff stitches into ring (each puff stitch = yo, insert hook, pull loop up 4 times total loops on hook, yo and pull through all loops).
- Close the round pulling tail.
Round 2-4:
- Continue making puff stitches around (repeat 3 more puff stitch rounds, total 4).
- Join round with sl st.
- Cut yarn, weave in ends.
- Sew pom pom onto top of hat.
Ornament Hanger
- Chain 25 stitches.
- Slip stitch into 2nd chain from hook to form hanging loop.
- Chain 1, cut yarn.
- Tighten loop and weave in ends.
Assembly
- Attach hat at top of base circle securely.
- Sew beard along base edge.
- Attach pom pom to top of hat.
- Attach hanger loop at back or top.
- Insert trimmed passport-size photo into front frame.
Summary
This Katitas Crochet Santa Ornament is a heartwarming and easy project for beginner to intermediate crocheters. It combines basic crochet techniques like magic ring, double crochet, half double crochet, and puff stitch to create a festive photo ornament. Using mercerized cotton yarn and a small hook helps achieve neat stitches and a firm shape. Personalize it by changing yarn colors or inserting your favorite photos. This ornament is perfect to decorate your tree, give as a gift, or keep as a special holiday keepsake.
Leave a Reply