

Create an adorable touch for your essentials with this free crochet snail coin purse pattern, a fun and simple project perfect for adding personality to your day.
Have you ever wanted a small, cute pouch to keep your coins safe? The free crochet snail coin purse pattern is just the right project for that! It’s a fun and easy way to make a little bag that looks like a snail, perfect for kids and grown-ups who like adorable things.
Easy Free Crochet Snail Coin Purse Pattern to Try
This snail coin purse is very lovely. It usually has a round, spiral shell like a real snail, made with soft yarn that feels nice in your hands. The purse can be made in many colors, so you can use bright reds, blues, or even your favorite shades. Plus, you can make it bigger or smaller, depending on how much money or small things you want to carry inside. Its small size makes it easy to put in a pocket, bag, or backpack.
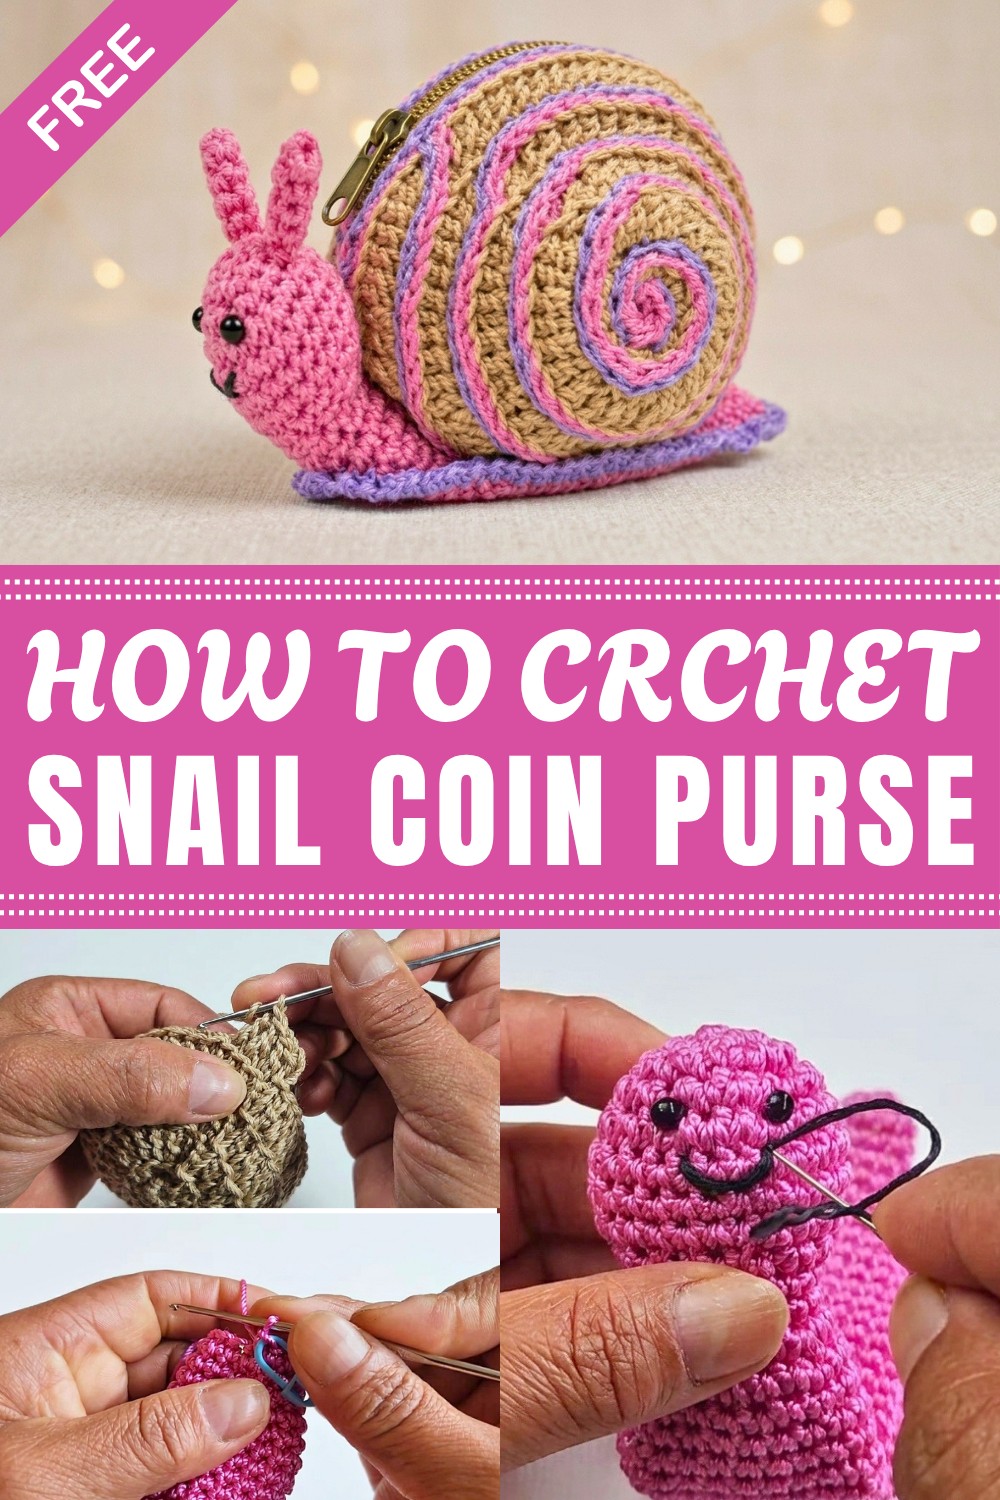
The shape of the coin purse is like a tiny snail, with a spiral shell and a small body. The style is playful and cute, which makes it stand out from plain coin purses. You can even add little eyes or a button to make your snail look friendly and fun.
To make this coin purse, the most important stitch you will use is the single crochet stitch. This stitch is simple, making the purse strong and tight so that coins don’t fall out. Working in rounds helps create the spiral shape of the snail’s shell, and you will also learn how to increase and decrease stitches to shape the purse nicely.
This snail coin purse pattern is a great way to make your own wallet, a cute gift, or a small bag for treasures like keys and tiny toys. It’s easy, colorful, and fun to create! Perfect for those who want a little handmade magic in their day.
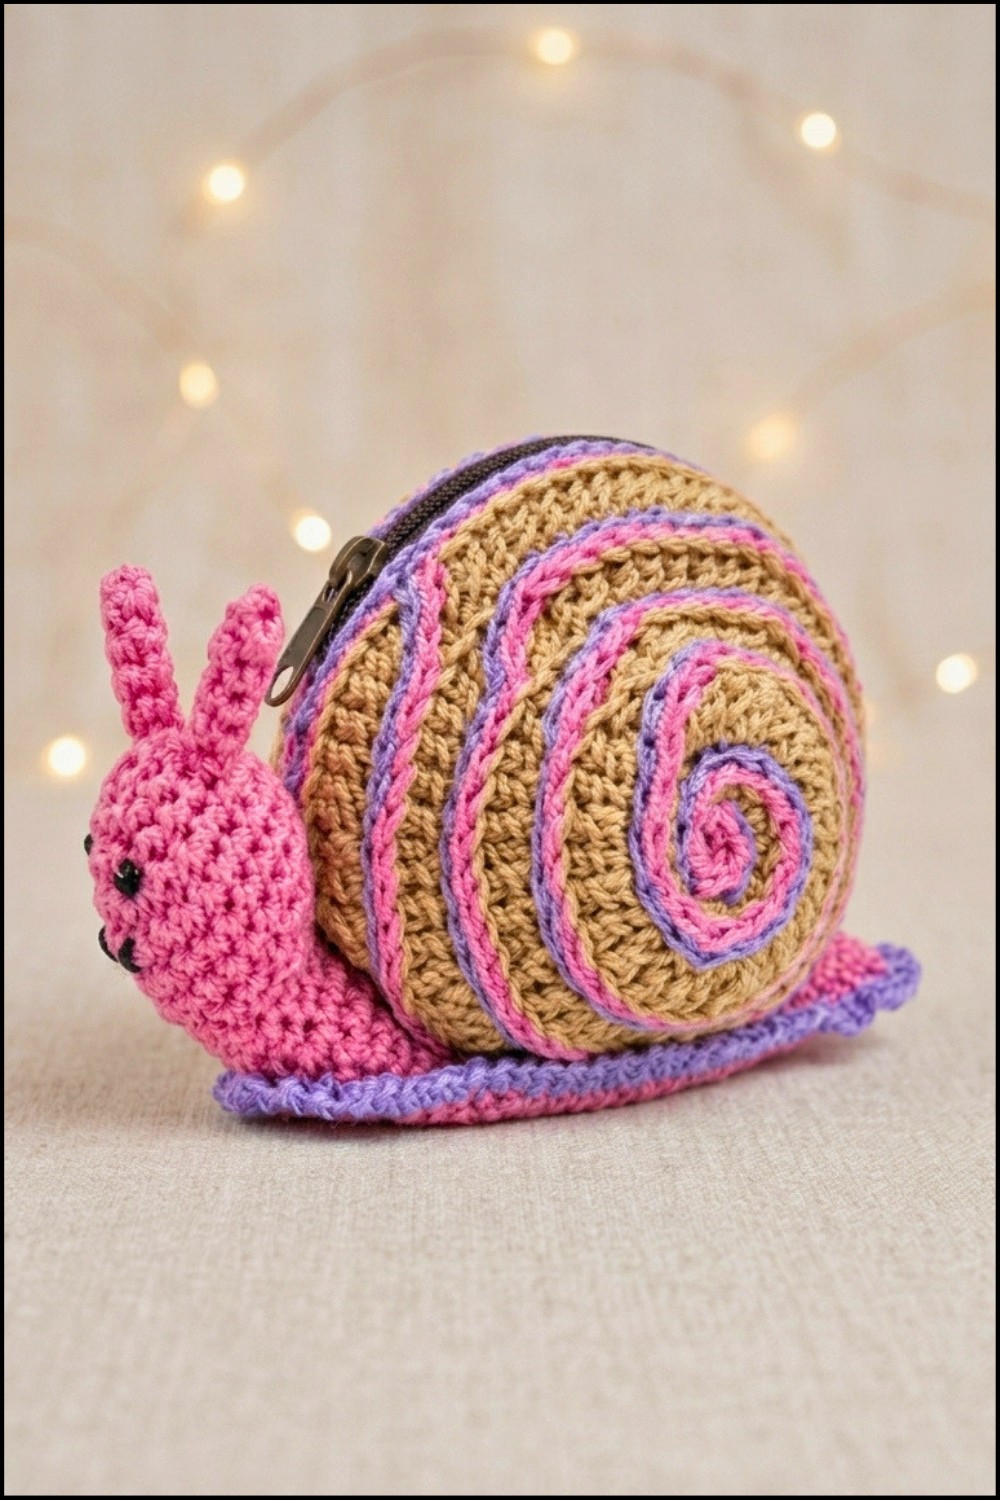
Crochet Snail Purse Pattern
This pattern guides you through making a whimsical snail purse, perfect for children or anyone who loves unique accessories. With its lively swirling shell and cheerful snail body, this purse combines functional design and playful character.
Pattern Basic Points
Key Construction Phases:
- Shell: Two spiraled circles (worked in the round with increases), slip stitch overlay in two colors, joined to create a pocket.
- Snail Body & Head: Classic amigurumi shaping with increases and decreases.
- Horns: Small tubes using magic ring technique.
- Details: Embroidery and sewn-on embellishments.
- Assembly: Secure sewing, closure installation, and final decorative borders.
Special Notes
- Use herringbone 100% nylon yarn for a durable, slightly shiny finish.
- Preferably work in continuous rounds with a stitch marker for accuracy.
- Slip stitches are worked over the base stitches in shell construction, always carrying yarn inside for color changes.
- Burn yarn ends with a lighter to prevent fraying – nylon can be lightly fused.
- When attaching body parts and closure, ensure seams are neat and avoid sewing over moving parts of the zipper.
- Stuff head gently; purse body should not be stuffed.
Skill Level
Beginner to Intermediate
- Requires knowledge of working in the round, increases, decreases, slip stitch, and sewing/assembly.
Materials
- Herringbone yarn:
- Beige (skin tone, base color #18)
- Purple (#18)
- Pink (#6)
- Crochet hook: Size 4 mm
- Scissors
- Lighter (for burning nylon ends)
- Black glass beads ("Chaquirón") for eyes, or other small beads
- Sewing needle
- Stitch markers/separators
- 20 cm zipper/closure
- Soft filling for snail head
Measurements / Sizing
- Purse diameter (shell): Approx. 10–12 cm
- Body length: Approx. 15 cm
- Zipper/closure: 20 cm

Gauge
Gauge is not critical. Aim for a medium tension – stitches should be close enough to avoid gaps, especially with nylon yarn.
Stitch Abbreviations
| Abbreviation | Stitch Name |
|---|---|
| ch | Chain |
| sl st | Slip stitch |
| sc | Single crochet |
| inc | Increase (2 sc in 1 stitch) |
| dec | Decrease (sc 2 together) |
| st | Stitch |
| MR | Magic ring |
Special Stitches
- Magic ring (MR): Create a ring for working in the round.
- Slip stitch overlay: Used for decorative shell ridges.
- Invisible decrease: Insert hook into front loops of two stitches, pull up loop and complete as one sc.
Pattern Instructions
Shell (Make 2 pieces)
Base Circle (Beige Yarn)
- Round 1:
Make a MR, work 6 sc into ring. [6] - Round 2:
Work 2 sc in each stitch around (inc x 6). [12]- Place a marker in the first sc of the round.
- Round 3:
Move to first sc, sl st. ch 3 (counts as first dc), work 2 dc in each st (using back loop only – BLO). [24]- Mark first st with stitch marker.
- Round 4:
Continue with ch 3 (as first dc), then (1 dc, 1 inc) around, working BLO only. [36] - Round 5:
ch 3, (2 dc, 1 inc) around, BLO only. [48] - Round 6:
ch 3, (3 dc, 1 inc) around, BLO only. [60] - End round:
Finish with a sl st; cut the yarn and burn ends for neatness.
Pink Slip Stitch Overlay
- Insert pink yarn at shell center.
- Attach yarn, carry inside, and work sl st in each stitch around entire shell until full spiral is achieved.
- Continue in slip sts, following spiral outwards. Cut and burn ends.
Purple Slip Stitch Overlay
- Attach purple yarn, continue overlay spiral as above with sl st all the way around shell.
- Cut and burn ends.
- Repeat both overlays for the second shell piece.
Snail Body & Head (Beige Yarn)
- Round 1:
MR, 6 sc. [6] - Round 2:
2 sc in each st around. [12]- Place marker.
- Round 3:
(1 sc, 1 inc) repeat around. [18] - Round 4:
(2 sc, 1 inc) repeat around. [24] - Rounds 5–7:
Work 1 sc in each st (no increases), marker placed. [24] - Round 8:
(2 sc, 1 dec) repeat around. [18] - Round 9:
(1 sc, 1 dec) repeat around. [12] - Rounds 10–11:
1 sc in each st. [12] - Round 12:
(1 sc, 1 inc) repeat around [18] - Rounds 13–28:
Work 1 sc in each st (no increases) for 16 rounds. [18] - At round 28:
Stuff gently and evenly in the head for a plump, cute shape. - Round 29:
Start with a dec, 7 sc, another dec, finish with 7 sc. [16] - Rounds 30–31:
1 sc in each st. [16] - Round 32:
Dec, 6 sc, dec, 6 sc. [14] - Rounds 33–34:
1 sc in each st. [14] - Round 35:
Dec, 5 sc, dec, 5 sc. [12] - Round 36:
1 sc in each st. [12] - Round 37:
Dec, 4 sc, dec, 4 sc. [10] - Rounds 38–39:
1 sc in each st. [10] - Finish:
Cut thread, pass through all stitches to close. Cut and burn yarn.


Horns (Make 2)
- Round 1:
MR, 6 sc. - Rounds 2–5:
1 sc in each st for 4 rounds. - Finish:
Cut, burn ends. Make two identical horns.
Assembly & Details
Shell Assembly:
- Place two shell pieces together, stitch edges (from marker to marker) using beige yarn, leaving the rest as open pocket for the purse.
Zipper Installation:
- Sew 20 cm zipper with small, neat stitches. Attach to shell opening, avoiding shell body seam and purse pocket.
Snail Body to Shell:
- Sew head/body to one side of shell at marked position, leaving zipper free.
- Use strong, neatly hidden stitches.
Attach Horns:
- Sew horns to head at eye level, between rounds 3 and 4, spaced symmetrically.
Face Embellishments:
- Glue or sew black beads for eyes between rounds 3 and 4 of head.
- Embroider mouth with black yarn across 3 stitches.

Neck Border (Purple):
- Attach purple yarn at neck base, work 1 round sc around neck, followed by a second round:
- (2 ch, sl st in next st), repeat.
Assembly & Finished Size
- Shell: Swirled with two colors, measuring ~10–12 cm diameter.
- Snail body: Stretched along side with gentle stuffing in head.
- Zipper: Professionally stitched, opens wide for coins/small items.
Conclusion
Finishing your snail purse, a unique blend of whimsy and practical crochet! Every stitch, from the spiraled shell to the expressive snail face, reflects both your skill and the playful spirit of handmade projects. Use it for coins, accessories, or as a conversation starter.

Leave a Reply