

Brighten your space with charming crochet mini flowerpots featuring sunflowers and tulips, perfect for gifts or unique handmade home decor.
Add a cheerful touch to your home with this crochet item. These Crochet Sunflower and Tulip measure about 4 to 6 inches tall, fitting nicely on desks, shelves, windowsills, or small corners. They also work well as gifts for friends and family or as unique accessories such as brooches, keychains, or bag charms.
Free Crochet Sunflower and Tulip Pattern with a Floral Style
This Crochet Sunflower and Tulip uses basic crochet stitches like single crochet, half double crochet, and slip stitch. It suits beginners and those with some crochet experience. Techniques include increasing and decreasing stitches to shape petals, leaves, and stems, giving the flowers a natural look.
Using soft cotton yarn helps the flowers hold their shape and feel smooth to the touch. Choosing bright or natural colors adds a lively appearance. Unlike real flowers, these do not require water or sunlight and will keep their appearance all year long.

Crochet sunflowers and tulips can be used as table decorations, added to wreaths, attached to gift wraps, or placed in vases without water. They can also decorate bags, hats, or clothing for a personal touch. These flowers require little care and add charm wherever placed.
Mini Crochet Flowerpots Pattern
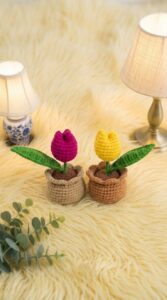
Today’s project is an adorable set of mini flowerpots, each measuring approximately 10.5 cm tall. We will create a base flowerpot, soil, leaves, stems, and two beautiful flowers—a sunflower and a tulip. This tutorial guides you round by round, ensuring you don’t miss a stitch. Let’s get started creating your charming floral accents.

Pattern Basic Points
What You'll Make
- Mini flowerpot body (cylindrical with a rounded base and realistic rim)
- Soil insert (removable disk to sit in the flowerpot)
- Two leaves
- Stem (wrapped wire)
- Sunflower (double-layered for a realistic effect, with stuffing and details)
- Tulip (using a written pattern provided on video)
- All components assembled for a lovely, decorative look
Special Notes
- All stitches are US terminology.
- Maintain stitch count for perfect shapes.
- A 16-gauge wire is used for the stem; it can be substituted with any stiff wire, then wrapped for a clean look.
- Silicone glue is recommended for attaching the stem, leaves, and for extra stability.
- Hide all yarn ends securely for a cleaner finish.
Skill Level
Intermediate:
This project combines basic rounds, joining, simple shaping, and light sewing/embroidery. Confident beginners may attempt it, but a sound knowledge of magic rings, working in the round, changing stitches within the same row, and basic sewing are essential.
Materials
- Cotton yarn in brown (pot), dark brown (soil), green (leaves and stem), yellow (sunflower petals), light brown (sunflower center), pink or desired color (tulip)
- 2.0–2.5 mm crochet hook
- Stitch marker
- Yarn needle
- Scissors
- 16-gauge floral wire, approx. 7.5 cm (3")
- Green elastic (floral tape or yarn) for wrapping stem
- Silicone glue
- Stuffing (fiberfill)
- Tweezers (optional, for assembling fiddly parts)
Measurements / Sizing
- Completed pot with flower: Approx. 10.5 cm tall.
- Pot itself: About 5 cm, but adjustable by yarn and hook.
Gauge
Gauge is not critical, but amigurumi should be worked tightly to avoid stuffing show-through. Just ensure your stitches are neat and even.
Stitch Abbreviations
- mr: Magic ring
- sc: Single crochet
- inc: Increase (2 sc in next st)
- sl st: Slip stitch
- ch: Chain
- hdc: Half double crochet
- dc: Double crochet
Special Stitches
- Magic ring (mr): Make a small loop, crochet directly into the loop, and pull tight for a seamless start.
- BLO (Back loop only): Work into the back strand of the stitch for forming shape edges.
The Complete Pattern
1. Flowerpot (in Brown)
Round 1:
- Start with a magic ring of 8 sc
Round 2:
- Do 8 inc (2 sc in each st)
- (Total: 16 sc)
Round 3:
- (1 sc, 1 inc) x 8 times
- (Total: 24 sc)
Round 4:
- 24 sc – all in BLO
- (This forms the crease at the base.)
Rounds 5 to 10:
- 24 sc in each round
- (6 rounds in total, building the pot’s sides)
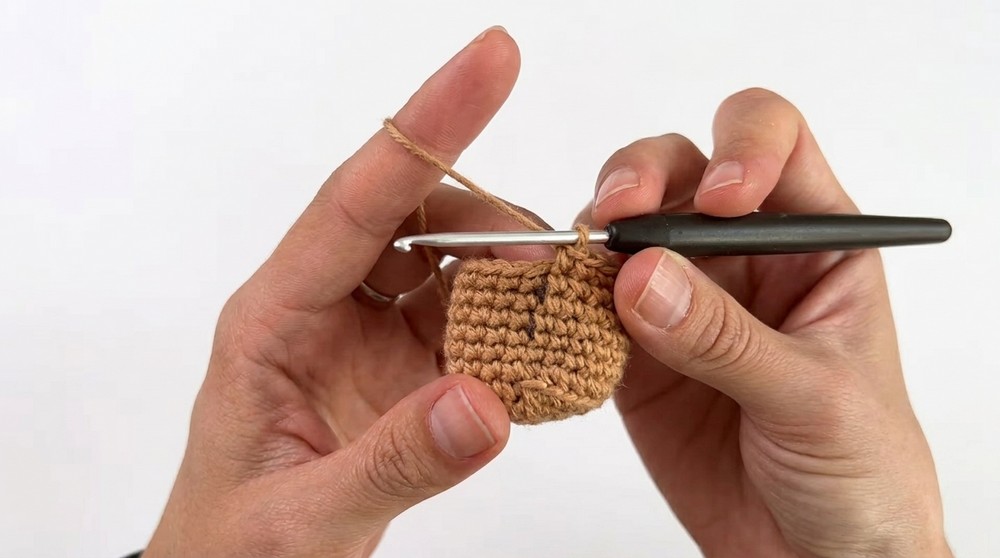
Round 11 (Pot Rim):
- Ch 2, turn work; work into BLO
- 24 dc (dc in each st around)
- (Adds height and pot rim shape)
- After completing, add 1 extra dc if needed to even the edge
- Sl st to first dc to join, ch 1.
Finishing Pot:
- Cut yarn. Hide and trim all excess strands inside the pot.
2. Soil (in Dark Brown or Light Brown)
Round 1:
- mr with 8 sc
Round 2:
- 8 inc (16 sc)
Round 3:
- (1 sc, 1 inc) x 8
- (24 sc)
- Sl st to finish, leave a long tail to sew it into the pot.
- Trim all other ends.
3. Leaves (Make 2) (in Green)
- Knot yarn, ch 6 (6 chains)
- Working back along the chain:
- Skip 1st chain from hook
- 1 sc in next ch
- hdc in next 3 ch (total of 3 hdc)
- In the last ch: 3 sc in same ch (turns the leaf)
- Now continue on the opposite side:
- 3 hdc
- 1 sc in last ch
- Sl st to finish, ch 1
- Cut yarn, secure and weave in the ends.
4. Stem
- Take 16-gauge wire, 7.5 cm long.
- Dab one end with silicone glue.
- Wrap the wire neatly with green elastic/yarn/floral tape to cover the entire stem.
- Finish with a dab of glue to secure, trim excess green elastic.
5. Flowerpot Assembly
- Add a generous amount of silicone glue to the inside of the flowerpot for stability.
- Insert some stuffing over the glue.
- Flatten firmly to create a stable base for your soil and flower.
- Use your yarn needle, insert the tail of the soil through a pot stitch.
- Sew soil to pot: From pot (outside in), sew into the back loop only of soil, connecting each sc from soil to top of the pot.
- Stuff lightly before closing all the way.
- Secure and hide yarn ends.
6. Preparing the Stem in Soil
- Widen the center of soil's magic ring with tweezers or hook.
- Apply silicone glue on one stem end, insert into the soil.
7. Attaching Leaves
- Use glue at the lower end of the stem/top of soil.
- Place leaves symmetrically on either side of the stem.
- Press gently in place and allow to set.

8. Sunflower
Back (Yellow) and Front (Brown): (Make one each)
Round 1:
- mr of 6 sc
Round 2:
- 6 inc (12 sc)
Round 3:
- (1 sc, 1 inc) x 6 (18 sc)
- Sl st to join, ch 1, cut yarn.
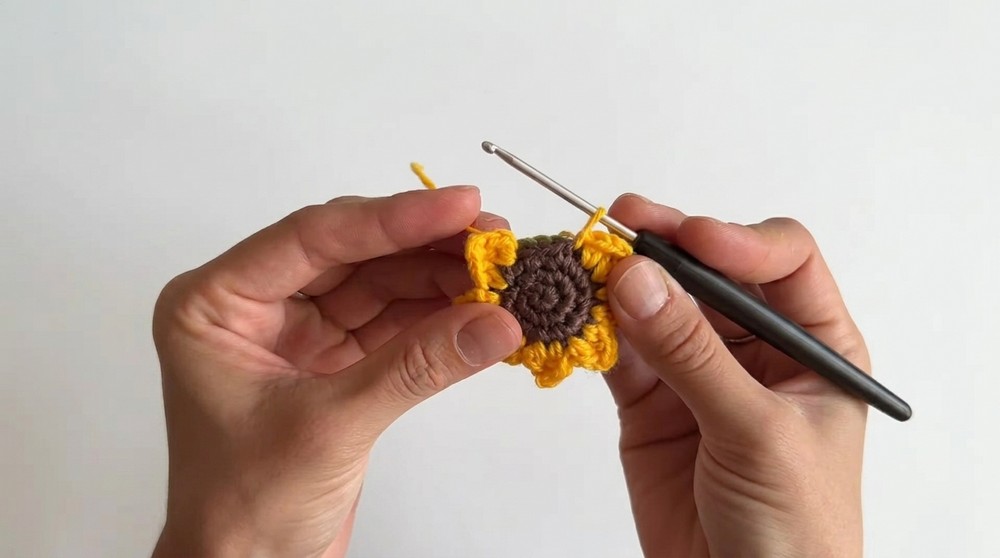
Assembly:
- Align yellow and brown pieces (wrong sides facing).
- Insert hook through both layers, join yellow yarn through both.
- For Each Petal:
- ch 1, hdc in same st, dc in same st
- ch 1, sl st down
- In next st: dc, hdc, ch 1, sl st
- Repeat around for 9 petals in total
- Before last petals, stuff lightly
- Finish with final sl st, ch 1, cut and hide end.
9. Attaching Sunflower
- Enlarge sunflower’s center hole with hook/tweezers.
- Add silicone glue to top of stem.
- Insert and affix sunflower firmly atop the stem.
10. Tulip
- Use tulip pattern instructions provided in the video.
- Stuff lightly, then sew closed as demonstrated.
- Enlarge magic ring in tulip’s base to fit stem.
- Attach to stem as with the sunflower.
Assembly & Finished Size
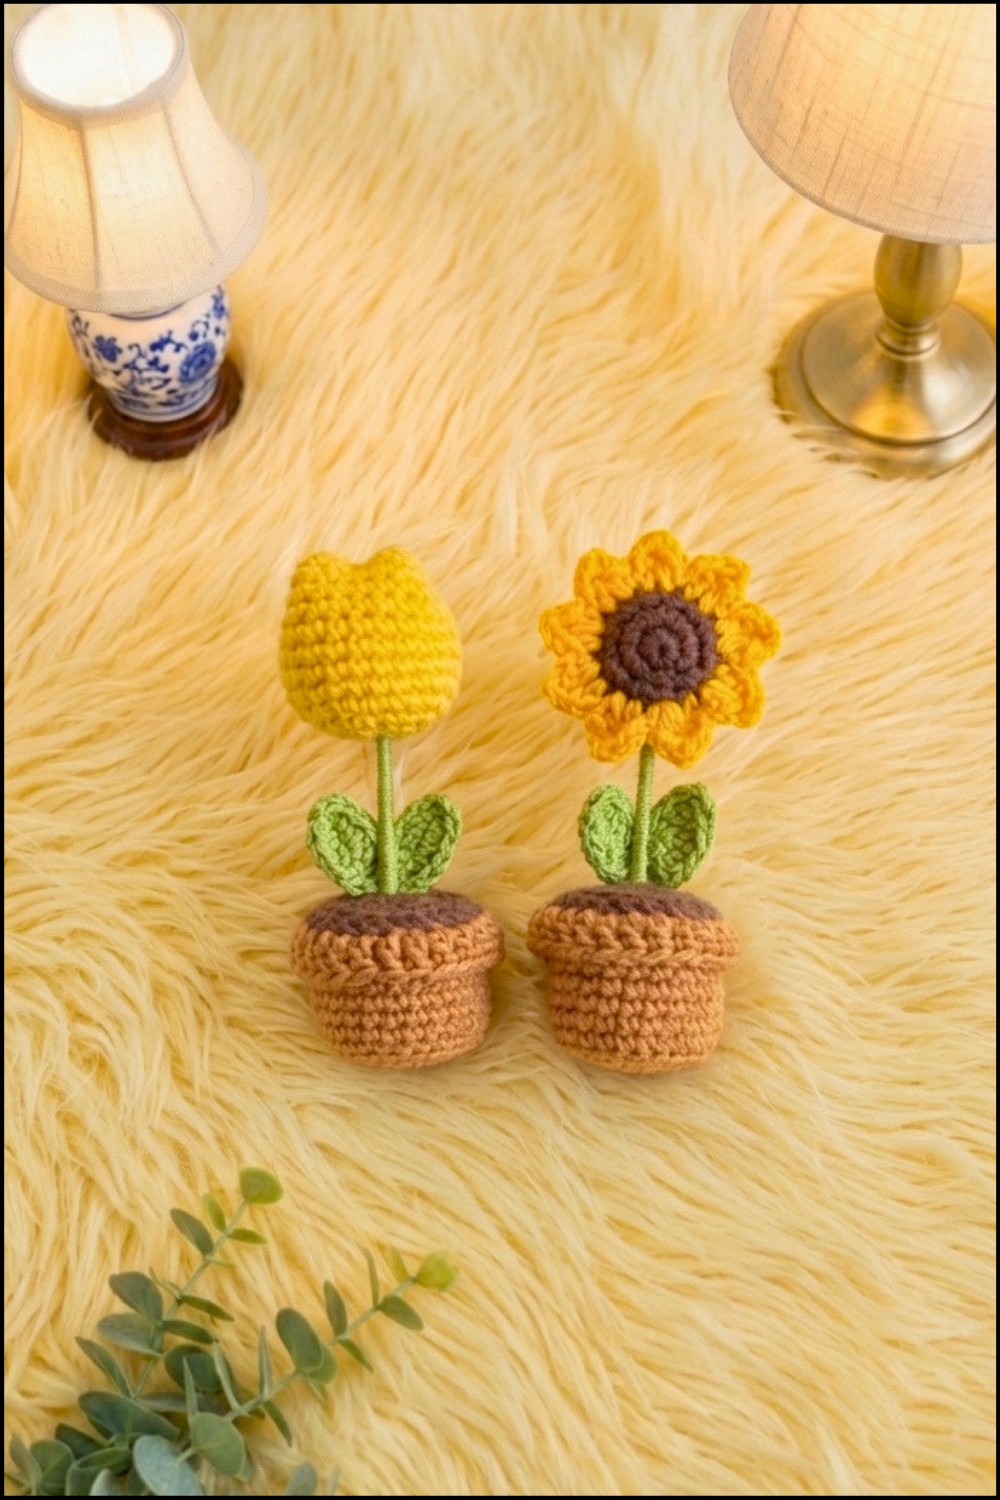
- Each mini flowerpot stands roughly 10.5 cm tall.
- Switch flower types for variety.
- Arrange and glue all pieces firmly; hold for a moment to set.
- Hide all yarn ends for a neat finish.
Conclusion
You have successfully crafted a charming, realistic mini flowerpot complete with soil, leaves, and beautiful flowers—a sunflower and a tulip. These make delightful decorations for your desk, gifts for friends, or additions to your amigurumi garden. Feel free to experiment with colors, stem length, and types of flowers for your personal touch!
Thank you for working along with Crochet Soul Vibes. If you enjoyed this pattern, please subscribe, like, and share your beautiful creation! Happy crocheting!

Leave a Reply