

Make a cozy holiday vibe with a charming Crochet Christmas Wreath that adds warmth and festive cheer to your home décor this season.
On a cold December evening, the room felt warm and cheerful. A colorful Crochet Christmas Wreath hung on the door. It was made from soft yarn shaped to look like pine branches and holiday decorations. This colorful Crochet project made the door look friendly and bright.
Simple Crochet Christmas Wreath Free Pattern for Holiday Decorating
The wreath usually has Christmas colors like green, red, and white. Some also include gold, silver, or light colors to match different decorations. The type of yarn matters. Thick yarn makes the wreath look full and firm. Soft yarn feels nice and gentle when touched.
The crochet wreath is light and easy to hang. You don’t need nails or tools to put it up. It stays in good shape all through the holiday and can be kept safely for the next year. Little decorations like buttons, beads, or small bells add extra charm and sparkle.
This crochet wreath can be used on doors, above fireplaces, or as a table centerpiece. It also works well as a gift or to decorate walls and windows. Besides being pretty, working on a colorful Crochet Christmas Wreath can help you relax during the busy holiday season. It adds color, texture, and a cozy feeling to your holiday decorations, making the home special and warm.
Mini Crochet Christmas Wreath Pattern
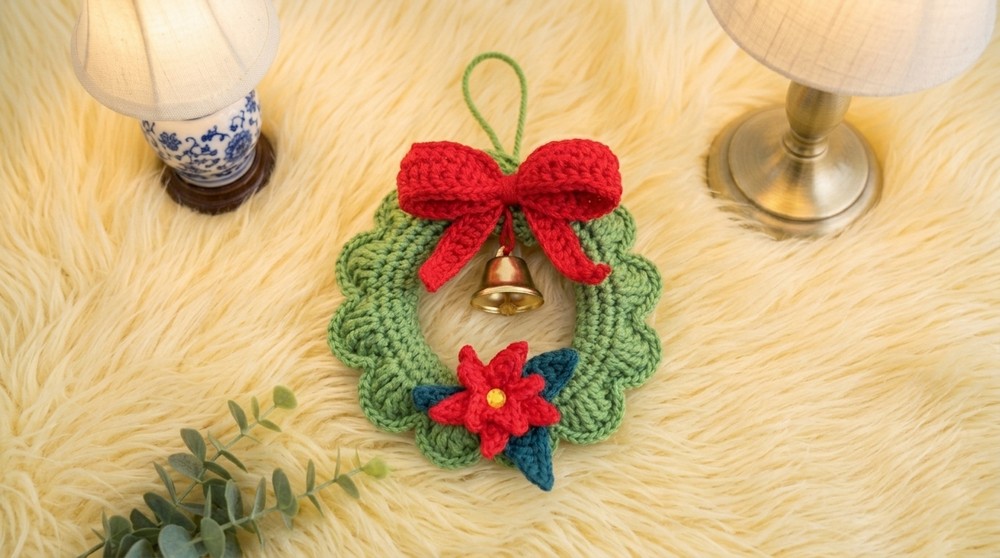
A charming mini crochet Christmas wreath, measuring approximately 11 cm in height. This project combines classic holiday colors and delightful textural details, making it a wonderful festive accent or handmade gift.
Quick Overview Of Pattern
- The wreath is crocheted in the round with increases for shape and depth.
- Two layers are worked and then joined, filled lightly with synthetic fiber.
- Edge ruffles are crafted using various tall stitches for a beautiful, wavy effect.
- The wreath is decorated with a crocheted bow, ribbon loop, a layered flower, crocheted leaves, and a bell.
- Faux diamond stickers are added as embellishments.
Notes
- Use a stitch marker to help identify the beginning of each round.
- The wreath’s assembly involves sewing pieces and attaching decorations.
- Filling is optional, but a moderate amount helps the wreath keep its shape.
- Take care to line up the ruffles and match stitches when joining both layers.
- Blocking and starching optional for crisper edges on flower and leaves.
Skill Level
Advanced Beginner to Intermediate
(Comfortable with working in the round, increases, a range of crochet stitches, and basic finishing techniques)
Materials
- 100% Cotton Yarn, 2 mm thick (or acrylic of same thickness)
- Bottle green, leaf green, red
- Synthetic fiber for stuffing
- #2 metal crochet hook
- Scissors
- Stitch marker or small safety pin
- Blunt tapestry/canevá needle
- Tweezers
- Metal bell (2.5 cm x 2.5 cm, or substitute any small bell)
- Imitation diamond/gem stickers (gold)
- Spray starch and iron (optional, for firming flower/leaves)
- Hot or cold silicone glue (for gem stickers, optional)
Measurements / Sizing
- Finished wreath: Approx. 11 cm high
- Bell: ~2.5 cm x 2.5 cm
Gauge
Gauge is not critical. Work firmly enough that the stuffing will not show through stitches.
Stitch Abbreviations
| Abbreviation | Term |
|---|---|
| ch | chain |
| sl st | slip stitch |
| sc | single crochet |
| hdc | half double crochet |
| dc | double crochet |
| tr | treble (triple) crochet |
| dtr | double treble crochet |
| inc | increase (2 sc in same st) |
| st(s) | stitch(es) |
Special Stitches
- dtr (double treble crochet): Yarn over three times before inserting hook.
- Magic ring: Form a ring with yarn and work stitches into it for a tight center.
- Ruffle group: Sequence of paired tall stitches (as detailed below).
Crochet Pattern
Wreath Base — Layer 1 (Leaf Green)
Foundation:
- Ch 40, straighten, and join into a ring with 1 sl st in first ch.
Round 1:
- Ch 1, sc in each chain around. (40 sc).
- Join with sl st in first sc.
Round 2:
- Ch 1. [1 sc, inc] repeat around.
- (60 sc at the end).
- Mark your first stitch for ease.
Round 3:
- Sl st in marked st. Ch 1, sc in next st (mark it).
- Sc in each st around (no increases; 60 sc).
- Join with sl st in first sc.
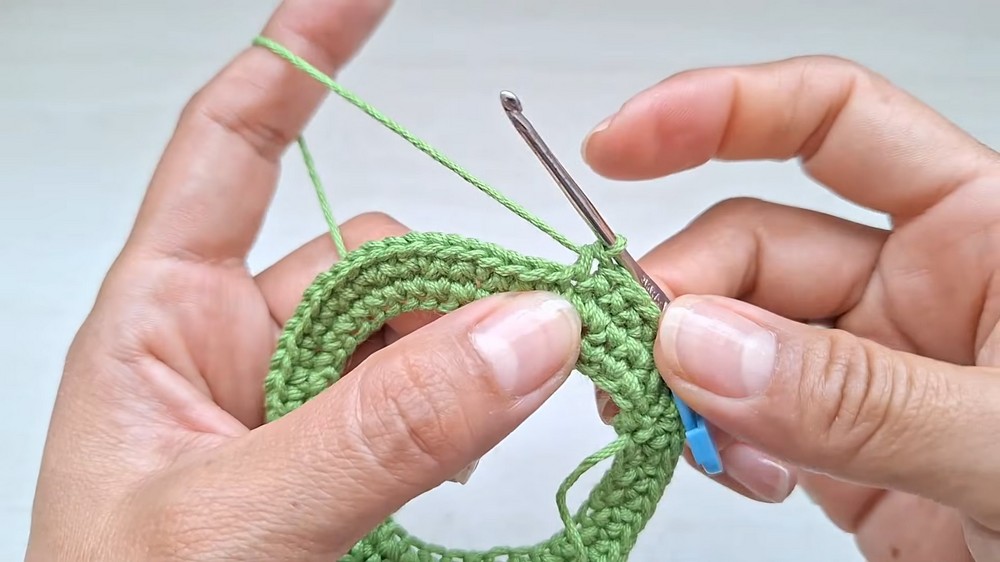
Ruffle Edge (Round 4, Work in Pattern Repeat):
- Ch 1, hdc in next st, dc in same st;
- In next st: dtr, dtr again in same st;
- Next st: dc, hdc in same st;
- Next st: dc;
- Next st: sl st.
- Repeat this entire grouping around (aligning “peaks” between dtr stitches for wave effect).
Finish:
- Sl st in last st, fasten off, leaving yarn tail.
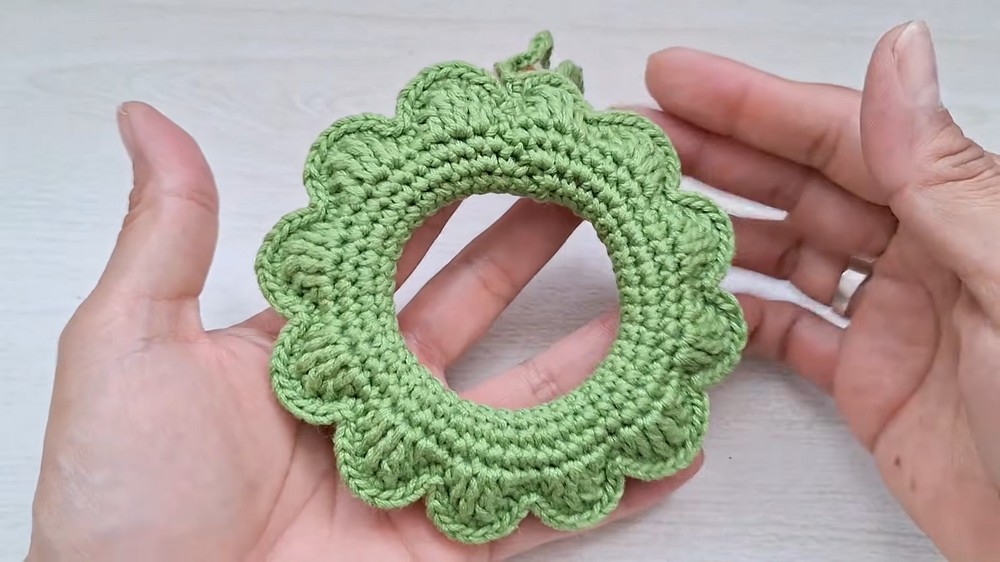
Wreath Base — Layer 2 (Repeat)
Work steps as above through Round 2
(Foundation, 40 ch; Round 1: 40 sc; Round 2: 60 sc)
Round 3:
- Sc in each st around (no increases; 60 sc).
- Join with sl st.
Ruffle Edge (Round 4, same as Layer 1):
- Repeat pattern of: hdc, dc in same st; 2 dtr in next st; dc, hdc in same st; dc in next; sl st in next*.
- Continue until all ruffles complete.
- Do not cut yarn—continue to joining step.
Joining Both Wreath Layers
- Turn both layers “right side out” so the ruffles face forward.
- Place them together, aligning ruffles.
- Working through matching stitches of both layers, join with sc or sl st (see video: start where ruffles peak).
- For peaks: “ripple” areas, use increases (work 2–4 sc in corresponding stitches for fullness), in between, sc in each stitch.
- Stuff lightly with synthetic fiber as you close, ruffle by ruffle.
- Finish round, leave a small opening if needed to add more fiber, then sew shut.
- Fasten off, hide yarn tail in work.
Hanging Cord
- Attach green or red yarn at any point, preferably peak/top center.
- Ch 45 for a hanging loop.
- Join to base with sl st, cut yarn and hide ends inside.
Bow
Foundation:
- Ch 42.
Shaping Sides:
- Into 2nd ch from hook:
- 1 sc, next ch: 1 sc
- Next 2 ch: 1 hdc in each
- Next 13 ch: 1 dc in each (13 dcs)
- Next 2 ch: 1 hdc in each
- Next ch: 1 sc
- Next ch: 1 sl st
- Next ch: 1 sc
- Next 2 ch: 1 hdc in each
- Next 13 ch: 1 dc in each
- Next 2 ch: 1 hdc in each
- Next ch: 1 sc
- Next ch (last): 1 sl st
Repeat on Other Side:
Ch 1, turn, mirror the stitch sequence on the other side of the foundation chain (see transcription: repeat sequence for symmetrical bow).
Finish:
- Pull yarn through, arrange in bow shape.
- With long tail, wrap center several times; tie off and leave extra for sewing to wreath.
Bow Loops
- Ch 26.
- In 2nd ch from hook: 1 sl st
- Next 2 ch: 1 sc each
- Next 2 ch: 1 hdc each
- Next 5 ch: 1 dc each
- Next ch: 1 hdc
- Next ch: 1 sc
- Next ch: 1 sl st
- Repeat for other side to mirror.
- Fasten off, leave tail for sewing to center of bow.
Crochet Flower (Red)
Base Petals:
- Make a magic ring.
- Ch 5.
- In 2nd ch from hook: 1 sl st
- Next ch: 1 sc
- Next ch: 1 hdc
- Next ch: 1 dc
- Join to ring with 1 sl st.
- Repeat for total 5 petals.
(Total: Ch 5, sl st, sc, hdc, dc, sl st in ring, 5x)
Upper Petals:
- Locate the five spaces between base petals.
- At each, ch 3, in 2nd ch from hook: 1 sl st, next ch: 1 sc, sl st to next point between base petals.
- Repeat for each space for 5 small petals.
Finish:
- Pull magic ring tight, weave in tail. Leave long tail for sewing.
Leaves
- Magic ring, ch 6 (count as 7 incl. anchor ch).
- In 2nd ch from hook: 1 sl st
- Next ch: 1 sc
- Next ch: 1 hdc
- Next ch: 1 dc
- Next 2 ch: 1 dtr in each
- Sl st into magic ring.
- Repeat for second leaf on same ring: ch 7, repeat sequence.
- Pull ring closed, weave in one tail, leave other long tail for sewing.

Assembly & Finished Size
- Firm Edges (Optional):
- Spray flower and leaves with starch and iron if stronger, crisper pieces are desired (iron gently if using cotton!).
- Sew Leaves:
- Sew overlapping leaves to the bottom (or a preferred area) of the wreath.
- Sew Flower:
- Sew flower just above or over leaves securely.
- Assemble Bow:
- Gather and sew bow in place at “top” of wreath, above flower/leaves and near hanging loop.
- Sew Bow Loops:
- Place at bow center or sides, as desired.
- Attach Bell:
- Thread red yarn through bell, pull up through bottom center of wreath, knot on top, adjust length for how low you want bell to hang, and weave in loose ends.
- Add Gem Stickers:
- Use glue if needed for added strength. Place as desired.
Finished size: Approx. 11 cm high including loop and bell.

Conclusion
Your mini crochet Christmas wreath is now finished! With rich texture, festive colors, and delightful details like the bow and flower, it’s a project that combines multiple skills for a rewarding and decorative result. Hang it on your door, tree, wall, or gift it to someone special to bring a little prosperity and handmade happiness this holiday season.



Leave a Reply