

Crochet a cute and colorful fish amigurumi with this free pattern complete with simple steps seamless fins and perfect for adding a splash of fun.
Crocheting small and delightful amigurumi pieces is always a rewarding way to enhance your craft collection. Recently, I enjoyed making a charming fish, a cute and colorful project that fits perfectly into an oceanic theme. This Free Crochet Fish Amigurumi Pattern offers a fun and engaging way to create a lovely sea creature figure, ideal for collecting, gifting, or decorating. It’s part of a series of keychain designs, making it a compact and portable piece for enthusiasts of all ages.
Crochet Fish Amigurumi – Free Pattern for Keychain Lovers
The fish boasts a vibrant and playful aesthetic, combining two main colors with smoothly interspersed stripes that give it a cheerful, lively appearance. Its shape is compact and rounded, with a well-defined belly and prominent fins crocheted with careful color transitions. The texture results from consistent use of half double crochet stitches, which provide a sturdy yet soft fabric appropriate for amigurumi.
Adorable Handmade Crochet Fish Amigurumi Pattern

The project includes creative techniques such as starting with a magic ring, precise stitch increases and decreases to shape the body, and skillful finishing details like attaching 5mm safety eyes, which bring the fish to life. The fins are integrated seamlessly as part of the work, with no sewing required, which simplifies assembly and maintains a polished look. Additionally, the project involves creating color changes and finished trims that enhance its decorative appeal. Ideal for intermediate crocheters, this pattern introduces a nice balance of challenge and accessibility.
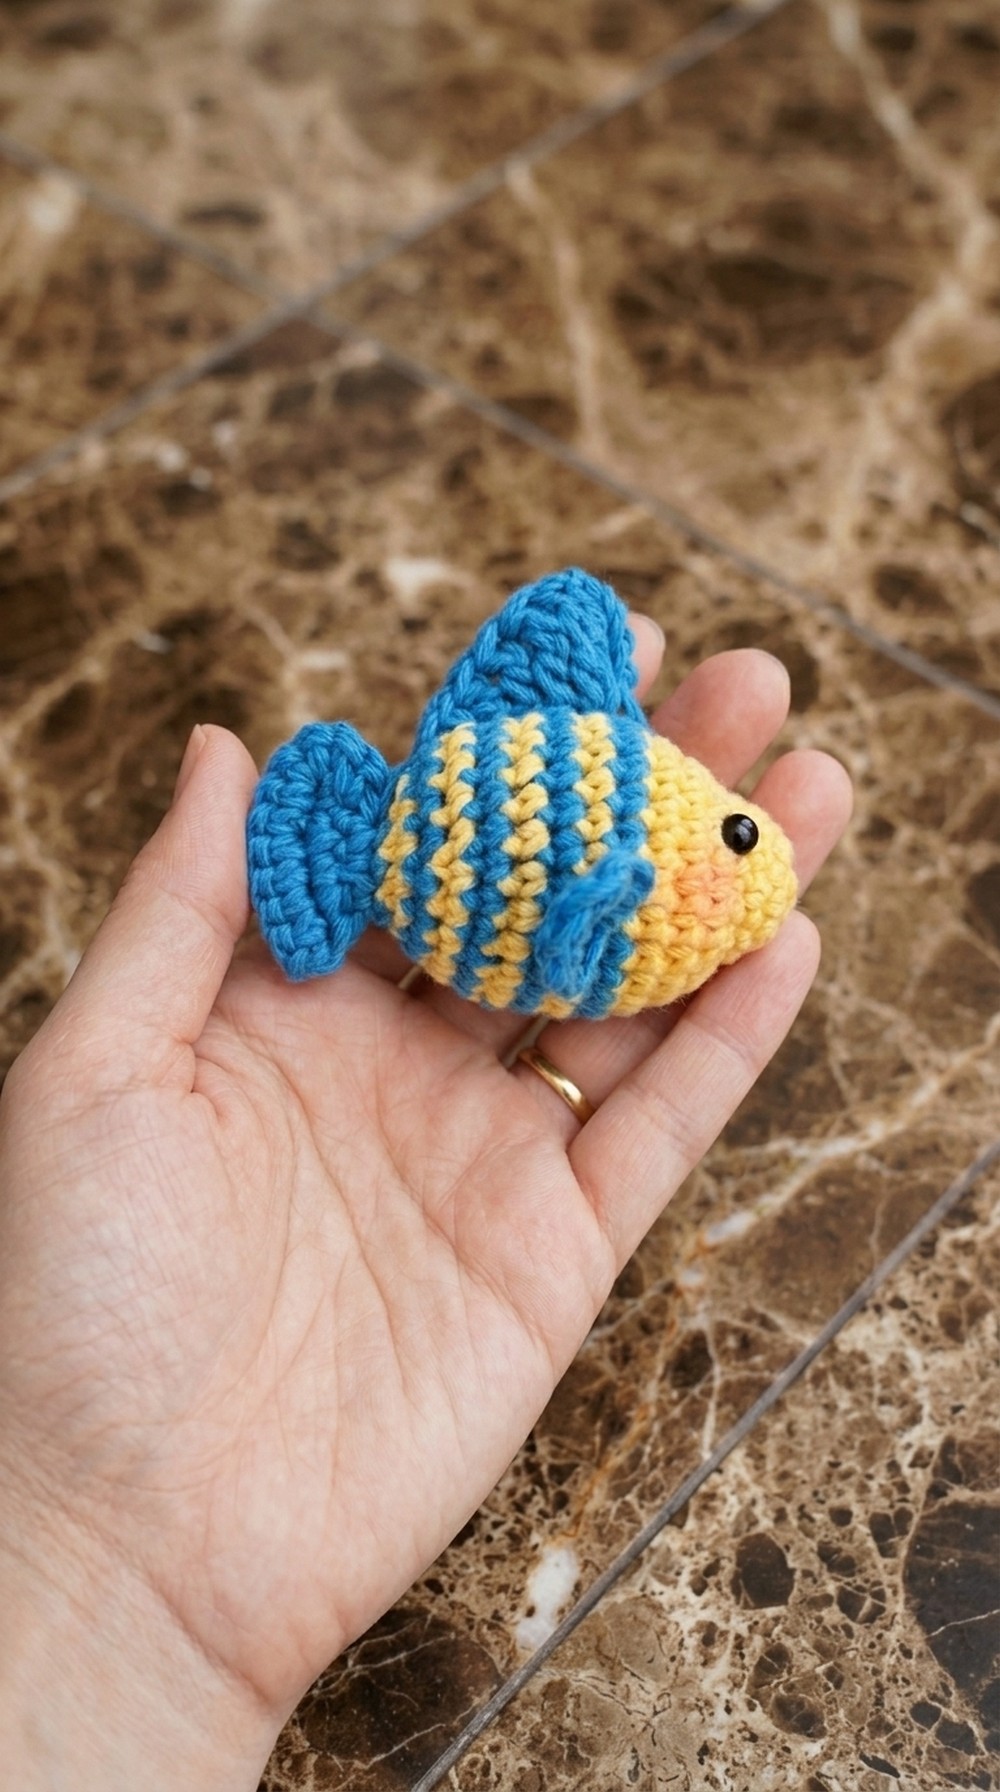
This crochet fish amigurumi is perfect as a unique handmade gift, a charming keychain, or a decorative accent for children’s rooms and ocean-themed settings. Its durable construction and delightful form make it a lovable collectible or a fun wearable accessory when attached to bags or backpacks. If you’re eager to expand your amigurumi skills while creating something colorful and playful, this free crochet fish pattern is an excellent choice that will inspire and satisfy your crocheting passion.

No-Sew Amigurumi Fish Keychain Pattern
Before You Start
- Have all materials and color choices ready before starting.
- This is a seamless, no-sew pattern — only one tail needs weaving in.
- Use stitch markers or scraps of yarn for marking important stitches.
- Familiarize yourself with color-change and basic amigurumi shaping.
- Pattern uses US crochet terms.
Pattern Notes
- The fish is worked in continuous rounds from nose to tail.
- Fins and details are crocheted as you work—no separate sewing required.
- Color changes form the stripes on the body and the belly.
- Markers are helpful for correctly placing fins and color-changes.
- Use invisible decrease for best shape.
- Eyes are placed while body is open for easier access.
How I Made the Crochet Pattern?
- Started with a magic ring and increased to form the head.
- Alternated increase and even rounds for rounded fish body.
- Integrated fins during body rounds with chains and stitches.
- Used color changes for a striped and belly effect.
- Flattened and shaped end for tail including fringe and a fin.
- Added dorsal fringe, embroidered (or painted) optional cheeks.
- Only weaving in the starting/ending tails required.
Skill Level
Advanced Beginner – Intermediate
Requires confidence with magic ring, increases, color changes, integrating shapes while working, and basic finishing.
Finished Size
Approx. 6–7 cm long (excluding ring), 3–4 cm tall
(Fits in your palm, perfect keychain size.)
Materials
- 2–3 colors of cotton yarn (sample: yellow and blue)
- 2 mm or 3 mm crochet hook
- Small amount of fiberfill (stuffing)
- 5 mm safety eyes (quantity: 2)
- Stitch markers or scrap yarn
- Tapestry needle for weaving in end
- Key ring or lanyard
- Lighter (optional, for securing eyes if no washer)
- (Optional) Blush, paint, or embroidery thread for cheeks
Measurements / Sizing
- Body length: ~6–7 cm
- Height (with fins): ~3–4 cm
Gauge
- Gauge is not critical for amigurumi.
- For reference: 5 rounds of sc in spiral ≈ 2 cm diameter (tight tension).
Stitch Abbreviations
- MR: Magic Ring
- ch: Chain
- sc: Single Crochet
- inc: Increase (2 sc in same stitch)
- dec: Decrease (sc 2 together, invisible)
- sl st: Slip Stitch
- st(s): Stitch(es)
Special Stitches
Invisible Decrease:
Insert hook in front loops of next two stitches, yarn over, pull through two loops, yarn over, pull through both loops.
Integrated Fin:
At marked st, ch 3, work 4 dc into same or next st, ch 3, join with sl st to origin st.
The Pattern
Fish Head
Round 1:
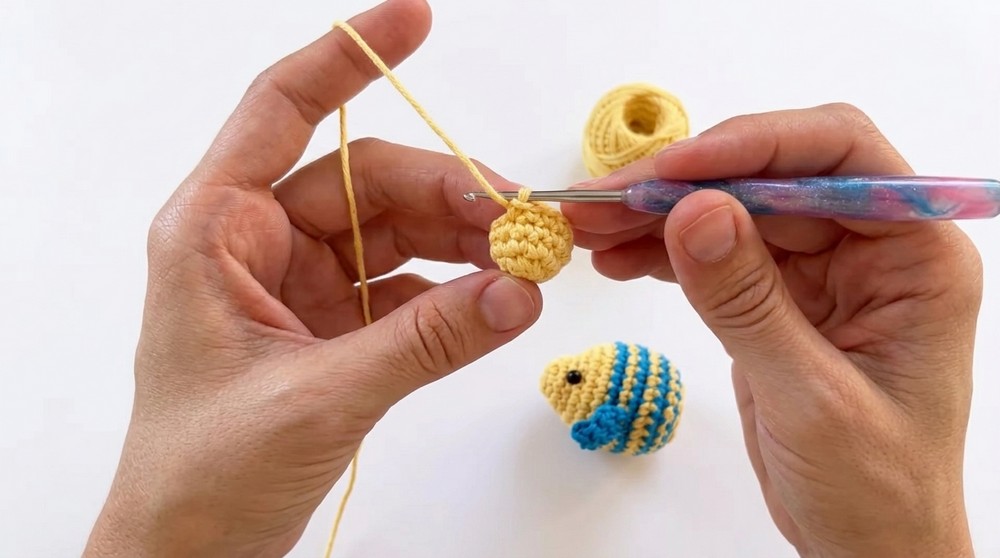
- With Color A (yellow), MR, 6 sc in ring (6)
Round 2:
- 6 inc (2 sc in each st) (12)
Rounds 3-4:
- sc in each st around (12 per round)
At this point, you have shaped a small dome for the fish's head.
Body and Stripes
Round 5:
- 12 inc (2 sc in each st) (24)
Rounds 6–7:
- sc in each st (24 per round)

Color Change:
On last stitch of Round 7, begin new color (blue). Pull new color through to close 24th sc; leave tail of last color inside.
Body and Fins Integration
Round 8 (first fin placement):
- With blue, sc 5
- At 6th st, fin: ch 3, 4 dc in same st, ch 3, sl st in same st
- sc 14
- At next st, repeat fin process
- sc 5 (24 total)
- Mark the stitch before and after each fin with a scrap of yarn for next round.

This round creates two symmetrical side fins. The markers help you navigate around fins in the following rounds.
Color Change:
On last sc, switch back to yellow.
Round 9:
- With yellow, sc in each st around (24).
- When you come to marker, remove and continue working as normal. Fins are simply skipped as you continue—the markers only help avoid confusion.
(Optional: Insert eyes here for easier placement—see below.)
Color Change:
At end of round, switch back to blue.
Round 10:
- sc in each st around (24)
- Switch back to yellow for next round.
Round 11:
- sc in each st (24)
Round 12:
- sc in each st (24)
Body Tapering (Tail End)
Round 13:
- (dec, sc 4) x4 (20)
Round 14:
- (dec, sc 3) x4 (16)
Round 15:
- (dec, sc 2) x4 (12)
- Stuff firmly but not overstuffed.
Tail Closure and Construction
Round 16:
- 6 dec (6)
- Fasten off with a tail for finishing.
- Flatten opening; join both sides with 5 sc to close flat for tail base.
Tail Fin:
- Ch 1, turn;
- sc in 1st st, inc in next, sc in next, inc in next, sc in last (7)
- Ch 1, turn; sc in each st (7)
Dorsal Fringe (top “hair” / mohawk)
- Work sl sts along top "belly" color-change seam, from tail to head.
- Ch 4, turn; in each of next 6–8 sts, sl st, ch 4, turn (creates small loops or spikes).
- Fasten off, weave in.
If desired, you may embroider or paint cheeks now.
Eyes Placement
- Place safety eyes between Rounds 4 and 5 above midline, 2–4 sts apart in front-center.
- If no washers, melt the stem base with a lighter and flatten to secure.

Assembly & Finishing
- Weave in both ends (start of head and end of dorsal).
- Hide remaining tails inside the body.
- Attach a key ring through a dorsal fringe loop or through part of the tail for keychain use.
- Paint/accent cheeks (optional).
Solution of Problems
Fish body not round or stripes not neat:
Maintain tight tension and use invisible joins for color-change. Always change color when completing the last yarn-over of the last st of old color.
Fins or tail lose shape:
Block gently with steam or shape by hand. Fins and tail stiffen naturally with tight cotton yarn; stiffen with diluted glue if needed.
What You Can Make Using These Stitches
- Small fish plushies for toys or gifts
- Amigurumi animals (base form for birds, axolotls, etc.)
- Flat or three-dimensional fish appliqué
- Desk mascots and bag charms
- Ocean/themed mobiles or garlands
This adorable fish keychain is the perfect no-sew amigurumi project! Have fun experimenting with color combinations, adding extra embroidery or blushing, or making a family of fish in different sizes. This is a fantastic beginner-intermediate project to practice integrated shapes and color changes with a polished, seamless look.
Leave a Reply