

Cheer up Halloween decor with this Free Crochet Chick Halloween Pattern while tiny chick details and playful touches bring warmth to spooky spaces.
A tiny yellow chick dressed for Halloween can bring a fun twist to seasonal crochet. Its cute bird shape mixed with spooky little details makes it a cheerful decoration rather than a scary one. The Free Crochet Chick Halloween Pattern is a sweet project for anyone who likes playful amigurumi and holiday project.
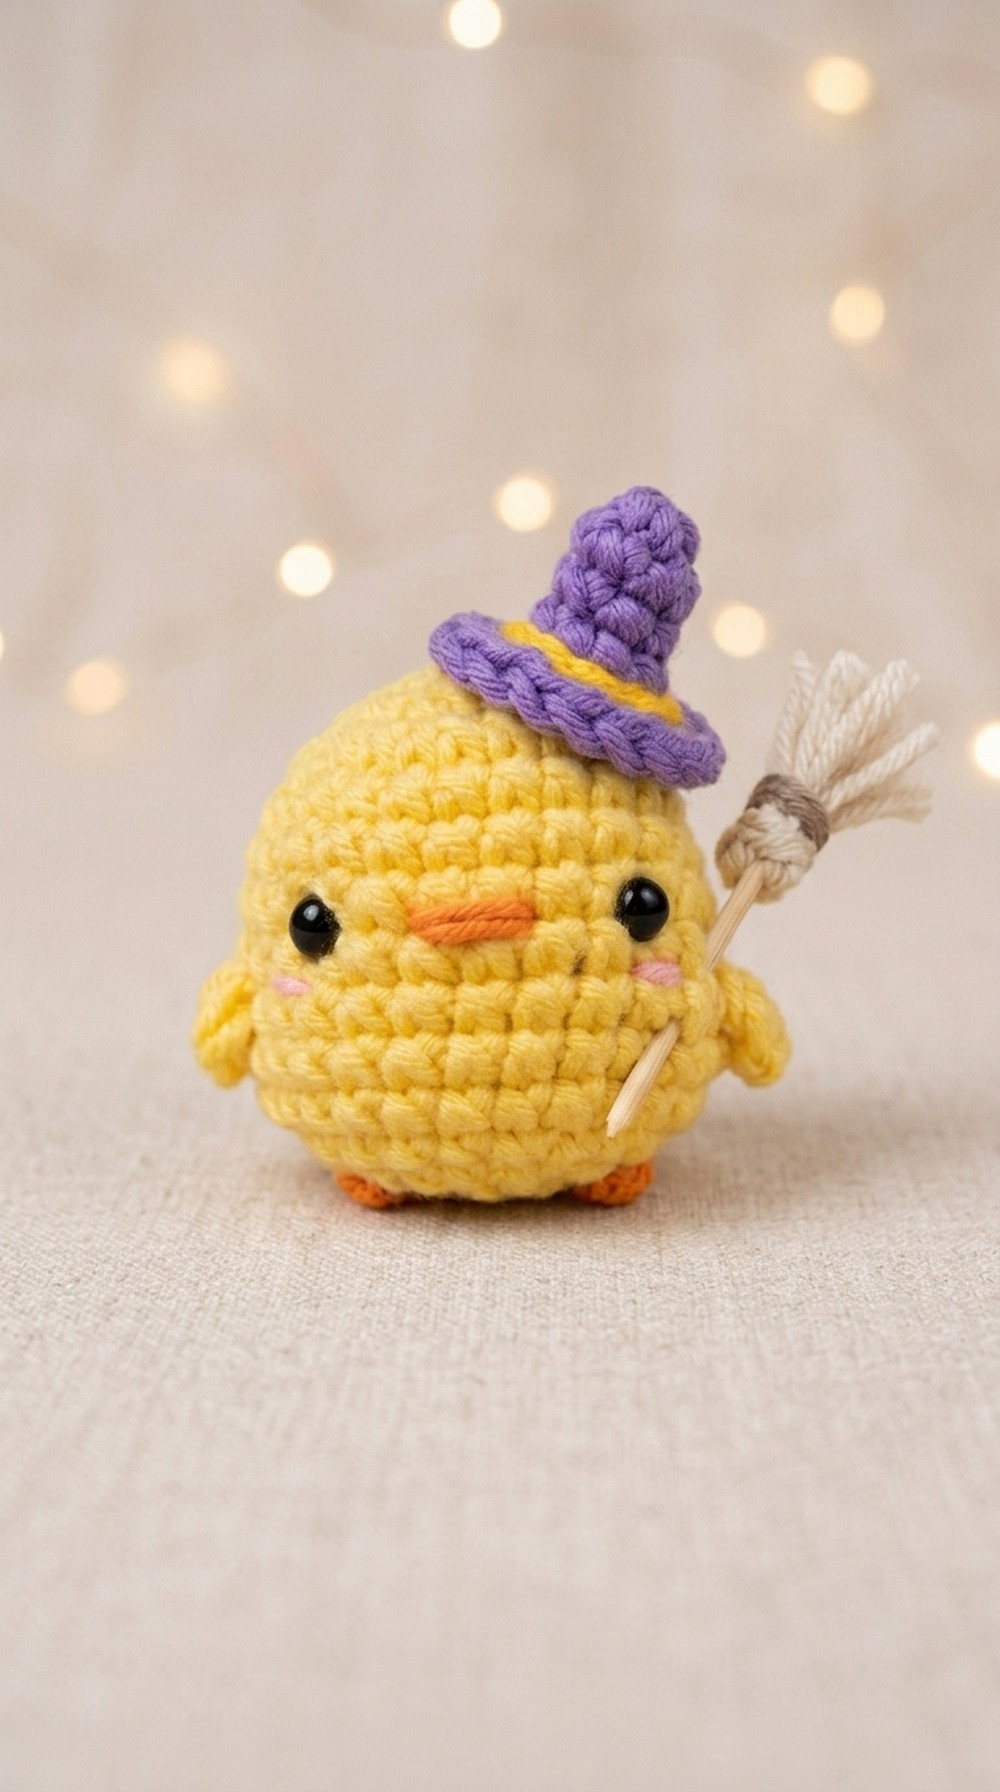
The chick has a round body that gives it a soft and plump look. Small wings, little feet, and a tiny beak help create its bird-like shape. Its smooth crochet surface adds a warm handmade feel, while Halloween touches give the character more personality. A small witch hat, pumpkin, ghost detail, or dark-colored accessory can make the yellow body stand out.
Free Crochet Pattern: Chick Halloween for Seasonal Decor
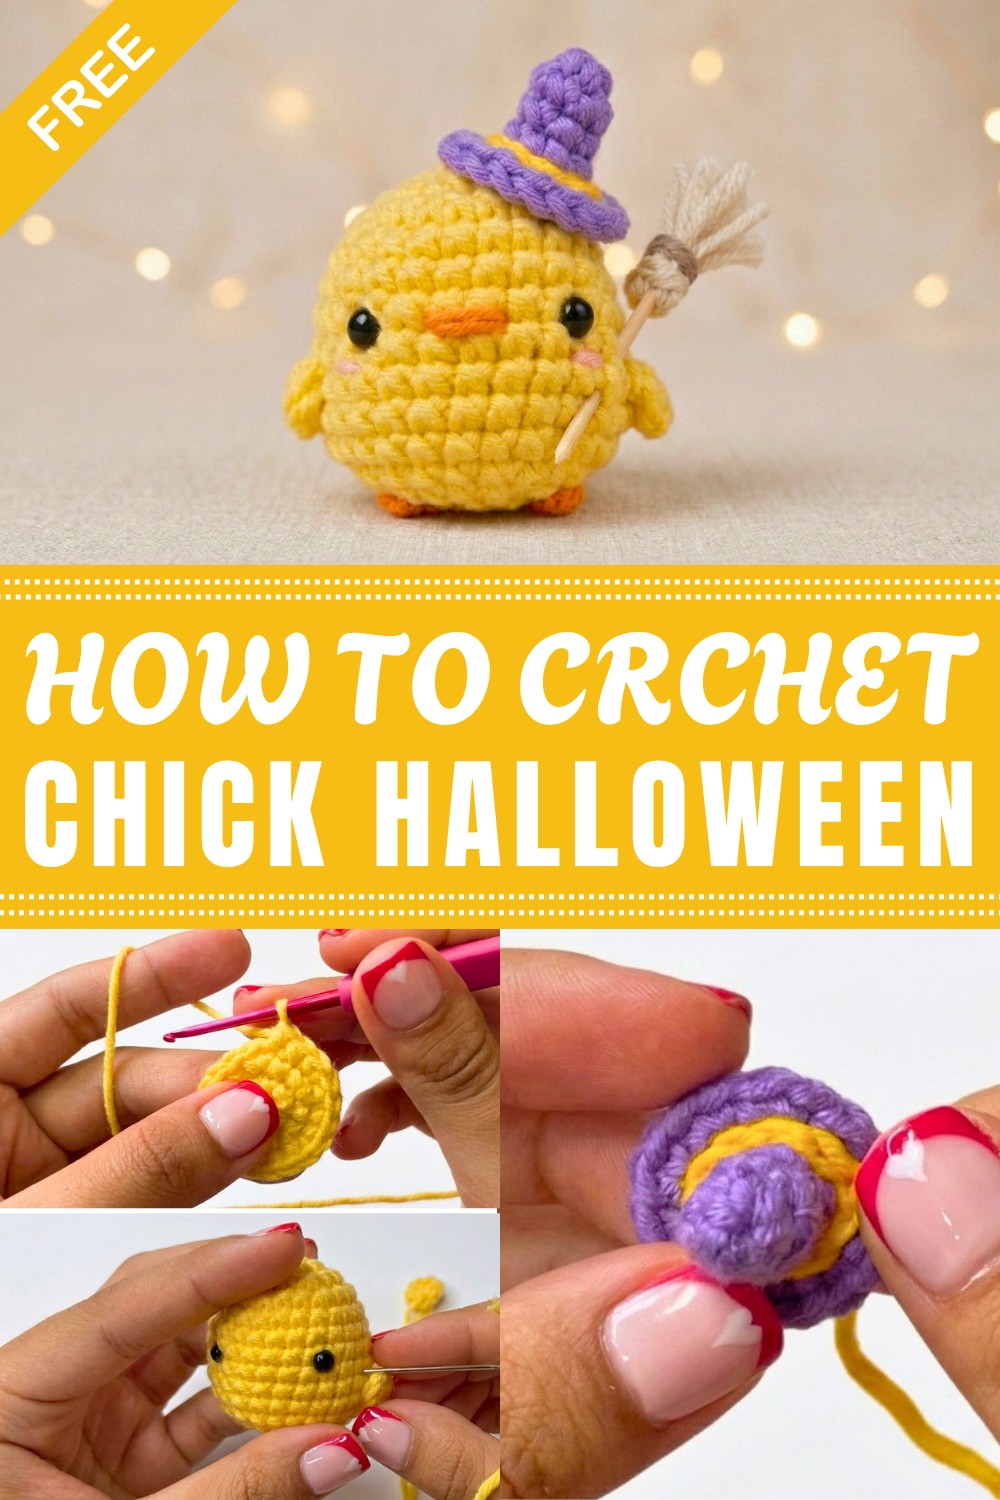
This little bird can find a place in many parts of your Halloween setup. Keep it beside a pumpkin, place it on a shelf, or let it sit on a desk during the spooky season. It can also decorate a party table or become a cute addition to a child's room. A smaller version could hang from a bag or key ring, giving the project another useful purpose.
Colors can change the mood of the chick quite a lot. Bright yellow keeps the bird cheerful, while black, orange, purple, and green can bring stronger Halloween colors into the design. You can also change the hat or add a tiny bow, cape, or pumpkin to give the character a look of its own.
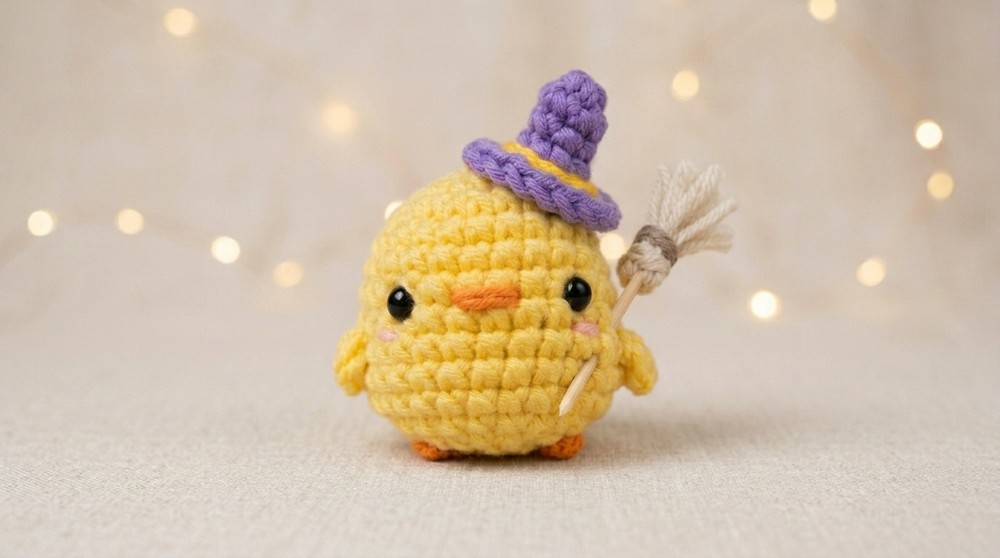
Crocheters who enjoy small character projects can have fun watching this bird come together. Beginners can practice making simple rounded shapes and small parts, while more experienced makers can experiment with colors and seasonal details. The project can also be a nice way to use small amounts of yarn left from other work.
Once finished, the chick can become a cute Halloween keepsake. Give it to a child, place it in a gift basket, or keep it with your holiday decorations for another year. Its cheerful face and spooky touches make it a fun handmade piece that adds personality to any Halloween display.
Amigurumi Witch Chick Crochet Pattern
This pattern guides you through the meticulous creation of a charming amigurumi witch chick, a perfect craft project for Halloween festivities or as a delightful handmade gift. Utilizing simple crochet techniques alongside color changes and embroidery, you will bring this whimsical character to life, complete with a quaint witch hat and a cute broom. With detailed, round-by-round instructions and assembly tips, this pattern is designed to help crocheters achieve a polished, professional finish.
Quick Overview of Pattern
The project breaks down into six key components: the chick body, wings, embroidered facial details, the witch hat, the broom accessory, and the final assembly. Each part is built using single crochet and half-double crochet stitches, employing increases and decreases to shape the figure. Safety eyes are inserted for a secure, expressive look, while subtle embroidery adds facial personality. The broom includes crafting from yarn and a toothpick, adding a multi-material dimension to the piece.
Notes
- Keep tension consistent and tight to prevent stuffing from showing.
- Use stitch markers to track rounds if needed.
- Insert safety eyes securely between designated rounds to avoid shifting.
- Yarn colors can be substituted to personalize your chick.
- When attaching parts, choose secure methods (sewing or fabric glue) to ensure durability.
- For acrylic yarn, singe excess fuzz carefully with a lighter if desired, working in a well-ventilated area.
- Stuff firmly but evenly to give the chick proper shape without distortion.
Skill Level
Beginner to Intermediate—basic familiarity with:
- Magic ring technique
- Single crochet (sc)
- Half-double crochet (hdc)
- Increases (2 sc in 1 stitch) and decreases (sc2tog)
- Simple embroidery stitches
- Safety eye insertion
- Basic assembly of amigurumi parts
Materials
- Hook size 2.20mm
- Purple yarn for hat
- Light yellow yarn for chick body
- Beige yarn for broom bristles
- Dark yellow yarn for hat detail
- Light brown yarn for broom handle detail
- 5 mm safety eyes (2)
- Toothpick (for broom handle)
- Scissors
- Yarn and sewing needles
- Polyester fiberfill stuffing
Measurements / Sizing
- Approximate finished size: 12–15 cm tall, depending on yarn thickness and stuffing firmness
Gauge and Stitch Pattern
- Gauge is flexible; focus on dense, firm single crochet stitches for durability.
- Main stitches used: single crochet (sc), half-double crochet (hdc), slip stitch (sl st) for edges and decoration.
Stitch Abbreviations
| Abbreviation | Stitch Description |
|---|---|
| ch | Chain |
| sc | Single crochet |
| hdc | Half-double crochet |
| sl st | Slip stitch |
| inc | Increase: 2 sc in same stitch |
| dec | Decrease: crochet two stitches together |
Special Stitches
- Magic ring: Adjustable loop to begin amigurumi rounds tightly.
- Safety eyes: Inserted firmly post-round 7 to hold securely between stitches.
- Decorative slip stitch edging: Used for hat detail in contrasting yarn color.
The Crochet Pattern!
1. Chick Body
Round 1:
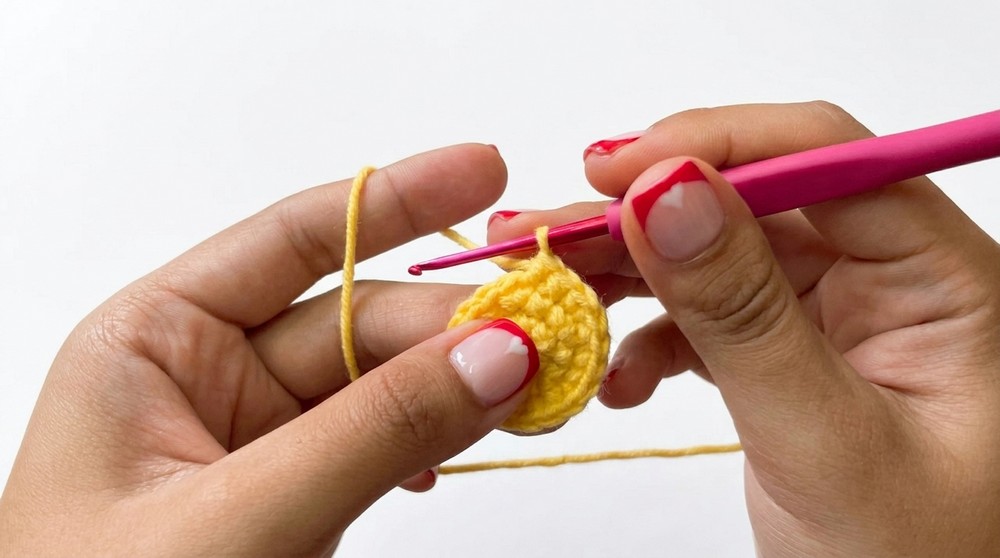
- Begin with a magic ring.
- Work 6 sc into the ring. (6 sts)
Round 2:
- Work 6 increases (inc) evenly around the round by making 2 sc in each stitch. (12 sts)
Round 3:
- [1 sc, 1 inc] repeat 6 times. (18 sts)
Round 4:
- [2 sc, 1 inc] repeat 6 times. (24 sts)
Rounds 5 to 11:
- Work even in 24 sc for 7 rounds, maintaining stitch count.
Eyes Placement:
- Insert 5 mm safety eyes between Rounds 7 and 8, spaced 6 stitches apart.
Round 12:
- [2 sc, 1 dec] repeat 6 times. (18 sts)
Round 13:
- [1 sc, 1 dec] repeat 6 times. (12 sts)
Filling:
- Add polyester fiberfill stuffing to the body, filling firmly but evenly.
Round 14:
- Work 6 decreases (dec) evenly around, closing the body. (6 sts)
Finish:
- Cut yarn, leaving a long tail. Pull yarn through the front loops, cinching closed tightly. Secure and hide the yarn tail within the body.
2. Wings
Pattern:
- Start with a magic ring.
- Chain 1.
- Work 3 half-double crochets (hdc) into the ring.
- Chain 1.
- Finish with a slip stitch (sl st) to the base to form a simple wing shape.
Assembly:
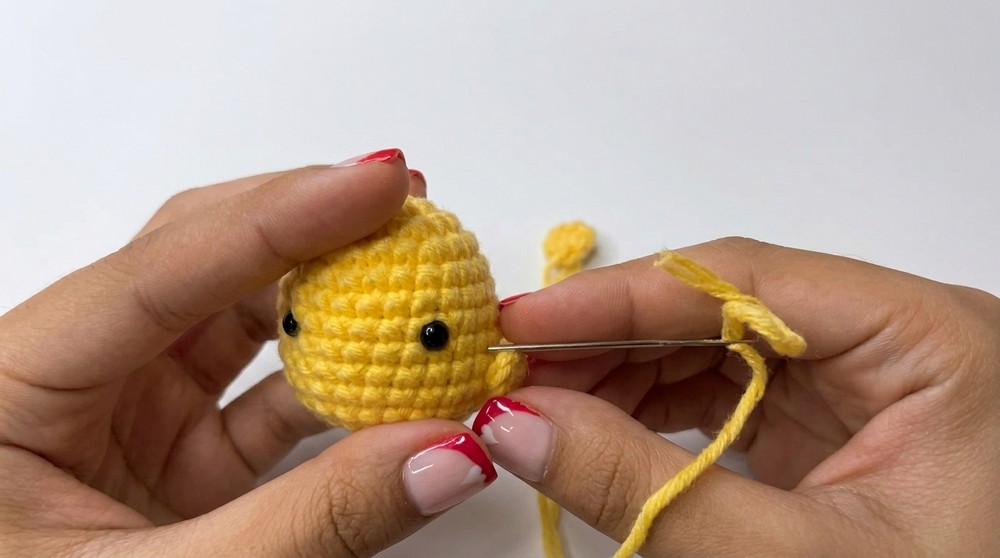
- Sew the wings onto the chick body between Rounds 8 and 9 on each side for balanced placement.
3. Face Details
Beak Embroidery:
- Using orange embroidery thread, embroider a small triangular beak composed of 3 stitches evenly placed centered between the eyes.
Cheeks Embroidery:
- Using light pink embroidery thread, add subtle horizontal stitches beneath each eye for delicate cheek details.
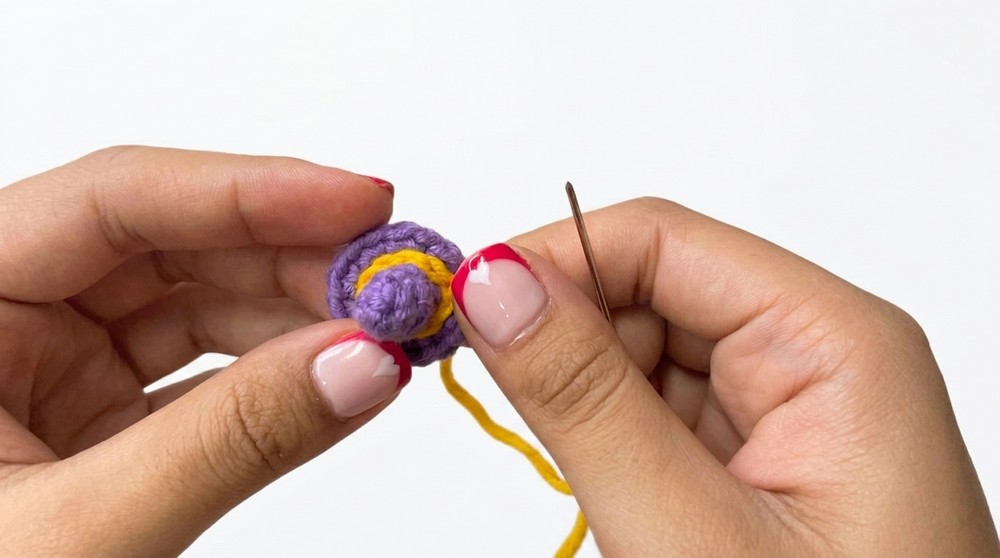
4. Witch Hat
Round 1:
- Begin with a magic ring, work 6 sc into ring.
Rounds 2 and 3:
- Work 6 sc per round to build cylindrical shape.
Round 4:
- [1 sc, 1 inc] repeat 3 times. (9 sts)
Round 5:
- Work 9 increases (inc) in the front loops only to flare the brim.
Finishing:
- Work slip stitches to tidy and fasten off.
- Using dark yellow yarn, add a decorative slip stitch line around Round 4 for hat detail.
5. Broom
Handle:
- Use a toothpick as the broomstick handle.
Bristles:
- Wrap beige yarn 6 times around your fingers to form a bundle.
- Cut and secure this bundle along one end of the toothpick using either strong glue or tightly wound thread.
Detail:
- Wrap light brown yarn/thread several times around the bristles close to the toothpick to bind securely and add a colored highlight.
6. Final Assembly
- Attach the witch hat to the side of the chick's head by sewing or gluing firmly, ensuring it sits at a playful angle.
- Insert the broom carefully into the chick’s side, attaching it securely by sewing or glue.
- (Optional) For 100% acrylic yarn, carefully singe any excess fuzz with a lighter in a safe and well-ventilated space to clean the look.
Assembly & Finished Size
The completed witch chick measures approximately 12 to 15 cm in height. The robust amigurumi stitches and firmly anchored safety eyes provide structural integrity and longevity. The broom and hat add thematic charm and texture variation, enhancing the witchy aesthetic. The embroidered beak and cheeks provide a personalized touch that brings the character vividly to life.
Conclusion
This whimsical witch chick amigurumi pattern blends simple crochet stitches with imaginative detailing and creative assembly. Even beginners can successfully complete the figure by following clearly delineated rounds and careful shaping through increases and decreases. The plush body, embroidered facial features, and signature accessories culminate in a unique, delightful Halloween décor or gift piece. Through attentive stitching and finishing, you will craft a playful and endearing companion to brighten your festive celebrations.
Leave a Reply