

Stitch whimsical childhood memories into your projects while the crochet Winnie the Pooh free pattern brightens every handmade moment with delight.
There’s something magical about bringing storybook characters to life with yarn, and few are as beloved as Winnie the Pooh. Creating a crocheted version of this adorable bear not only connects you to a world of childhood memories but also fills your space with a touch of whimsy and warmth. The Crochet Winnie the Pooh Free Pattern offers a delightful way to make a soft, endearing friend who's perfect for cuddling or displaying, turning simple yarn into a cherished keepsake.
Fun Crochet Winnie the Pooh Free Pattern That Fans Will Adore
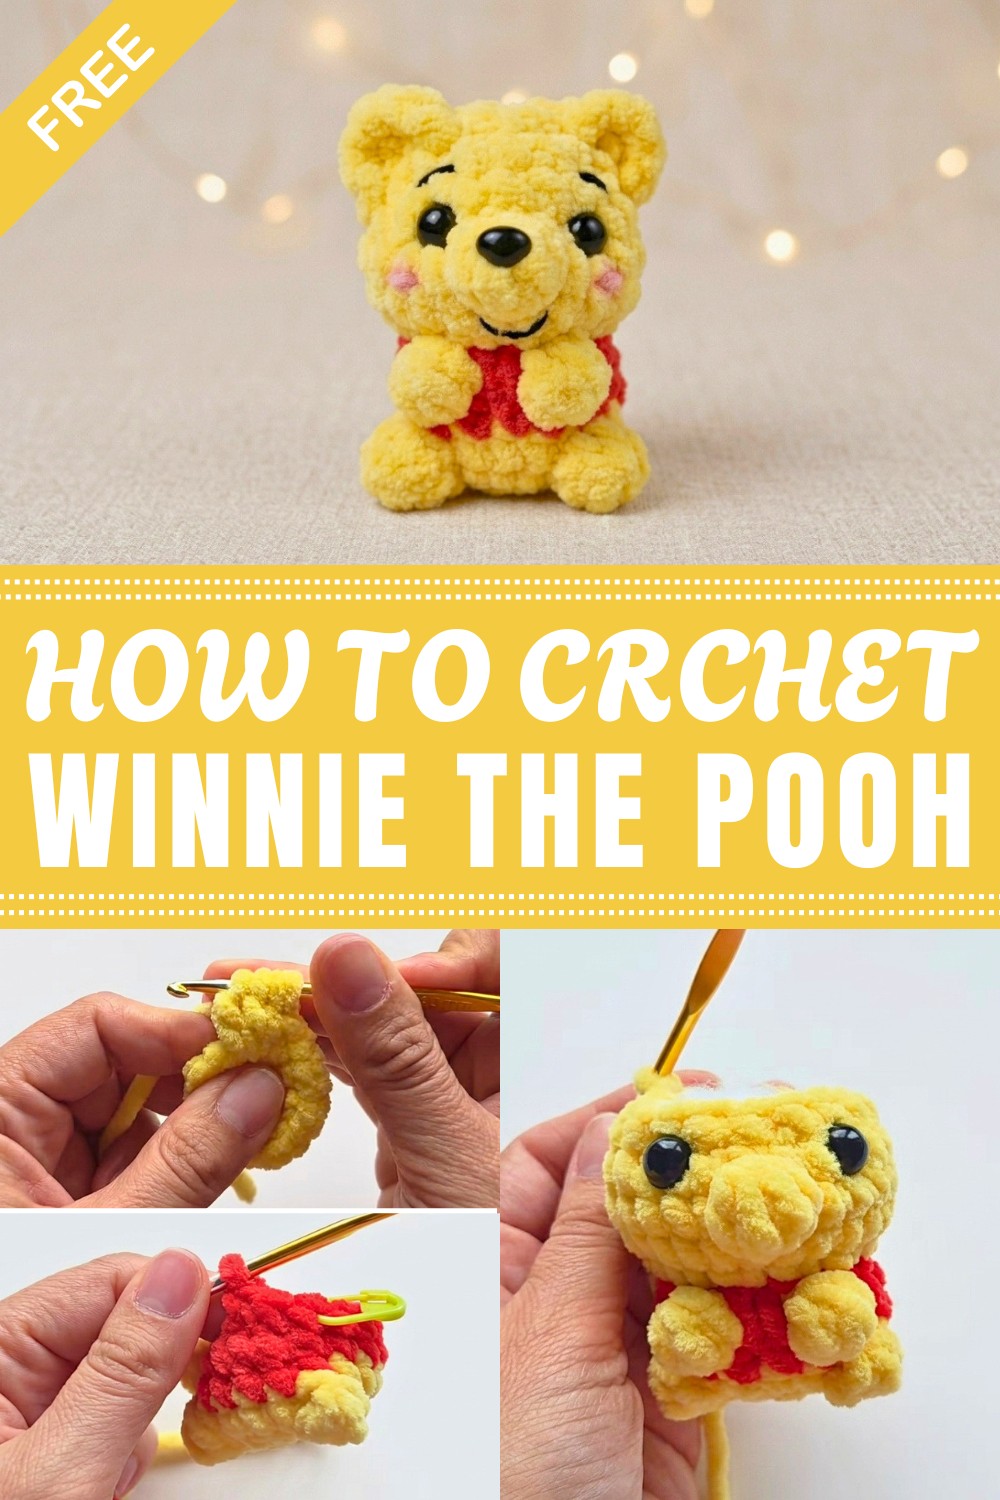
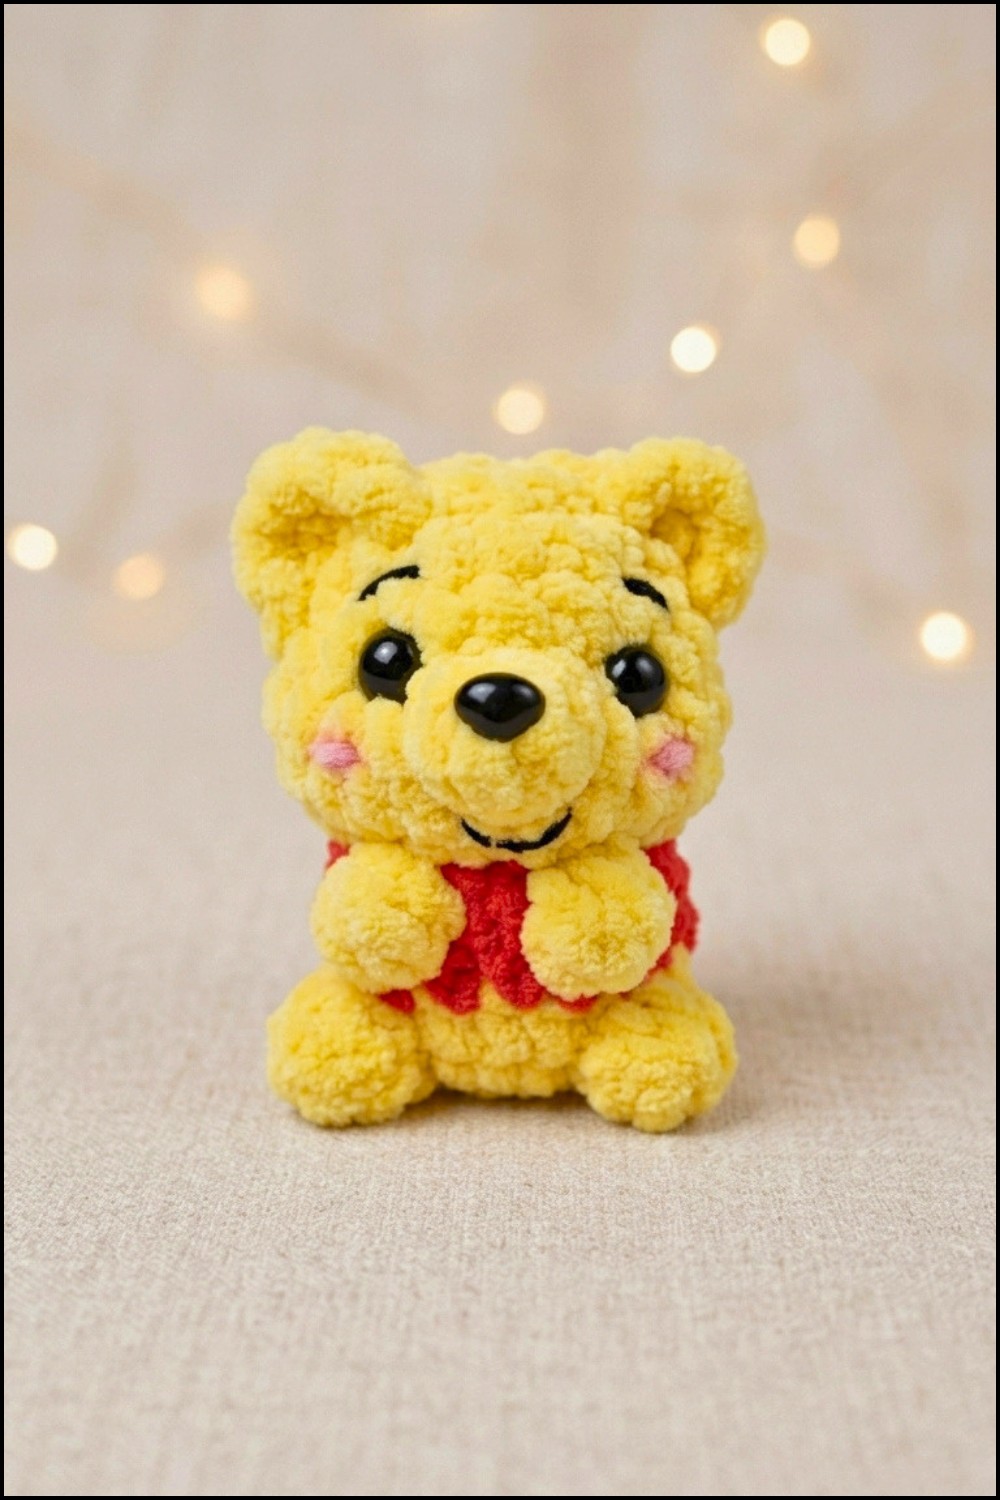
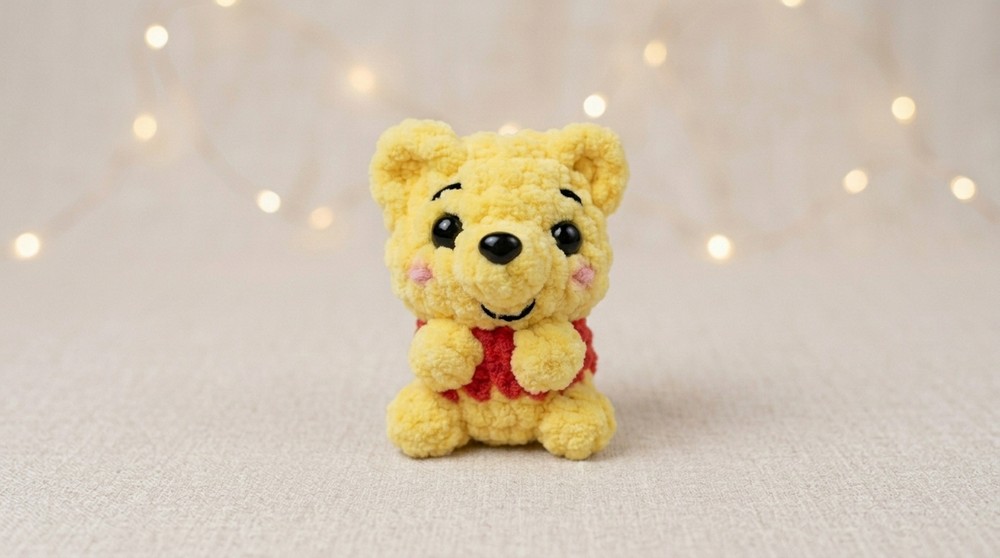
What makes this little Pooh bear so special is its inviting texture and inviting shape. The plush, rounded form captures the essence of the friendly bear perfectly, with an emphasis on those iconic features that make Pooh so recognizable—his gentle smile and those classic, cuddly proportions. The finished piece feels soft to the touch, yet structured enough to hold its shape beautifully, making it an excellent addition to a nursery shelf or a cozy nook.
This project offers plenty of room for personalization, whether you choose classic honey-yellow tones or a more playful color twist to match your style. You can even experiment with different yarn weights or add unique accessories like a tiny scarf or a honey pot to give your Pooh extra charm.
Whether you’re new to crocheting or have been making for a while, this pattern strikes a lovely balance. It’s approachable enough to keep newer makers engaged, while also offering techniques that intermediate stitchers will enjoy refining. Along the way, you’ll develop a better understanding of shaping, working in the round, and bringing a character to life stitch by stitch.
If you’re ready to create a sweet, snuggly friend that’s as fun to make as it is to hold, be sure to check out the Crochet Winnie the Pooh Free Pattern and start your own magical crochet journey today.
Crochet Winnie the Pooh Free Pattern Step-by-Step Guide
Experience the charm of iconic childhood with this step-by-step Winnie the Pooh plush crochet pattern. Each stage guides you seamlessly from foundational stitches through whimsical color changes, precise shaping, and expressive embellishments. This approach produces a miniature bear with personality, firm structure, and a soft, plush finish, all worked in one continuous piece. Essential amigurumi techniques—including bobble and puff stitches—are smoothly integrated for both visual interest and dimension. Detailed instructions ensure confidence at every round, resulting in a durable, huggable companion. Whether for yourself or as a thoughtful handmade gift, this little Pooh will surely spread warmth and nostalgia.
Quick Overview Of Pattern
- Worked seamlessly in one piece from the bottom up
- Rounds build body, legs, tail, arms, and head without attaching parts separately
- Color changes create Pooh’s iconic red shirt
- Limbs, tail, and face features are shaped using bobble and puff techniques
- Ears are crocheted directly onto the closed head
- Finishing touches include safety eyes and embroidery for facial detail
Notes
- All pattern instructions use US crochet terminology.
- Use a stitch marker to keep track of the start of each round.
- When “not to the end” is stated, leave the last yarn-over for a color change or bobble completion.
- Bobble stitch here means working 3 double crochets (dc) together into one stitch, leaving the last loop of each dc unworked, then finishing them together.
- The toy is worked in continuous rounds (spiral); do not join at the end of each round unless stated.
- Stuff the piece as you go, especially before closing the head.
Skill Level
Advanced Beginner to Intermediate
You should be familiar with working in the round, performing color changes, assembling amigurumi, and creating simple bobble or puff stitches.
Materials
- Plush yarn in two colors: yellow (main) and red (shirt); approx. 100g/120m per color
- 4 mm crochet hook (No. 4)
- Safety eyes, 10 mm
- Toy stuffing (fiberfill)
- Yarn needle for sewing/hiding ends and embroidery
- Dark embroidery thread for facial features (eyebrows and mouth)
Measurements / Sizing
- Finished toy height: approx. 7 cm (including ears)
- Fits perfectly as a keychain or small desk buddy
Gauge
- Gauge is not critical, but keep stitches firm so stuffing does not show between stitches.
- After Rounds 1–2, work should measure roughly 2–2.5 cm in diameter.
Stitch Abbreviations
| Abbreviation | Meaning |
|---|---|
| ch | chain |
| sc | single crochet |
| dc | double crochet |
| inc | increase (2 sc in same stitch) |
| dec | decrease (sc 2 sts together) |
| sl st | slip stitch |
| MR | magic ring (amigurumi ring) |
Special Stitches
- Bobble Stitch: (For tail and limbs)
Work 3 dc with a common top: Yarn over, insert hook in stitch, yarn over, pull up loop, yarn over, pull through two loops (repeat this 3 times in same stitch, leaving the last loop of each dc); yarn over, pull through all 4 loops on hook. - Puff Stitch (Snout):
Work 4 dc with a common top in one stitch; leave the last loop of each dc on the hook, then yarn over and pull through all loops together.
The Crochet Pattern
Body & Head (Worked Bottom-Up)
Let’s begin! Use yellow as the main color unless otherwise specified.
Round 1:
- Form a magic ring (MR) and work 8 sc in the ring. (8 sts)
Round 2:
- Work 1 inc in each stitch around: (2 sc in each stitch) (16 sts)
Round 3:
- Begin tail, legs, and base shaping:
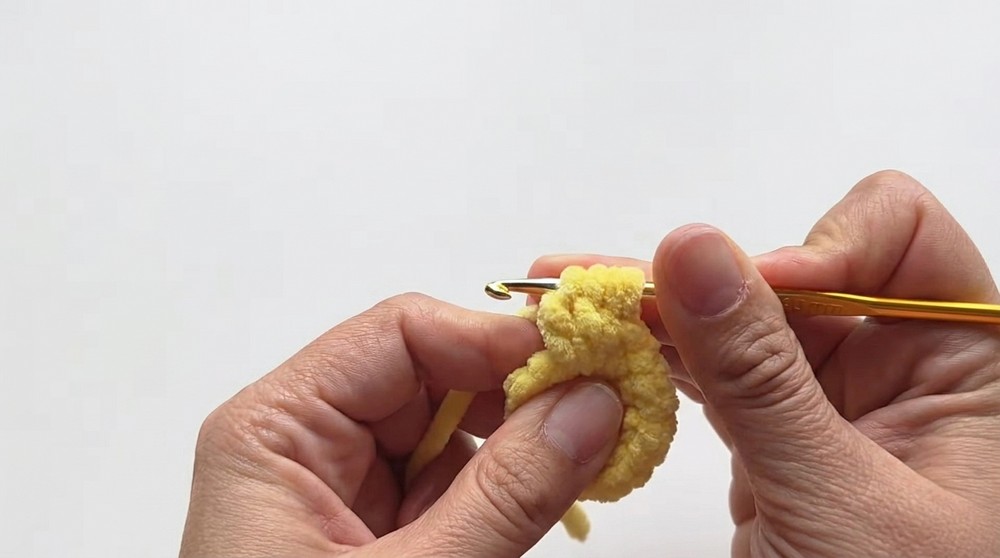
- Tail: In the first stitch, work a bobble stitch (3 dc with a common top, unfinished).
-
- Back: 4 sc
- Leg 1: 1 bobble stitch (3 dc with a common top)
- Belly: 4 sc
- Leg 2: 1 bobble stitch (3 dc with a common top)
- Side: 5 sc; on the 5th stitch, leave unfinished and pull though with red yarn to switch colors for the shirt. (16 sts)
Round 4:
- Switch to red yarn.
- 16 sc around in red to form the base of the shirt. (16 sts)
Round 5:
- Shirt and arm placement
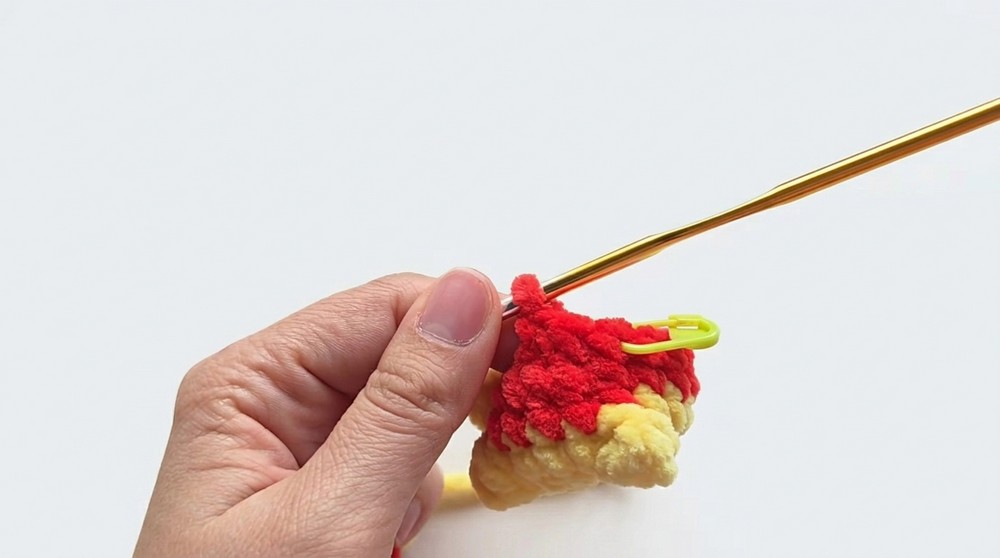
- 6 sc in red; keep the 6th incomplete for color change.
-
- Arm 1: Switch to yellow, work 1 bobble stitch (3 dc with a common top)
- 2 sc (2nd is unfinished, change back to yellow)
- Arm 2: 1 bobble stitch in yellow.
- Switch to red and finish with 6 sc. (16 sts)
Round 6:
- (2 sc, 1 dec) repeat 4 times:
- 2 sc, dec four times around; finish last stitch with yellow and cut red yarn. (12 sts)
Round 7:
- Switch to yellow for the head.
- Work 1 inc in each stitch around: (2 sc in each stitch) (24 sts)
Round 8:
- 24 sc around in yellow, building up the head.
Round 9:
- Snout placement
- 12 sc to reach the front center.
- In next stitch, work a puff stitch (4 dc with a common top) to form the snout.
- 11 sc to finish the round. (24 sts)
Round 10:
- 24 sc around in yellow.
- Now is the time to insert 10 mm safety eyes between Rounds 9 & 10 and stuff the body and head well with fiberfill.
Round 11:
- (2 sc, 1 dec) repeat 6 times:
- 2 sc, dec six times around. (18 sts)
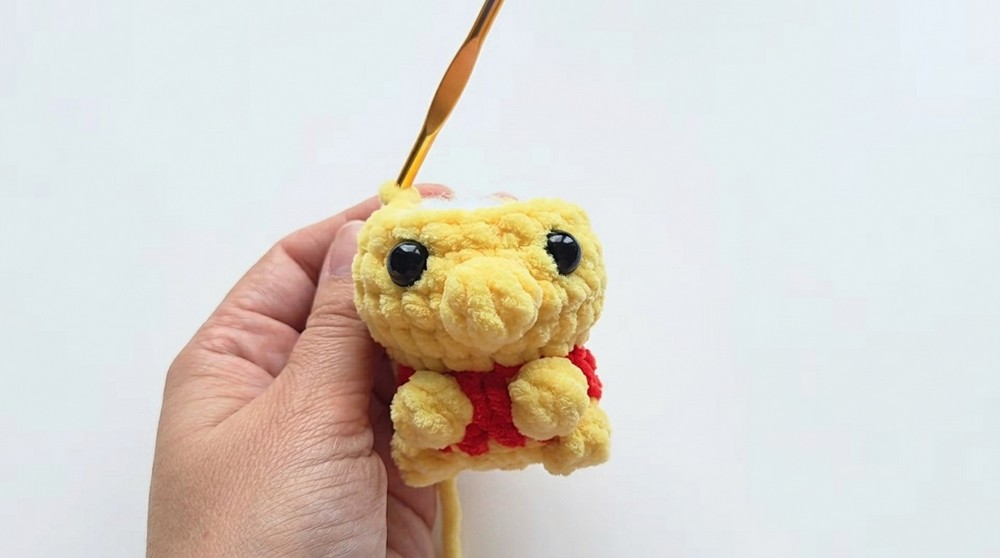
Round 12:
- (1 sc, 1 dec) repeat 6 times:
- 1 sc, dec six times around. (12 sts)
Round 13:
- 6 dec to close the top of the head. (6 sts)
- Fasten off: break yarn, thread tail onto needle, weave through front loops of final 6 stitches, pull tight to close and hide end inside.
Face Sculpting & Details
- Eye sculpting:
Insert yellow yarn at the base of the head, exit near outer corner of one eye, reinsert needle one stitch over, exit again at base. Pull gently for slight shaping. Repeat for second eye, knot ends and secure inside head. - Facial embroidery:
With dark embroidery thread and yarn needle, add expressive eyebrows and a cheery smile above the snout.
Ears (Crochet Directly onto Head)
First Ear:
- Attach yellow yarn to the top side of the head.
- 1 sc in the next stitch.
- In the following stitch (one round higher for lift), work 3 dc into the same stitch to create an ear arch.
- Go forward by one stitch, 1 sc; then 1 sl st to finish.
- Cut yarn, hide tail inside head.
Second Ear:
- Repeat above on opposite side of the head.
Assembly & Finished Size
- Confirm the head and body are well-stuffed and closed neatly at the top.
- Ears should be evenly set and symmetrical.
- Weave in all yarn tails inside for a tidy finish.
- Height should be about 7 cm (2.75 inches) with plump proportions and clear facial features.
Conclusion and Ending Words
Upon completing your mini Winnie the Pooh plush, you will have a whimsical keepsake that reflects playful detail and classic character. Thoughtful shaping in every round, colorwork for the iconic shirt, and surface embroidery combine to express individuality and charm. The seamless assembly allows for lasting structure and durability, while the plush yarn texture invites gentle squeezes and heartfelt smiles. Whether this small bear becomes a treasured toy, keychain, or desk companion, it is destined to brighten spaces and spark fond memories. Keep the instructions close for future projects or heartfelt gifts that continue this tradition of handmade joy.




Leave a Reply