

Level up your decor with this Crochet Hello Kitty Flower Pot Pattern and add a playful little flower pot to shelves, tables, desks, or windowsills.
If you’re looking for a charming and delightful way to brighten up your space, a small but adorable project can make all the difference. Imagine a cute flower pot that combines the timeless appeal of Hello Kitty with the warmth of a handmade piece. The Crochet Hello Kitty Flower Pot Pattern offers just that—a sweet and playful decorative item that can add personality to any room. Full credit for this lovely pattern goes to the YouTube channel Tejidos Leslylu, where you can find detailed instructions for bringing this project to life.
Lovely Crochet Hello Kitty Flower Pot Free Pattern With A Floral Touch
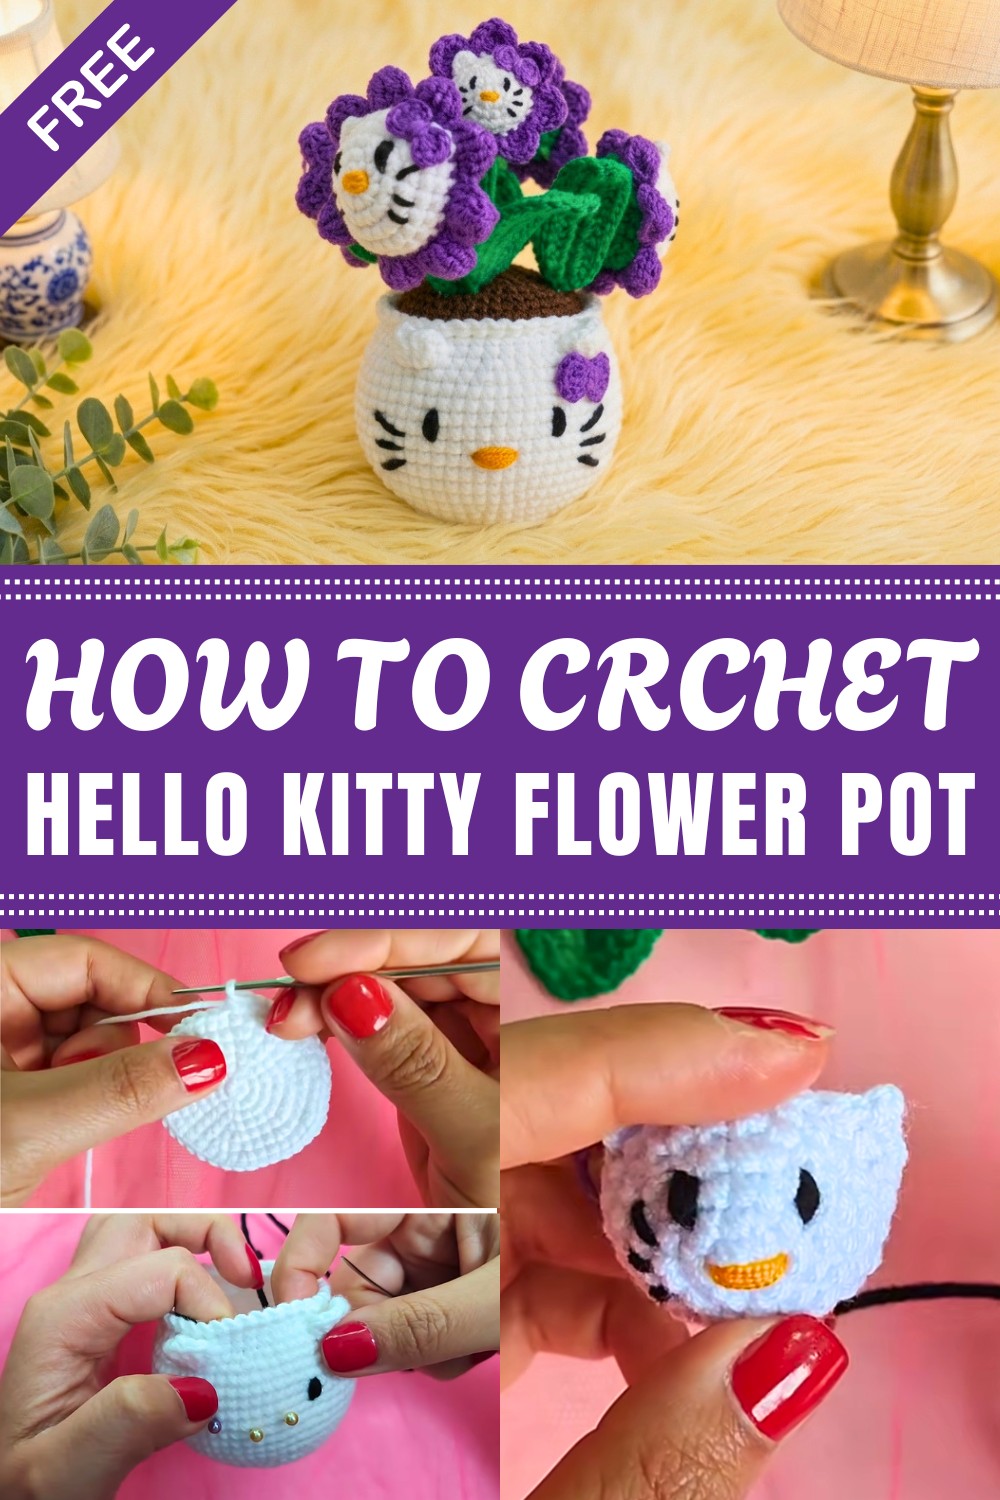
This flower pot cover is the perfect blend of fun and function. It provides a soft, inviting touch to your plant pots, turning ordinary greenery into a captivating centerpiece. Whether placed on a windowsill, desk, or shelf, this pattern becomes an instant conversation starter. It also makes an excellent gift for friends, family, or anyone who appreciates cute, handmade décor with a personal touch.
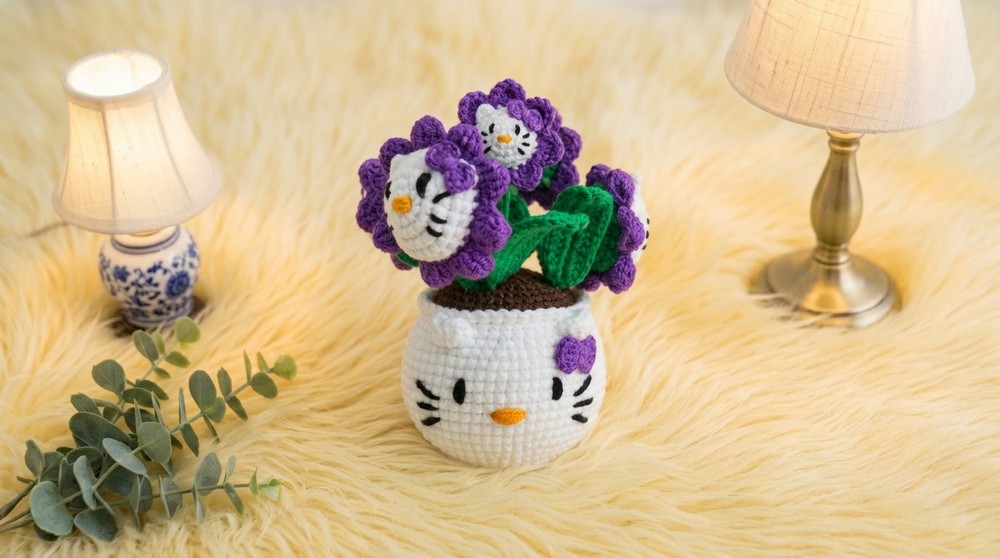
Looking closely at the design, the project features the iconic Hello Kitty face, complete with her signature bow, all framed around the flower pot. The texture is smooth yet cozy, offering a gentle contrast to the natural surface of a ceramic or plastic pot. The shape snugly fits typical small pots, enhancing their look without overpowering. The style is whimsical and youthful, perfect for adding a pop of color and charm to your living space.
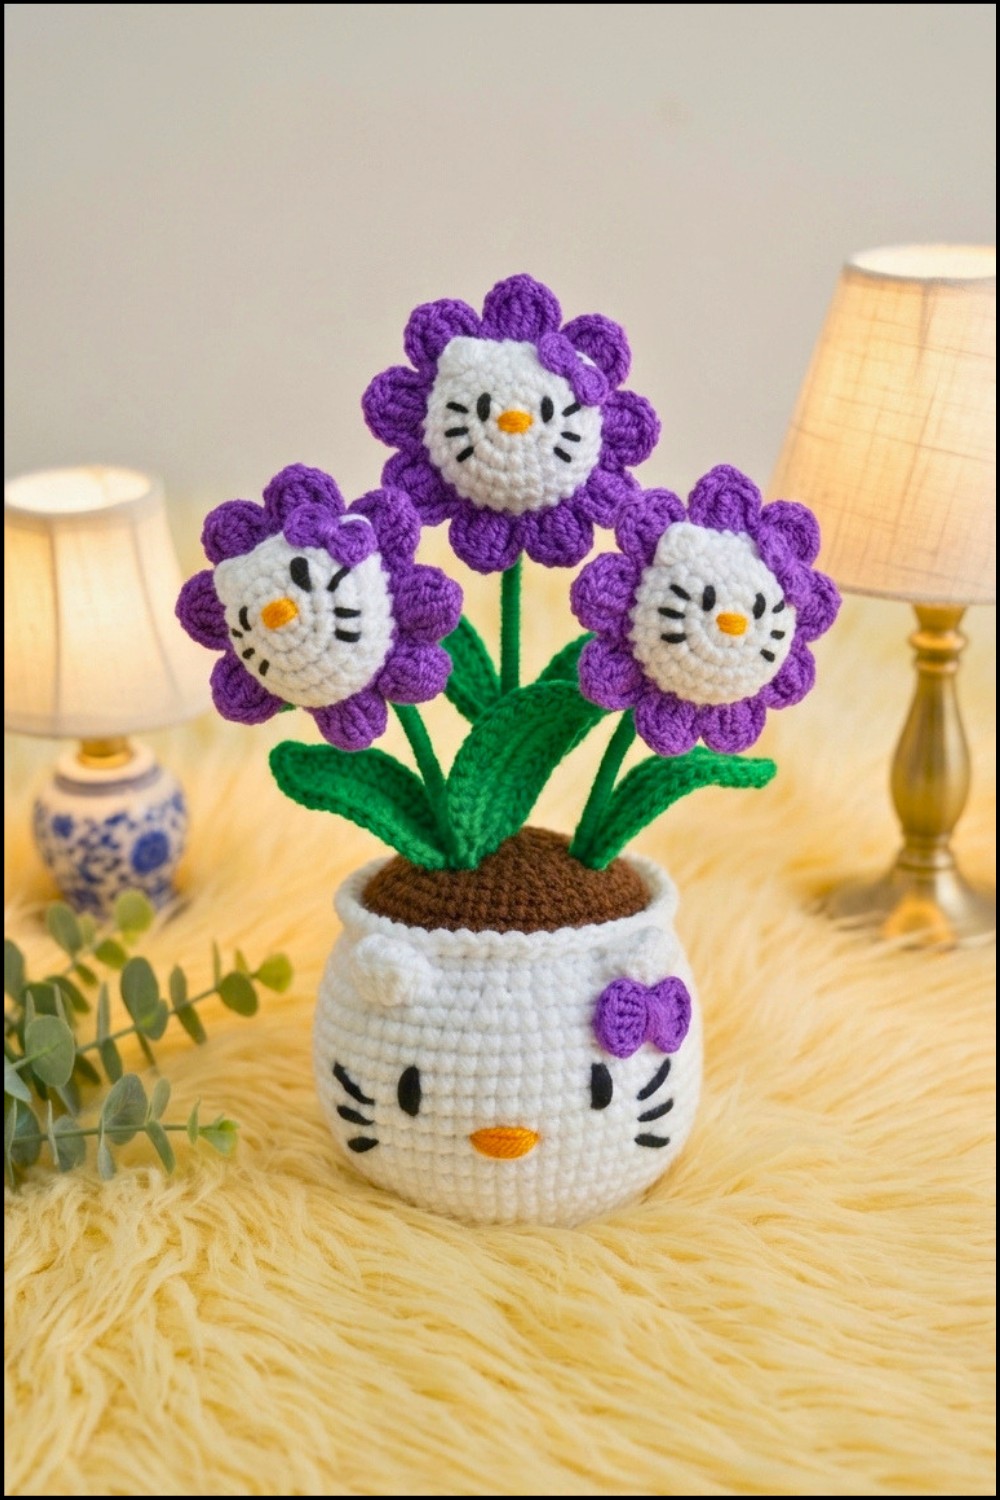
One of the standout details is the delicate balance between the floral elements and the beloved character, perfectly merging nature and nostalgia. This project not only brightens your plants but also warms the heart of anyone who sees it. In short, the Crochet Hello Kitty Flower Pot Pattern is an easy and delightful way to celebrate cute design with practical use and gift-giving appeal.
Crochet Hello Kitty Flower Pot Free Pattern
This delightful Hello Kitty Flower Pot project is a charming addition to any home or office. The instructions that follow guide you through each phase using approachable crochet techniques, detailed stitch explanations, and careful assembly tips. A bright palette of yarn brings the familiar Hello Kitty face and whimsical flower arrangement to life, while durable wire and thoughtful construction add both stability and personality. Suitable for anyone looking to add a touch of cheer to their space, this project celebrates iconic character design with a playful three-dimensional twist. Every step has been outlined for ease and accuracy throughout.
Quick Overview of Pattern
- Create the pot’s base, body, and rim with single crochet increases and decreases
- Make the soil disc for inside the pot
- Craft Hello Kitty’s face and embroider features
- Make a 3D flower, leaves, and a mini bow
- Wrap wire for stems and leaves, then assemble all pieces
Notes
- Stitch markers are crucial for counting rounds.
- Maintain tight, even tension for structure.
- Embroider and assemble all parts before gluing.
- Use glue and wire as instructed for a neat finish.
Skill Level
- Intermediate. Experience with continuous rounds, amigurumi shaping, basic embroidery, and sewing parts together is recommended.
Materials
- Acrylic yarn (2 mm): Purple, yellow, orange, green, chocolate brown, black, and white
- Crochet hook: size 3 mm
- Tapestry needle
- Stitch marker
- Thin wire (black, white, green or silver)
- Scissors
- Hot glue or liquid silicone
- Plastic (for pot base and templates)
- Stuffing/fiberfill
Measurements / Sizing
- Pot: approx. 8–10 cm tall, 6–7 cm wide
- Flower: 6–7 cm diameter
- Bow: ~2–3 cm across
- Leaves: ~5–7 cm
Gauge & Stitch Pattern
- Tight amigurumi gauge.
Main stitches: Magic ring (MR), chain (ch), single crochet (sc), increase (inc), decrease (dec), slip stitch (sl st), half double crochet (hdc), double crochet (dc)
Stitch Abbreviations
- MR: Magic ring
- ch: Chain
- sc: Single crochet
- inc: Increase (2 sc in same st)
- dec: Decrease (sc2tog)
- sl st: Slip stitch
- hdc: Half double crochet
- dc: Double crochet
- BLO: Back loop only
Special Stitches
- Picot: ch 1, sl st in 1st ch made.
- BLO:
The abbreviation BLO stands for “Back Loop Only” and refers to a method of crocheting stitches. Instead of inserting the hook under both loops of a stitch as usual, you insert it solely into the back loop—the loop furthest from you. This approach produces a subtle horizontal line and creates a defined ridge on the fabric’s surface. BLO is widely used to make structural corners, decorative edges, or to add flexibility and texture to amigurumi and garments. Working in the back loop only can also help the piece “bend” or “fold” at rounds, making it an essential technique in crochet.
THE CROCHET PATTERN
1. Pot Base and Body
ROUND 1:
- Start with a MR
- 6 sc into ring (6 sts)
ROUND 2:
- inc in each st around (2 sc in each, 12)
ROUND 3:
- 1 sc, inc around (18)
ROUND 4:
- 2 sc, inc around (24)
ROUND 5:
- 3 sc, inc around (30)
ROUND 6:
- 2 sc, inc, 4 sc, inc — repeat sequence to end (36)
ROUND 7:
- 5 sc, inc around (42)
ROUND 8:
- BLO sc in each st around (42)
Insert plastic template for stability here
ROUND 9:
- 3 sc, inc, (6 sc, inc) four times, 3 sc left (48)
ROUND 10:
- 7 sc, inc around (54)
ROUND 11:
- 4 sc, inc, (8 sc, inc) four times, 4 sc left (60)
ROUNDS 12–19:
- sc in each stitch around for 8 rounds (60)
ROUND 20:
- 8 sc, dec around (54)
ROUND 21:
- 7 sc, dec around (48)
ROUND 22:
- sc in each st around (48)
ROUND 23:
- 3 sc, dec, (6 sc, dec) four times, 3 sc left (36)
Finish off with invisible join using a needle.
2. Pot Rim/BORDER
In FLO (front loop only):
- (ch 1, sl st in next st) repeat around rim for a decorative scallop effect.
- Fasten off. Weave in end.
Embroider face:
- Nose: Yellow or orange yarn, several satin stitches, centered below magic ring
- Eyes: Black yarn, aligned with ears, about 8 rounds up from base, each eye 3 stitches wide
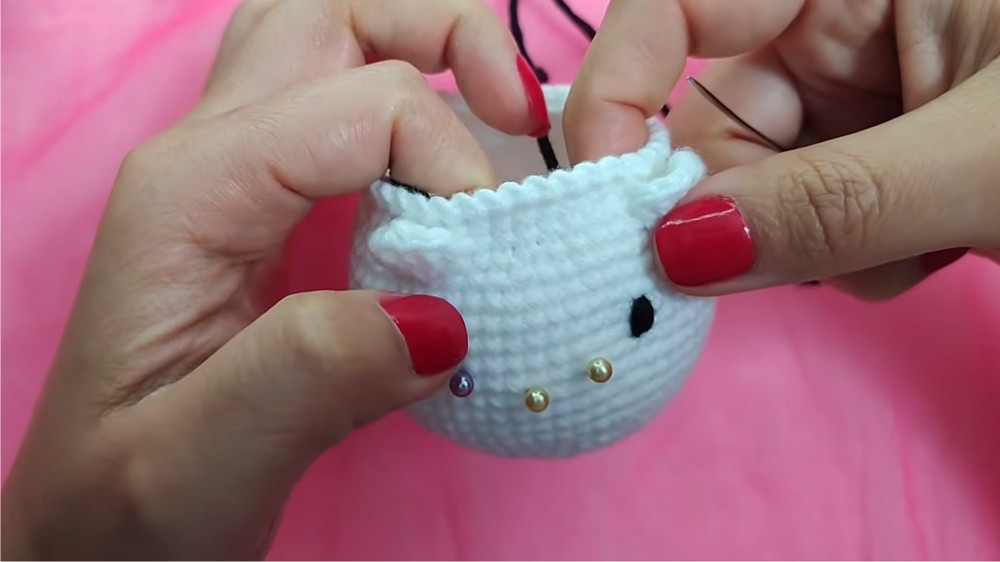
- Whiskers: Black thread, 3 on each side, radiating from mid-face outwards.
3. Soil
ROUND 1:
- MR, 6 sc
ROUND 2:
- inc in each st (12)
ROUND 3:
- (sc, inc) around (18)
ROUND 4:
- (2 sc, inc) around (24)
ROUND 5:
- (3 sc, inc) around (30)
ROUND 6:
- (4 sc, inc) around (36)
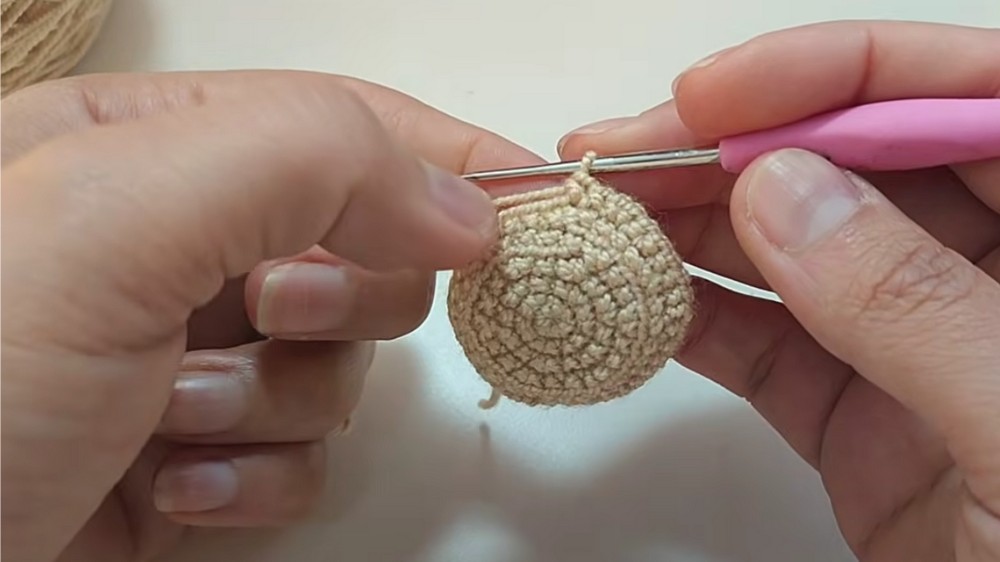
ROUND 7:
- (5 sc, inc) around (42)
ROUND 8:
- (6 sc, inc) around (48)
Leave a tail for sewing.
- Place soil disc into pot, sew most of the way around, stuff firmly, then close.
4. Hello Kitty Face
ROUND 1:
- MR, 6 sc (doubled white yarn)
ROUND 2:
- inc in each st (12)
ROUND 3:
- (sc, inc) around (18)
ROUND 4:
- (2 sc, inc) around (24)
ROUNDS 5–7:
- sc in each st (24)
Ears:
- In desired stitch, hdc, ch 2, picot, hdc in same st—repeat for other ear (2 ears at sides)
- Continue with sl st along edge.
- Fasten off, secure and hide all ends.
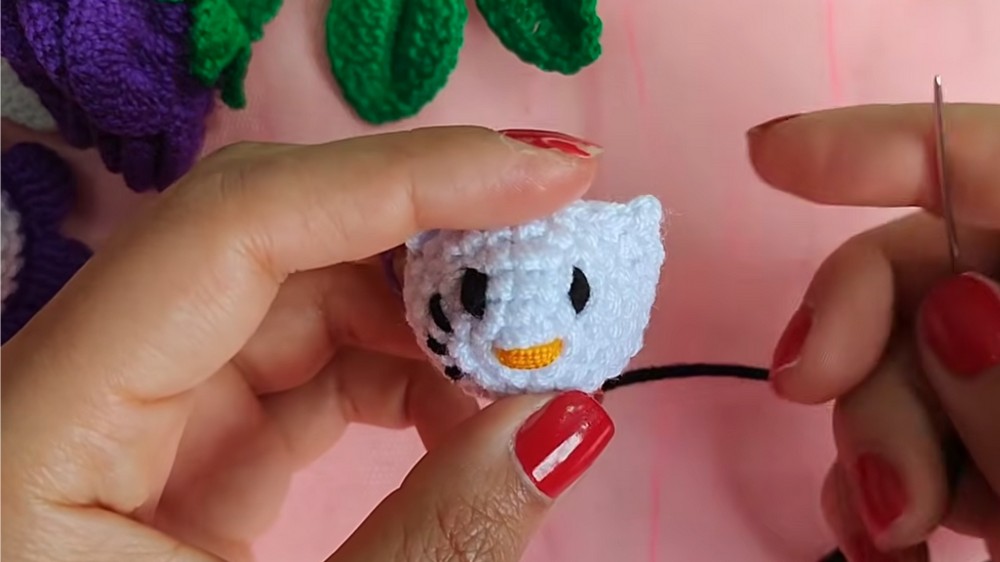
Embroider face:
- Nose: Yellow or orange yarn, several satin stitches, centered below magic ring
- Eyes: Black yarn, aligned with ears, about 3 rounds up from base, each eye 3 stitches wide
- Whiskers: Black thread, 3 on each side, radiating from mid-face outwards.
5. Flower (Back + Petals)
Back (Green)
ROUND 1:
- MR, 6 sc
ROUND 2:
- inc in each st (12)
ROUND 3:
- (sc, inc) around (18)
ROUND 4:
- (2 sc, inc) around (24)
ROUND 5:
- sc in each st (24).
- Leave opening in center; do not close tightly.
Petals (Purple or desired color)
- Join with sl st in any st.
- Repeat 8 times:
- ch 4
- In same/next st, work 3 dc, do not close each, instead cluster (yo, pull through all)
- ch 4, sl st in next st
- Make 8 petals total.
6. Bow
For both large and mini bows:
- MR, ch 2, 3 hdc into ring, ch 2, sl st in ring (one loop of bow)
- Repeat from ** to ** for other side of bow
- Pull magic ring tight, wrap center with tail, sew or glue to pot or Hello Kitty face as desired
7. Stems & Leaves
Stems:
- Cut wire (one 9 cm, two 7 cm)
- Dab tip with glue, wrap tightly with green yarn, covering 1 cm at start/end
- Shape with gentle curve near top
Leaves:
- Cut green or silver wire to 16 cm
- Form wire along back of chain:
- ch 15 around wire base without slip knot
- On wire (into chains): sc, hdc, 10 dc, hdc, 3 sc in final ch (curve to work back along opposite side), then: hdc, 10 dc, hdc, sc
- Sew end closed. Wrap base of stem with green yarn as above.
Assembly & Finished Size
- Insert and glue plastic template inside pot for firm base.
- Sew or glue soil to the inside using leftover coil and tail.
- Embroider Hello Kitty’s face.
- Attach bow to ear and sew or glue Hello Kitty face to front of pot.
- Insert, glue, and arrange flower stems in center. Secure each flower head.
- Glue leaves to stems, arranging around flowers.
- Fill, shape, and adjust petals and leaves as desired.
Finished size: Approx. 12–15 cm tall.
Conclusion
This Hello Kitty Flower Pot project provides a cheerful decorative item that stands out for its playful detail and durability. Each component—pot, soil, face, bow, and flowers—was constructed with attention to both appearance and function, resulting in a truly collectible crochet work. Subtle techniques such as embroidery and wire shaping offer dimension and vibrant character, while sturdy assembly ensures this piece remains upright and eye-catching. Whether placed on a shelf, desk, or given as a thoughtful handmade gift, the finished flower pot promises to brighten any environment with personality and color, making the effort truly rewarding.

Leave a Reply